Use Knowledge Assistant to create a high-quality chatbot over your documents
This page describes how to use Knowledge Assistant to create a question-and-answer chatbot over your documents and improve its quality based on natural language feedback from your subject matter experts.
What is Knowledge Assistant?
Use Knowledge Assistant to create a chatbot that can answer questions about your documents and provide high-quality responses with citations. Knowledge Assistant uses advanced AI and follows an Instructed Retriever approach to address limitations of the traditional retrieval-augmented generation (RAG) approach and deliver the highest quality answers based on the documentation you provide.
Knowledge Assistant is ideal for supporting the following use cases:
- Answer user questions based on product documentation.
- Answer employee questions related to HR policies.
- Answer customer inquiries based on support knowledge bases.
Knowledge Assistant enables you to improve the chat agent's quality and adjust its behavior based on natural language feedback from your subject matter experts. Provide questions and guidelines directly in the experience, and share your agent to let others collaborate and improve the agent's performance.
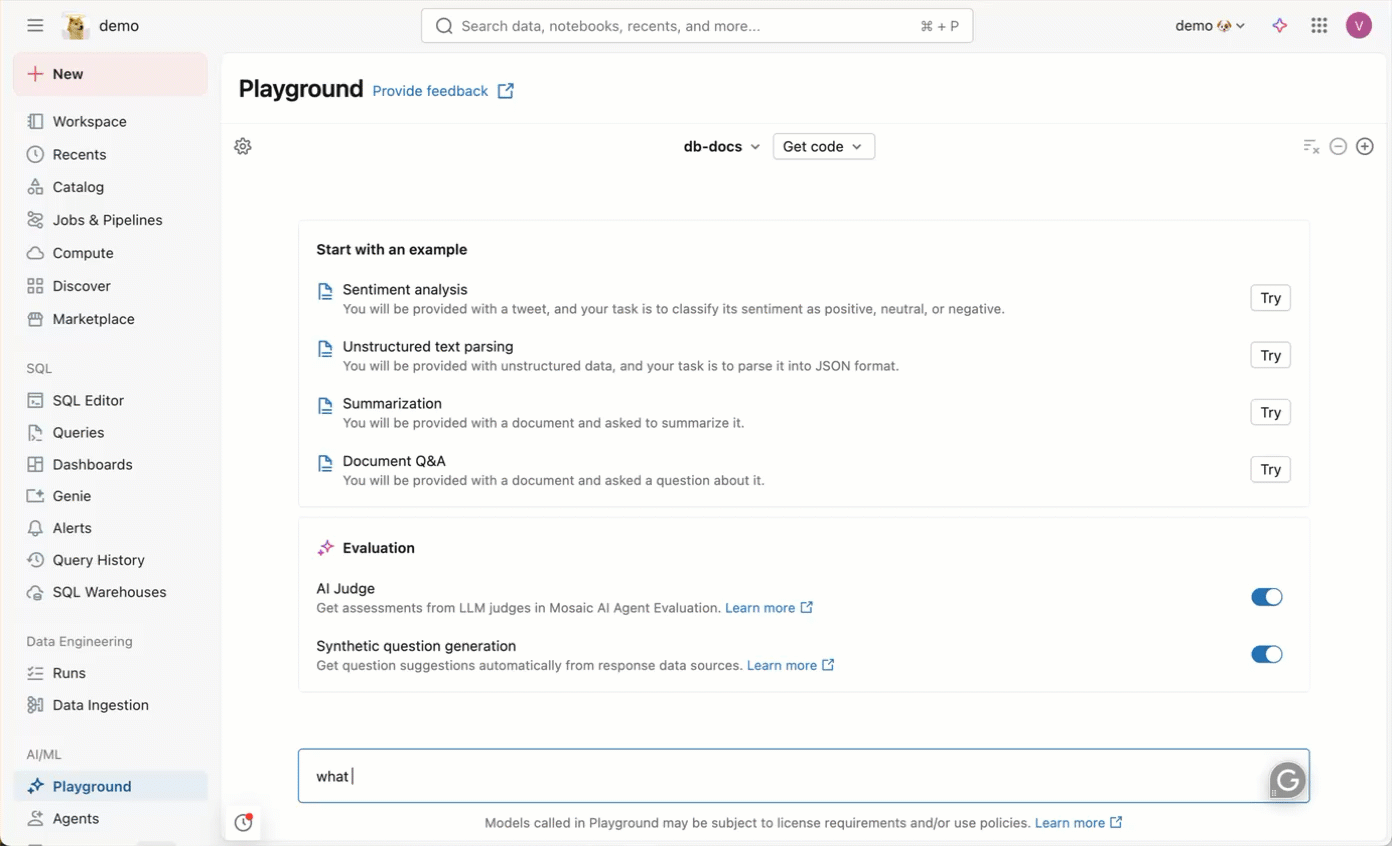
Knowledge Assistant creates an agent endpoint that you can use downstream for your applications. For example, the image below shows how you can interact with the endpoint by chatting with it in AI Playground. Ask the agent questions related to your documents, and the agent will answer with citations.
Knowledge Assistant uses default storage to store temporary data transformations, model checkpoints, and internal metadata that power each agent. On agent deletion, all data associated with the agent is removed from default storage.
Requirements
- A workspace that includes the following:
- Serverless compute available (enabled by default in workspaces with Unity Catalog).
- Unity Catalog enabled. See Enable a workspace for Unity Catalog.
- Access to Mosaic AI Model Serving.
- Access to a serverless budget policy with a nonzero budget.
- A workspace in one of the supported regions.
- The
databricks-gte-large-enembedding model endpoint must have AI Guardrails and rate limits disabled. See Configure AI Gateway on model serving endpoints. - You must have input data ready to use. You can choose to provide either:
- Files in a Unity Catalog volume or volume directory. Supported file types are txt, pdf, md, ppt/pptx, and doc/docx.
- A vector search index that uses
databricks-gte-large-enas its embedding model. See Create a vector search index.
- (Optional) Production monitoring for MLflow (Beta) enabled. This is required for tracing to work. See Manage Databricks previews.
Create a knowledge assistant agent
Go to ![]() Agents in the left navigation pane of your workspace. From the Knowledge Assistant tile, click Build.
Agents in the left navigation pane of your workspace. From the Knowledge Assistant tile, click Build.
Step 1: Configure your agent
On the Build tab, configure your agent and provide knowledge sources for it to use to answer questions.
-
In the Name field, enter a name for your agent.
-
In the Description field, describe what your agent can do.
-
In the Knowledge source panel, add your knowledge source. You can choose to provide either Unity Catalog files or a vector search index.
- UC Files
- Vector Search Index
For UC files, the following file types are supported: txt, pdf, md, ppt/pptx, and doc/docx. Files larger than 50 MB are automatically skipped during ingestion and will not be included in the knowledge base.
- Under Type, select UC Files.
- In the Source field, select the Unity Catalog volume or volume directory that contains your files.
- In the Name field, enter a name for your knowledge source.
- Under Describe the content, describe what content the knowledge source contains to help the agent understand when to use this data source.
noteVector search indexes are only supported if the index uses
databricks-gte-large-enas its embedding model. When creating your vector search index, ensure you select this embedding model. For more information, see Create a vector search index.- Under Type, select Vector Search Index.
- In the Source field, select the vector search index you want to provide the agent.
- In the Name field, enter a name for your knowledge source.
- In the Doc URI Column, select the column with a link or reference to where the information came from. The agent will use this in its citations.
- In the Text Column field, specify the column that contains the raw text you want the agent to retrieve.
- Under Describe the content, describe what content the knowledge source contains to help the agent understand when to use this data source.
-
(Optional) If you would like to add more knowledge sources, click Add knowledge source. You can provide up to 10 knowledge sources.
-
(Optional) In the Instructions field, specify guidelines for how the agent should respond.
-
Click Create Agent.
It can take up to a few hours to create your agent and sync the knowledge sources you provided. When the agent is ready, the right side panel displays the synced knowledge sources.
If you update or add files to your knowledge sources, you need to click ![]() Sync for the agent to pick up the changes. Syncing is done incrementally. For example, if you add a new file to a previously synced Unity Catalog volume, syncing will only process the newly added file.
Sync for the agent to pick up the changes. Syncing is done incrementally. For example, if you add a new file to a previously synced Unity Catalog volume, syncing will only process the newly added file.
Only the creator of the knowledge assistant can sync knowledge sources.
Step 2: Test your agent
After your agent has finished building, test it out by chatting with it. The agent should respond with citations for questions related to its knowledge sources.
- Start chatting with your agent directly in the Build tab.
- (Optional) You can also click Open in Playground to chat with it in AI Playground.
- Enter a question for your agent.
- Evaluate its response:
- Click View thoughts to see how your agent approached responding to the question.
- Click View trace to see the full trace. You can add labels to traces in the UI to track quality assessments during the development process.
- Click View sources to see what files the agent cites as references. This opens a side panel with a list of sources for you to review.
If you're satisfied with your agent's performance, continue using the agent as-is.
Step 3: Improve quality
Knowledge Assistant can adjust the agent's behavior based on natural language feedback. Gather feedback from experts through the configuration page to improve your agent's quality. Collecting labeled data for your agent can improve its quality and behavior.
In the Examples tab, add questions your users will ask or questions your agent has previously gotten wrong. Alternatively, you can also import labeled data directly from a Unity Catalog table.
-
Add questions to label:
- Click + Add to add a question.
- In the Add a question modal, enter your question.
- Click Add. The question should appear in the UI.
- Repeat until you’ve added all the questions you want to evaluate.
- To delete a question, click the kebab menu, then Delete.
-
After you've finished adding your questions, you can share the agent with others to review to help you build a high-quality labeled dataset. In the upper righthand corner, click the kebab menu
 to manage permissions.
In order for experts to access and provide feedback, you need to grant them the following permissions:
- CAN_MANAGE permission from the agent configuration page
-
Share a link to your Knowledge Assistant configuration page to gather feedback from experts.
-
To label data, click on a question and add Guidelines in the pane that appears. Guidelines apply right after they are saved.
-
Test the agent again in the configuration page or AI Playground to see its improved performance. If needed, add more questions and guidelines to continue improving the behavior.
(Optional) Import and export labeled data
To import new questions and feedback directly from a Unity Catalog table:
-
Click Import.
-
In the Source field, select the Unity Catalog table containing the labeled data.
The table must have the following schema:
eval_id:stringrequest:stringguidelines:arrayitems:string
metadata:stringtags:string
-
Click Import.
New questions and guidelines are merged into the labeled data table on the right.
To export labeled data as a Unity Catalog table:
- Click Export.
- In the Schema field, select the Unity Catalog schema location to save the data to.
- In the Table name field, enter a name for the table.
- Click Export.
A new table is created with the labeled data.
Manage knowledge sources
After you create a knowledge assistant, you can add, remove, and update knowledge sources without recreating the agent. Only the creator of the knowledge assistant can manage knowledge sources.
You can draft multiple changes at once — for example, add a new source, remove an existing one, and update the description of another — and then apply all changes simultaneously when you click Save and Update.
Add a knowledge source
- On the agent configuration page, go to the Sources tab.
- Click + Add below the existing knowledge source cards.
- Select the type of knowledge source to add (Unity Catalog files or vector search index) and configure it as described in Step 1: Configure your agent.
- Click Save and Update.
The agent begins syncing the new knowledge source. Existing knowledge sources and their data are not affected.
You can provide up to 10 knowledge sources per knowledge assistant. Adding a file source starts an ingestion job that can take time depending on the volume of data.
Remove a knowledge source
- On the agent configuration page, go to the Sources tab.
- Hover over the knowledge source card you want to remove and click the trash icon
 in the top right corner.
 - In the confirmation dialog, click Confirm to remove the source.
- Click Save and Update.
The knowledge source and its associated data are removed from the agent. This action is not easily reversible because re-adding the source requires re-ingesting the data.
You cannot remove the last remaining knowledge source. A knowledge assistant must always have at least one knowledge source.
Update knowledge source details
You can update the name and description of an existing knowledge source. These details help the agent understand when to use each source.
- On the agent configuration page, go to the Sources tab.
- Hover over the knowledge source card you want to edit and click the pencil icon.
- Update the Name or Description fields.
- Click Save and Update.
Manage permissions
By default, only agent authors and workspace admins have permissions to the agent. To allow other users to edit or query your agent, you need to explicitly grant them permission.
To manage permissions on your agent:
- Open your agent on the Agents page.
- At the top, click the kebab menu.
- Click Manage permissions.
- In the Permission Settings window, select the user, group, or service principal.
- Select the permission to grant:
- Can Manage: Allows managing the agent, including setting permissions, editing the agent configuration, and improving its quality.
- Can Query: Allows querying the agent endpoint in AI Playground and through the API. Users with only this permission cannot view or edit the agent on the Agents page.
- Click Add.
- Click Save.
Only the creator of the knowledge assistant can sync and manage knowledge sources, including adding, removing, and updating sources.
Query the agent endpoint
On the agent page, click ![]() See Agent status in the upper-right to get your deployed agent endpoint and see endpoint details.
See Agent status in the upper-right to get your deployed agent endpoint and see endpoint details.
There are multiple ways to query the created knowledge assistant endpoint. Use the code examples provided in AI Playground as a starting point:
- On the Build tab, click Open in playground.
- From Playground, click Get code.
- Choose how you want to use the endpoint:
- Select Curl API for a code example to query the endpoint using curl.
- Select Python API for a code example to interact with the endpoint using Python.
Manage knowledge assistants using the Databricks SDK
You can use the Databricks SDK for Python to programmatically create and manage knowledge assistants and their knowledge sources. For the full list of available API operations, see the Knowledge Assistants API reference.
Create a knowledge assistant
The following example creates a new knowledge assistant with a display name, description, and instructions.
from databricks.sdk import WorkspaceClient
from databricks.sdk.service.knowledgeassistants import KnowledgeAssistant

w = WorkspaceClient()

knowledge_assistant = KnowledgeAssistant(
    display_name="<display-name>",
    description="<description>",
    instructions="<instructions>",
)
created = w.knowledge_assistants.create_knowledge_assistant(knowledge_assistant=knowledge_assistant)
print(created)
Replace <display-name>, <description>, and <instructions> with the values for your knowledge assistant.
Manage knowledge sources
You can add, remove, and update knowledge sources on an existing knowledge assistant using the SDK.
Add a knowledge source
The following example adds a Unity Catalog files knowledge source to an existing knowledge assistant.
from databricks.sdk import WorkspaceClient
from databricks.sdk.service.knowledgeassistants import KnowledgeSource, FilesSpec

w = WorkspaceClient()

files_source = KnowledgeSource(
    display_name="<knowledge-source-name>",
    description="<knowledge-source-description>",
    source_type="files",
    files=FilesSpec(
        path="<volume-path>",
    ),
)

created_source = w.knowledge_assistants.create_knowledge_source(
    parent="knowledge-assistants/<knowledge-assistant-id>",
    knowledge_source=files_source,
)
print(created_source)
To add a vector search index source instead, use IndexSpec:
from databricks.sdk.service.knowledgeassistants import KnowledgeSource, IndexSpec

index_source = KnowledgeSource(
    display_name="<knowledge-source-name>",
    description="<knowledge-source-description>",
    source_type="index",
    index=IndexSpec(
        index_name="<catalog.schema.index-name>",
        text_col="<text-column>",
        doc_uri_col="<doc-uri-column>",
    ),
)

created_source = w.knowledge_assistants.create_knowledge_source(
    parent="knowledge-assistants/<knowledge-assistant-id>",
    knowledge_source=index_source,
)
print(created_source)
Remove a knowledge source
The following example deletes a knowledge source from a knowledge assistant.
from databricks.sdk import WorkspaceClient

w = WorkspaceClient()

w.knowledge_assistants.delete_knowledge_source(
    name="knowledge-assistants/<knowledge-assistant-id>/knowledge-sources/<knowledge-source-id>",
)
Update a knowledge source
The following example updates the display name and description of an existing knowledge source.
from databricks.sdk import WorkspaceClient
from databricks.sdk.service.knowledgeassistants import KnowledgeSource

w = WorkspaceClient()

updated_source = w.knowledge_assistants.update_knowledge_source(
    name="knowledge-assistants/<knowledge-assistant-id>/knowledge-sources/<knowledge-source-id>",
    knowledge_source=KnowledgeSource(
        display_name="<new-name>",
        description="<new-description>",
    ),
    update_mask="display_name,description",
)
print(updated_source)
Allowed fields in update_mask: display_name, description.
Migrate a knowledge assistant across workspaces
You can use the SDK to replicate a knowledge assistant from one workspace to another. The following example retrieves a knowledge assistant from the source workspace and recreates it, along with its knowledge sources, in the target workspace.
The knowledge sources referenced in the target workspace (such as vector search indexes or Unity Catalog volumes) must already exist in the target workspace before you create the knowledge sources.
from databricks.sdk import WorkspaceClient
from databricks.sdk.service.knowledgeassistants import (
    KnowledgeAssistant,
    KnowledgeSource,
    IndexSpec,
    FilesSpec,
)

# Retrieve the knowledge assistant from the source workspace
source_client = WorkspaceClient()
ka = source_client.knowledge_assistants.get_knowledge_assistant(name="<source-knowledge-assistant-name>")
print(ka.display_name, ka.description, ka.instructions)

# Set up the client for the target workspace
target_client = WorkspaceClient(
    host="<target-workspace-url>",
    token="<target-workspace-token>",
)

# Create the knowledge assistant in the target workspace
knowledge_assistant = KnowledgeAssistant(
    display_name=ka.display_name,
    description=ka.description,
    instructions=ka.instructions,
)
created = target_client.knowledge_assistants.create_knowledge_assistant(knowledge_assistant=knowledge_assistant)
print(created)

# Re-create knowledge sources in the target workspace
index_source = KnowledgeSource(
    display_name="<knowledge-source-name>",
    description="<knowledge-source-description>",
    source_type="index",
    index=IndexSpec(
        index_name="<catalog.schema.index-name>",
        text_col="<text-column>",
        doc_uri_col="<doc-uri-column>",
    ),
)

files_source = KnowledgeSource(
    display_name="<knowledge-source-name>",
    description="<knowledge-source-description>",
    source_type="files",
    files=FilesSpec(
        path="<volume-path>",
    ),
)

created_index_source = target_client.knowledge_assistants.create_knowledge_source(
    parent=created.name,
    knowledge_source=index_source,
)
print(created_index_source)

created_files_source = target_client.knowledge_assistants.create_knowledge_source(
    parent=created.name,
    knowledge_source=files_source,
)
print(created_files_source)
Replace the placeholder values with the appropriate values for your source and target workspaces. The <source-knowledge-assistant-name> follows the format knowledge-assistants/<knowledge-assistant-id>.
Evaluate your knowledge assistant
This notebook demonstrates how to evaluate a Databricks Knowledge Assistant using curated evaluation datasets and custom scorers.
Limitations
-
Only English is supported.
-
Files larger than 50 MB are automatically skipped during ingestion and are not included in the knowledge base.
-
Files with names that start with an underscore (
_) or period (.) are automatically skipped during ingestion and are not included in the knowledge base. -
Unity Catalog tables are not supported.
-
Only vector search indexes that use
databricks-gte-large-enas the embedding model are supported. -
AI Guardrails and rate limits must be disabled on the
databricks-gte-large-enmodel endpoint. See Configure AI Gateway on model serving endpoints. -
In order for tracing to work, you must enable production monitoring for MLflow (Beta). If you don't need tracing, you do not need to enable this preview. See Manage Databricks previews.