Create a SharePoint connection
Create a Microsoft SharePoint connection in Catalog Explorer to store authentication credentials for Lakeflow Connect ingestion. Any user with the USE CONNECTION privilege on the connection can then create SharePoint ingestion pipelines without needing direct access to the credentials.
Alternatively, admin users can create a connection and a pipeline at the same time in the data ingestion UI. See Create an ingestion pipeline.
For privilege requirements, see Connect to managed ingestion sources.
The following authentication methods are supported:
- OAuth U2M: Databricks-managed (Recommended)
- No Azure app registration required. Databricks manages OAuth and token refresh automatically.
- OAuth U2M: Custom-managed
- Bring your own Azure app registration.
- OAuth M2M
- For fully automated production pipelines that run without user interaction.
- OAuth with manual token refresh
- A legacy method. Not recommended for new implementations.
Prerequisites
Complete the source setup that matches your chosen authentication method. Use the authentication details you obtain to create the connection.
Create a connection
- Databricks-managed (Recommended)
- Custom-managed
- M2M
- Manual refresh token
No Azure app registration or source setup is required. Databricks manages OAuth configuration and token refresh automatically.
- In the Databricks workspace, go to Catalog > Create connection.
- Specify a unique Connection name.
- In the Connection type drop-down menu, select Microsoft SharePoint.
- In the Auth type drop-down menu, select OAuth U2M: Databricks-managed.
- (Optional) Add a comment.
- Click Next.
- Enter the SharePoint site URL.
- Click Sign in and complete authentication in the pop-up window.
-
Complete the U2M source setup. Use the authentication details that you obtain to create the connection.
-
In the Databricks workspace, click
 Catalog > Create > Create a connection.
 -
On the Connection basics page of the Set up connection wizard, specify a unique Connection name.
-
In the Connection type drop-down menu, select Microsoft SharePoint.
-
In the Auth type drop-down menu, select OAuth.
-
(Optional) Add a comment.
-
Click Next.
-
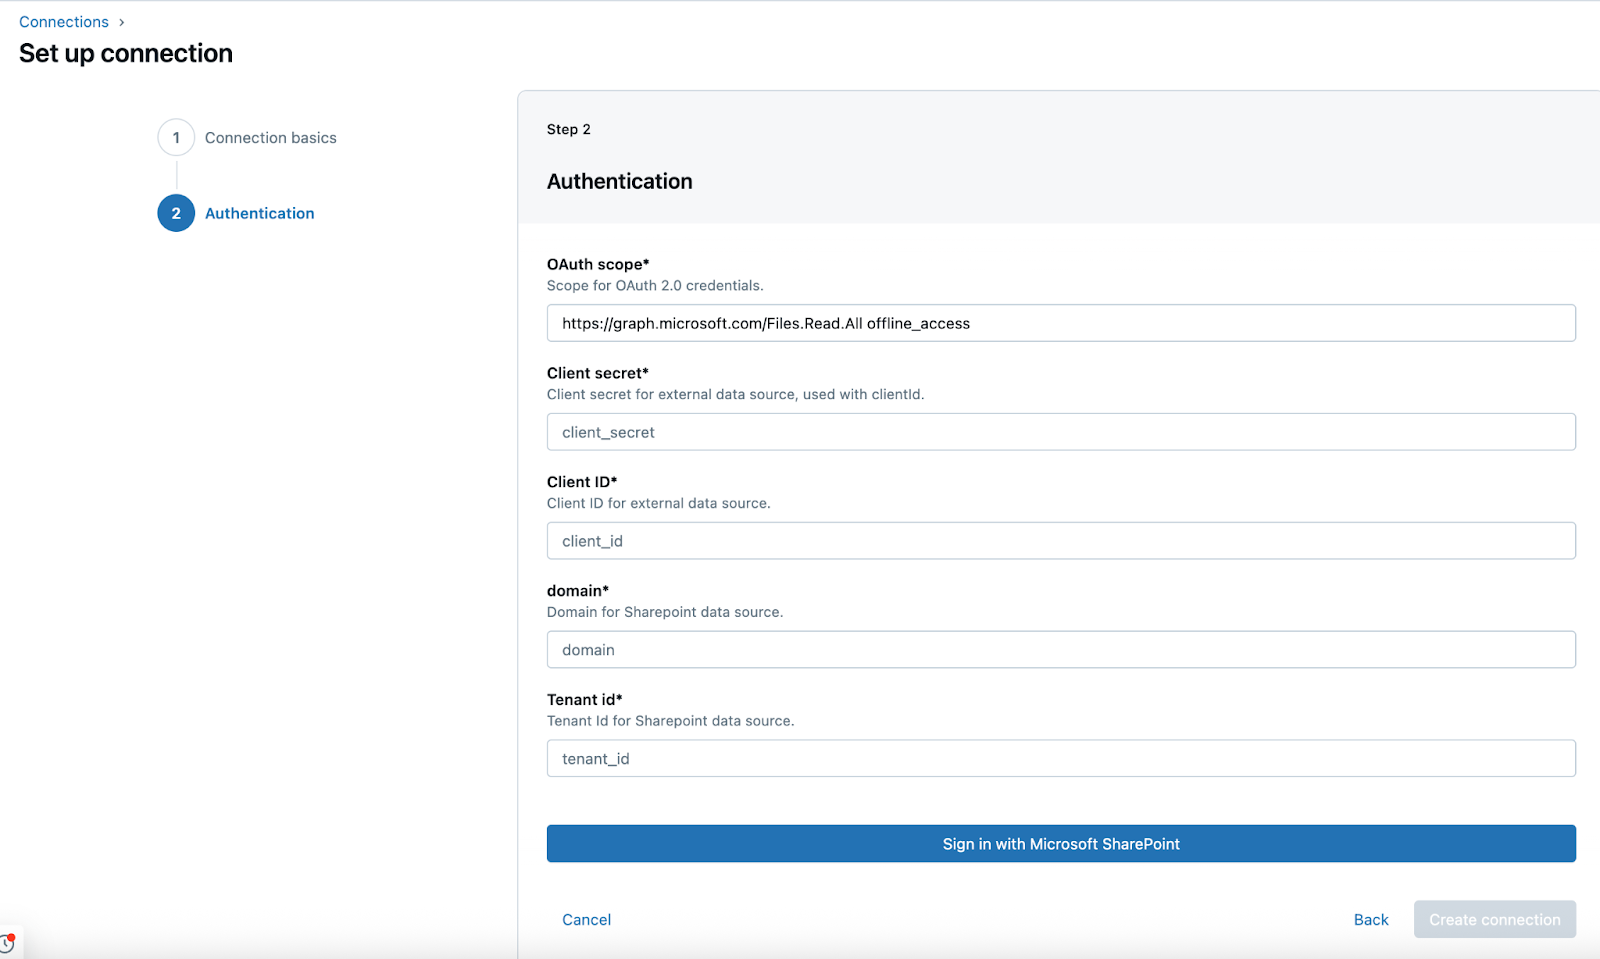
On the Authentication page, enter the following credentials for your Microsoft Entra ID app:
- Client secret: The client secret that you retrieved in the source setup.
- Client ID: The client ID that you retrieved in the source setup.
- Domain: The SharePoint instance URL in the following format:
https://MYINSTANCE.sharepoint.com - Tenant ID: The tenant ID that you retrieved in the source setup.
-
Click Sign in with Microsoft SharePoint.
A new window opens. After you sign in with your SharePoint credentials, the permissions you're granting to the Entra ID app are shown.
-
Click Accept.
A Successfully authorized message displays, and you're redirected to the Databricks workspace.
-
Click Create connection.
-
Complete the M2M source setup. Use the authentication details that you obtain to create the connection.
-
In the Databricks workspace, click
Catalog > Create > Create a connection. -
On the Connection basics page of the Set up connection wizard, specify a unique Connection name.
-
In the Connection type drop-down menu, select Microsoft SharePoint.
-
In the Auth type drop-down menu, select OAuth Machine to Machine.
-
(Optional) Add a comment.
-
Click Next.
-
On the Authentication page, enter the following credentials for your Microsoft Entra ID app:
- Client secret: The client secret that you retrieved in the source setup.
- Client ID: The client ID that you retrieved in the source setup.
- Domain: The SharePoint instance URL in the following format:
https://MYINSTANCE.sharepoint.com - Tenant ID: The tenant ID that you retrieved in the source setup.
-
Click Sign in with Microsoft SharePoint.
A new window opens. After you sign in with your SharePoint credentials, the permissions you're granting to the Entra ID app are shown.
-
Click Accept.
A Successfully authorized message displays, and you're redirected to the Databricks workspace.
-
Click Create connection.
-
Complete the manual token refresh source setup. You'll use the authentication details that you obtain to create the connection.
-
In the Databricks workspace, click
Catalog > Create > Create a connection. -
On the Connection basics page of the Set up connection wizard, specify a unique Connection name.
-
In the Connection type drop-down menu, select Microsoft SharePoint.
-
In the Auth type drop-down menu, select OAuth Refresh Token.
-
(Optional) Add a comment.
-
Click Next.
-
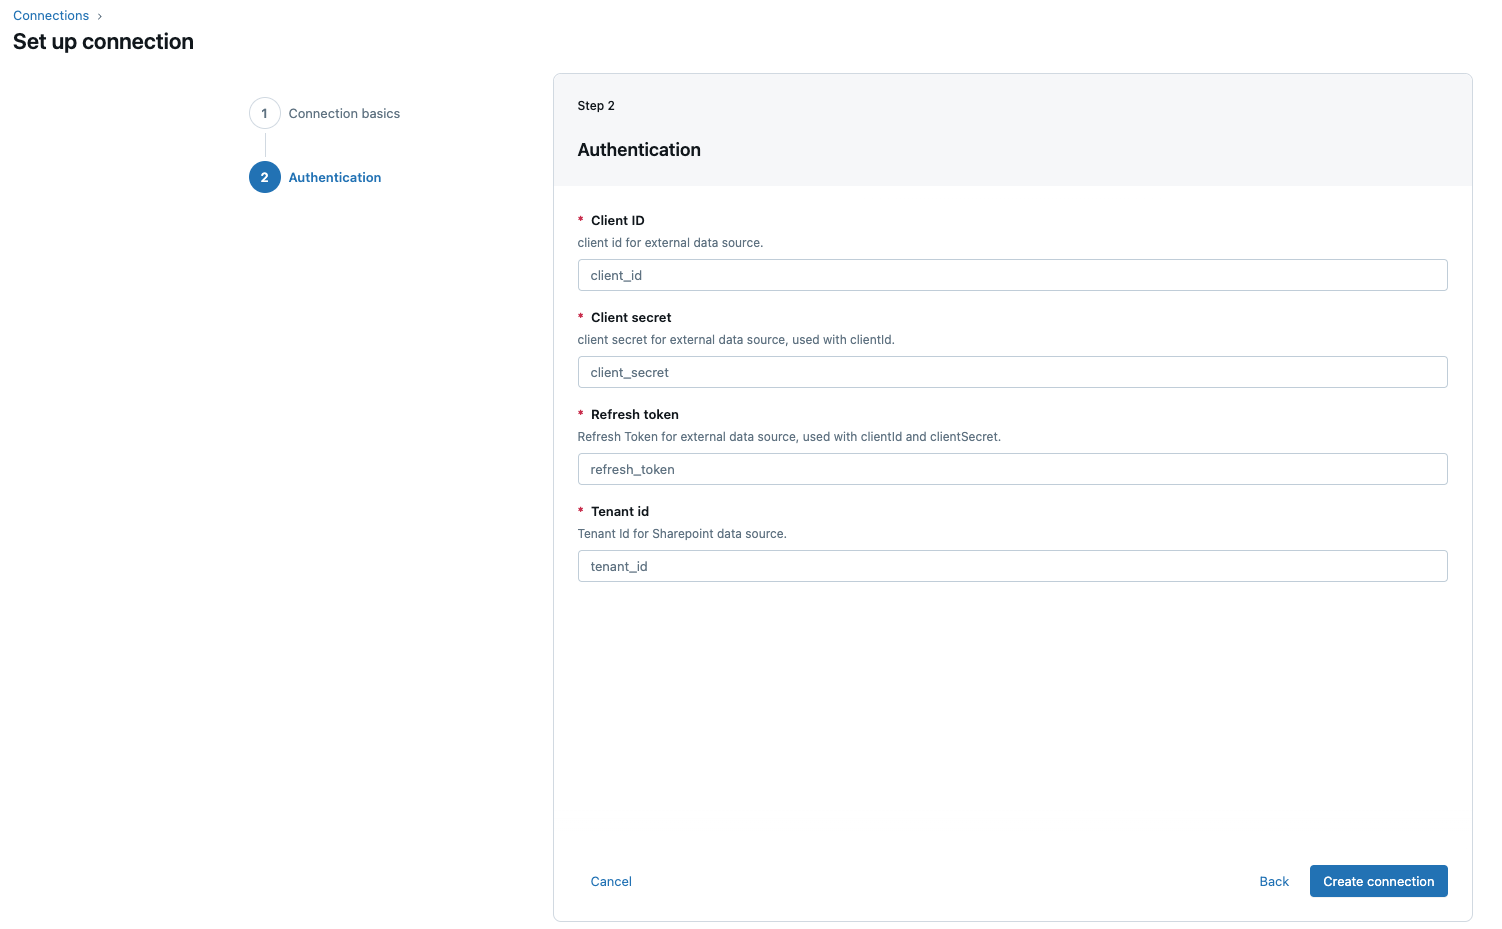
On the Authentication page, enter the following credentials for your Microsoft Entra ID app:
- Tenant ID: The tenant ID that you retrieved in the source setup.
- Client ID: The client ID that you retrieved in the source setup.
- Client secret: The client secret that you retrieved in the source setup.
- Refresh token: The refresh token that you retrieved in the source setup.
-
Click Create connection.
Only share this connection with other Databricks users if you authenticated with a service account. If you authenticated with a personal account, do not share the connection. Sharing a personal-account connection grants other users access to your personal account's credentials and data.