Develop code-based scorers
In MLflow Evaluation for GenAI, custom code-based scorers allow you to define flexible evaluation metrics for your AI agent or application.
As you develop scorers, you will often need to iterate quickly. Use this developer workflow to update your scorer without rerunning your entire app each time:
- Define evaluation data
- Generate traces from your app
- Query and store the resulting traces
- As you iterate on your scorer, evaluate using the stored traces
The example notebook contains all code from this tutorial.
Prerequisites: Set up MLflow, and define your application
Update mlflow[databricks] to the latest version for the best GenAI experience, and install openai since the example app below uses the OpenAI client.
%pip install -q --upgrade "mlflow[databricks]>=3.1" "openai>=1.0.0"
dbutils.library.restartPython()
The mlflow.openai.autolog() call below automatically instruments the application with MLflow Tracing. The recorded traces will be the inputs to scorers during evaluation.
import mlflow

mlflow.openai.autolog()

# If running outside of Databricks, set up MLflow tracking to Databricks.
# mlflow.set_tracking_uri("databricks")

# In Databricks notebooks, the experiment defaults to the notebook experiment.
# mlflow.set_experiment("/Shared/docs-demo")
Use the databricks-openai package to get an OpenAI client that connects to Databricks-hosted LLMs. Select a model from the available foundation models:
from databricks_openai import DatabricksOpenAI

# Create an OpenAI client that is connected to Databricks-hosted LLMs
client = DatabricksOpenAI()

# Select an LLM
model_name = "databricks-claude-sonnet-4"
Create a simple question-answering assistant app for this tutorial:
@mlflow.trace
def sample_app(messages: list[dict[str, str]]):
    # 1. Prepare messages for the LLM
    messages_for_llm = [
        {"role": "system", "content": "You are a helpful assistant."},
        *messages,
    ]

    # 2. Call LLM to generate a response
    response = client.chat.completions.create(
        model= model_name,
        messages=messages_for_llm,
    )
    return response.choices[0].message.content


sample_app([{"role": "user", "content": "What is the capital of France?"}])
Step 1: Define evaluation data
The evaluation data below is a list of requests for the LLM to answer. For this app, the requests can be simple questions or conversations with multiple messages.
eval_dataset = [
    {
        "inputs": {
            "messages": [
                {"role": "user", "content": "How much does a microwave cost?"},
            ]
        },
    },
    {
        "inputs": {
            "messages": [
                {
                    "role": "user",
                    "content": "Can I return the microwave I bought 2 months ago?",
                },
            ]
        },
    },
    {
        "inputs": {
            "messages": [
                {
                    "role": "user",
                    "content": "I'm having trouble with my account.  I can't log in.",
                },
                {
                    "role": "assistant",
                    "content": "I'm sorry to hear that you're having trouble with your account.  Are you using our website or mobile app?",
                },
                {"role": "user", "content": "Website"},
            ]
        },
    },
]
Step 2: Generate traces from your app
Use mlflow.genai.evaluate() to generate traces from the app. Since evaluate() requires at least one scorer, define a placeholder scorer for this initial trace generation:
from mlflow.genai.scorers import scorer

@scorer
def placeholder_metric() -> int:
    # placeholder return value
    return 1
Run evaluation using the placeholder scorer:
eval_results = mlflow.genai.evaluate(
    data=eval_dataset,
    predict_fn=sample_app,
    scorers=[placeholder_metric]
)
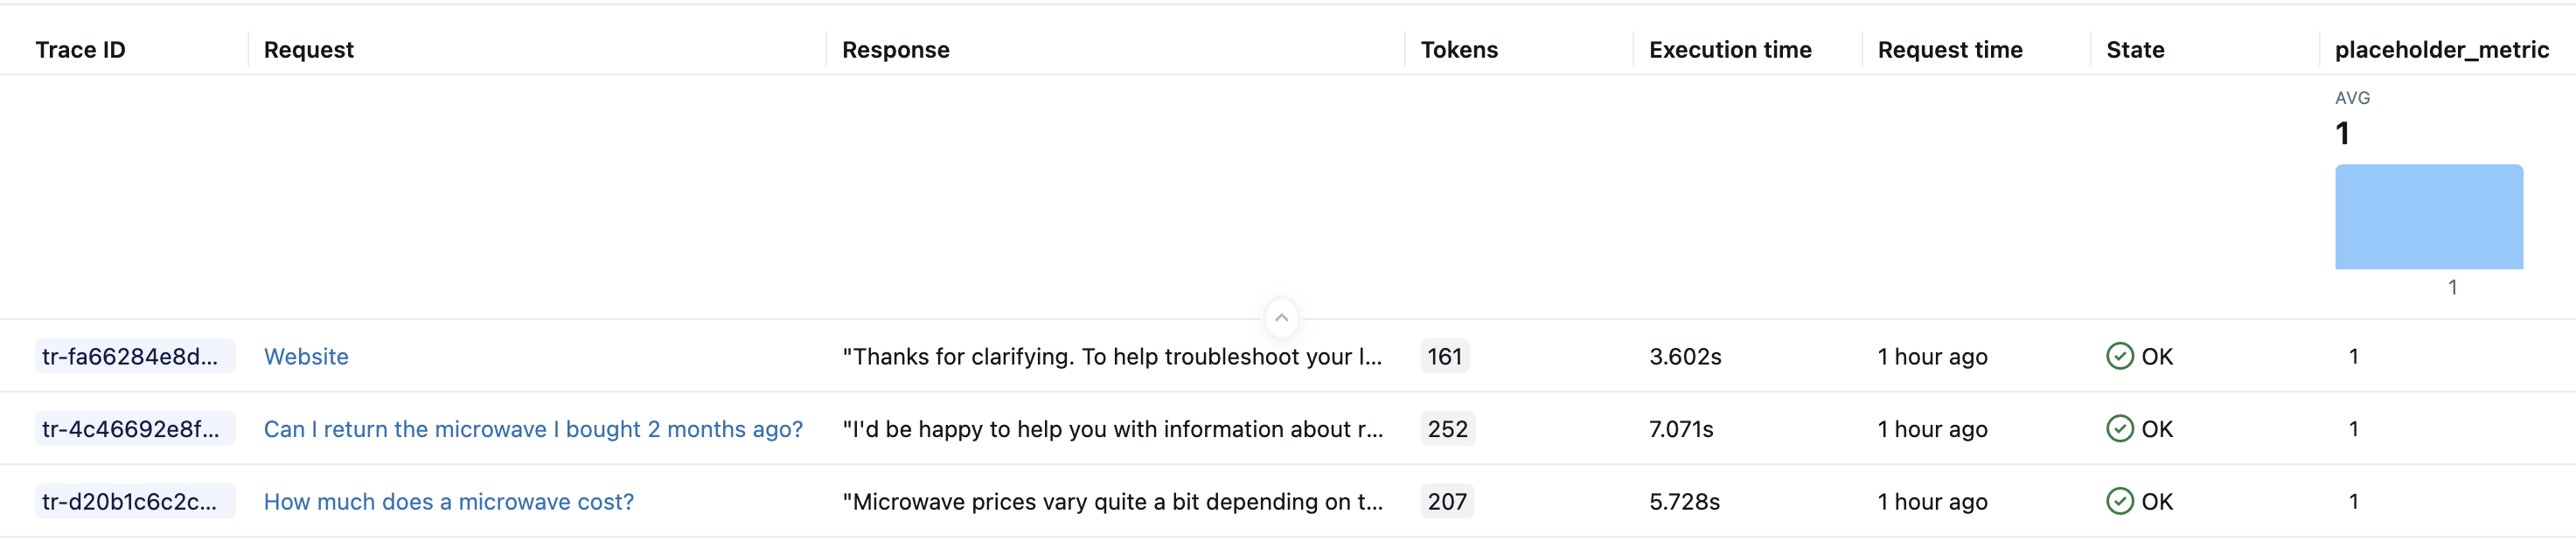
After running the above code, you should have one trace in your experiment for each row in your evaluation dataset. Databricks Notebooks also display trace visualizations as part of cell results. The LLM's response generated by the sample_app during evaluation appears in the notebook Trace UI's Outputs field and in the MLflow Experiment UI's Response column.
Step 3: Query and store the resulting traces
Store the generated traces in a local variable. The mlflow.search_traces() function returns a Pandas DataFrame of traces.
generated_traces = mlflow.search_traces(run_id=eval_results.run_id)
generated_traces
Step 4: As you iterate on your scorer, call evaluate() using the stored traces
Pass the Pandas DataFrame of traces directly to evaluate() as an input dataset. This allows you to quickly iterate on your metric without having to re-run your app. The code below runs a new scorer on the precomputed generated_traces.
from mlflow.genai.scorers import scorer

@scorer
def response_length(outputs: str) -> int:
    # Example metric.
    # Implement your actual metric logic here.
    return len(outputs)

# Note the lack of a predict_fn parameter.
mlflow.genai.evaluate(
    data=generated_traces,
    scorers=[response_length],
)
Example notebook
The following notebook includes all of the code on this page.
Developer workflow for code-based scorers for MLflow Evaluation
Additional resources
- Custom LLM scorers - Learn about semantic evaluation using LLM-as-a-judge metrics, which can be simpler to define than code-based scorers.
- Run scorers in production - Deploy your scorers for continuous monitoring.
- Build evaluation datasets - Create test data for your scorers.
- Code-based scorer reference - Reference for
@scorerandScorer, including signatures, inputs, outputs, metric naming, error handling, and accessing secrets.