Create and manage scheduled notebook jobs
You can create and manage notebook jobs directly in the notebook UI. If a notebook is already assigned to one or more jobs, you can create and manage schedules for those jobs. If a notebook is not assigned to a job, you can create a job and a schedule to run the notebook. To learn more about scheduling jobs, see Run jobs on a schedule.
Schedule a notebook job
Tell Genie Code (Agent mode) to do this for you:
Schedule this notebook to run daily at 9am PST.
To schedule a notebook job to run periodically:
-
In the notebook, click
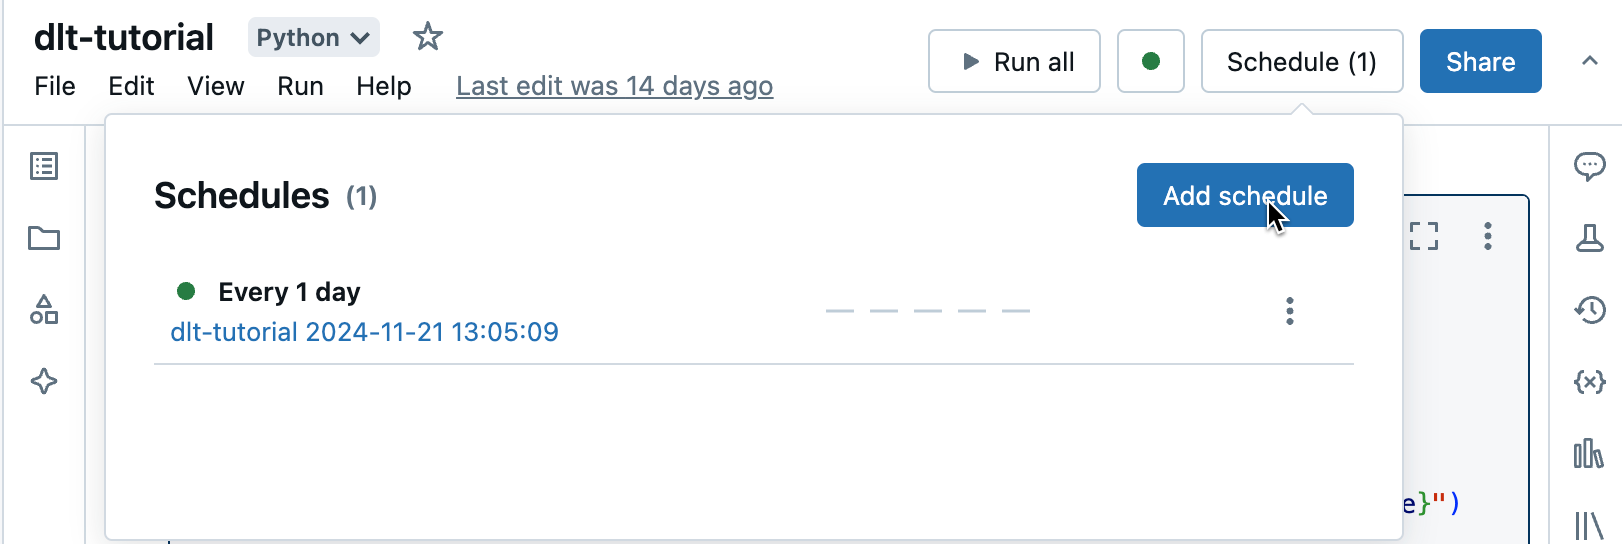
 Schedule in the upper-right.
If no jobs exist for this notebook, the New schedule dialog appears.
If jobs already exist for the notebook, the Schedules dialog shows the list of jobs. To add a new schedule, click Add schedule.
-
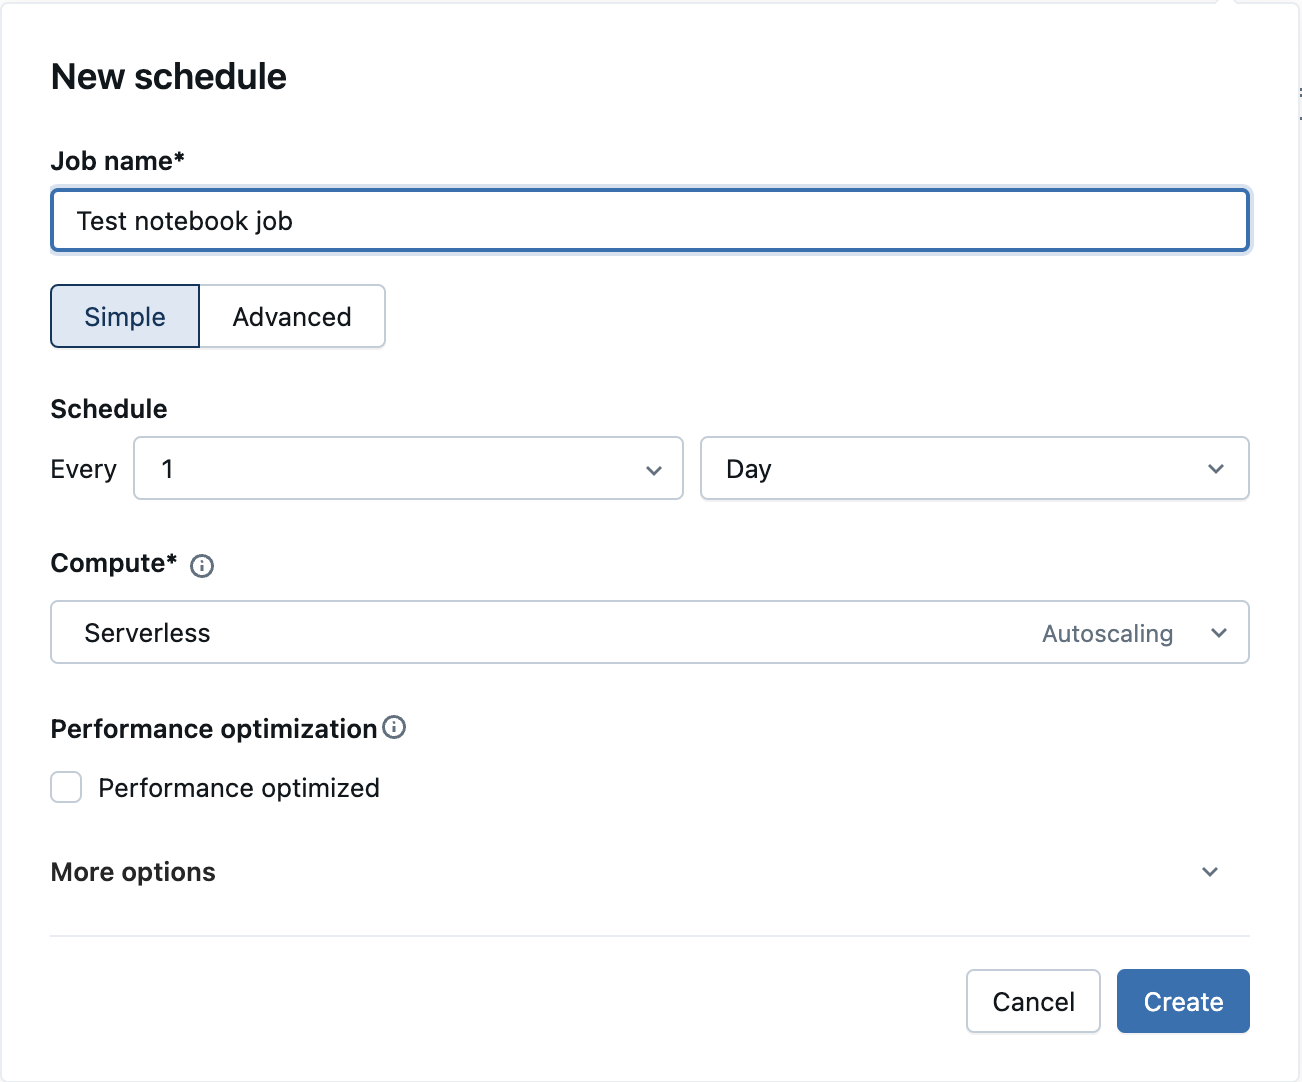
In the New Schedule dialog, optionally enter a name for the job. The default name is the name of the notebook.
-
Select Simple to run your job on a simple schedule, such as every day, or Advanced to define a custom schedule for running the job, such as a specific time every day. Use the drop-downs to specify the frequency. If you choose Advanced, you can also use cron syntax to specify the frequency.
-
In the Compute drop-down list, select the compute resource to run the task.
If the notebook is attached to a SQL warehouse, the default compute is the same SQL warehouse.
If your workspace is Unity Catalog-enabled and Serverless Jobs is enabled, the compute choice defaults to serverless compute.
If you have the Allow unrestricted cluster creation entitlement, you can click Add new job cluster to configure and create a new job cluster.
You can also select an existing all-purpose compute resource.
-
If you use serverless, select the performance mode. See Select a performance mode.
-
Optionally, under More options, you can specify email addresses to receive notifications on job events. See Add notifications on a job.
-
Optionally, under More options, enter any Parameters to pass to the job. Click Add and specify the key and value of each parameter. Parameters set the value of the notebook widget specified by the key of the parameter. Use dynamic value references to pass a limited set of dynamic values as part of a parameter value.
-
Click Create.
Run a notebook job
To manually run a notebook job:
- In the notebook, click Schedule in the upper-right.
- Click
 next to the scheduled job, then click Run now.
 - To view the job run details, click the job name.
View last successful run and update notebook
There are several ways to view the last successful scheduled job run directly in the notebooks UI:
- Click Schedule in the upper-right. Hover over the schedule you're interested in, then click View last successful run.
- Click
 Notebook and dashboard views in the upper-right, then click View last successful run for either the notebook view or the dashboard view.
 - Click
 Version history in the right sidebar, then click Last successful scheduled run.
The notebook view of the last successful job run shows the latest run results in the cell outputs.
- To update the notebook to the latest run, click Update notebook with run at the top.
- To exit this view and switch back to the original notebook, click Edit notebook.
Manage scheduled notebook jobs
To display jobs associated with this notebook, click ![]() Schedule. The Schedules dialog appears, showing all jobs currently defined for this notebook. To manage jobs, click
Schedule. The Schedules dialog appears, showing all jobs currently defined for this notebook. To manage jobs, click ![]() at the right of a job in the list.
at the right of a job in the list.
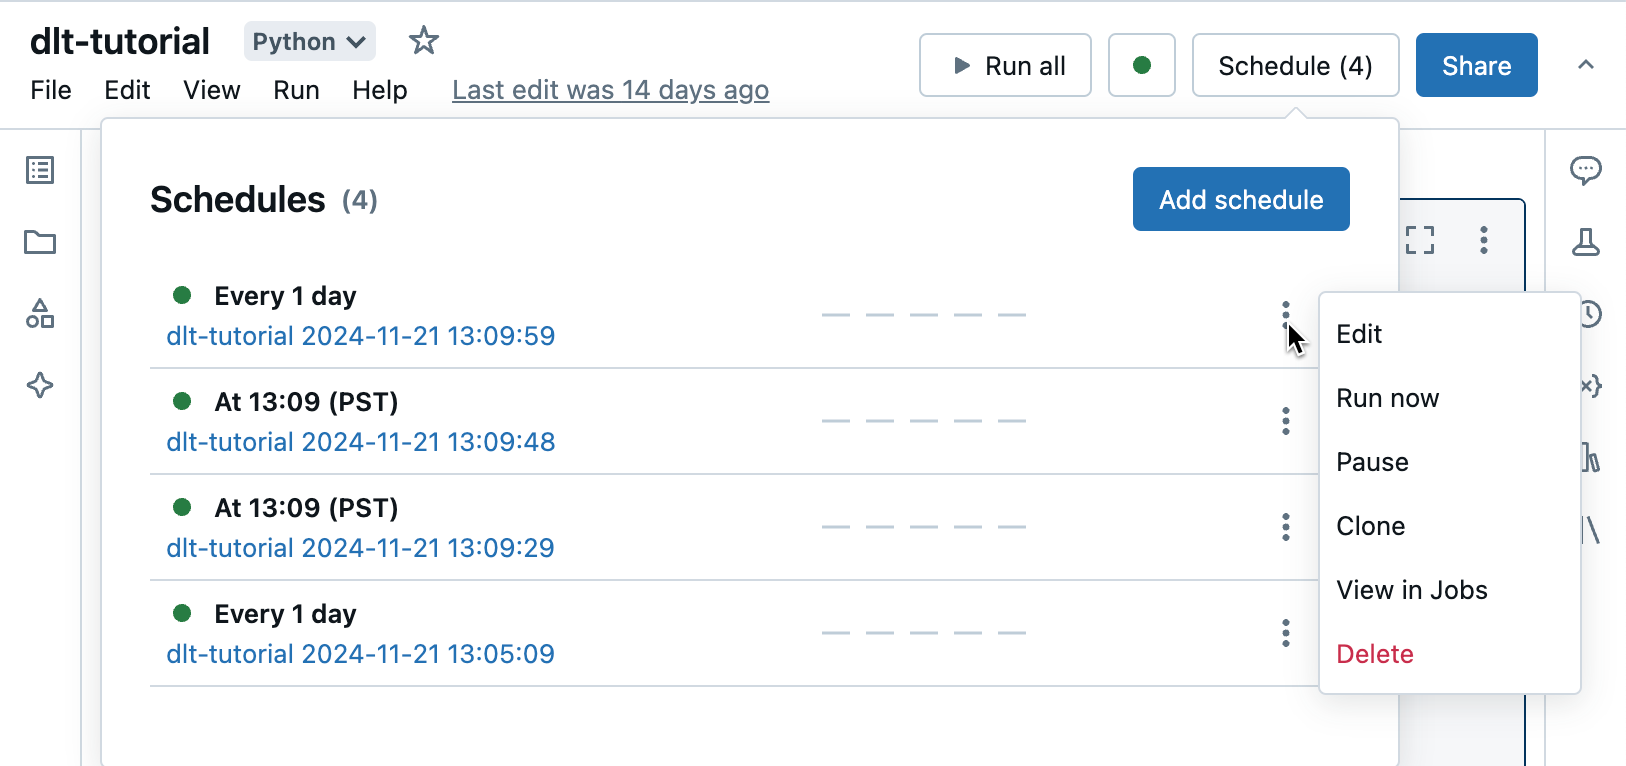
From this menu, you can edit the schedule, clone the job, view job run details, pause the job, resume the job, or delete a scheduled job.
When you clone a scheduled job, a new job is created with the same parameters as the original. The new job appears in the list with the name Clone of <initial job name>.
How you edit a job depends on the complexity of the job's schedule. Either the Schedule dialog or the job details panel displays, allowing you to edit the schedule, cluster, parameters, and so on. See Automate jobs with schedules and triggers.