Quickstart
Connect to your database using OAuth tokens or Postgres passwords. For managing Lakebase infrastructure (creating projects, branches, computes), see Project permissions.
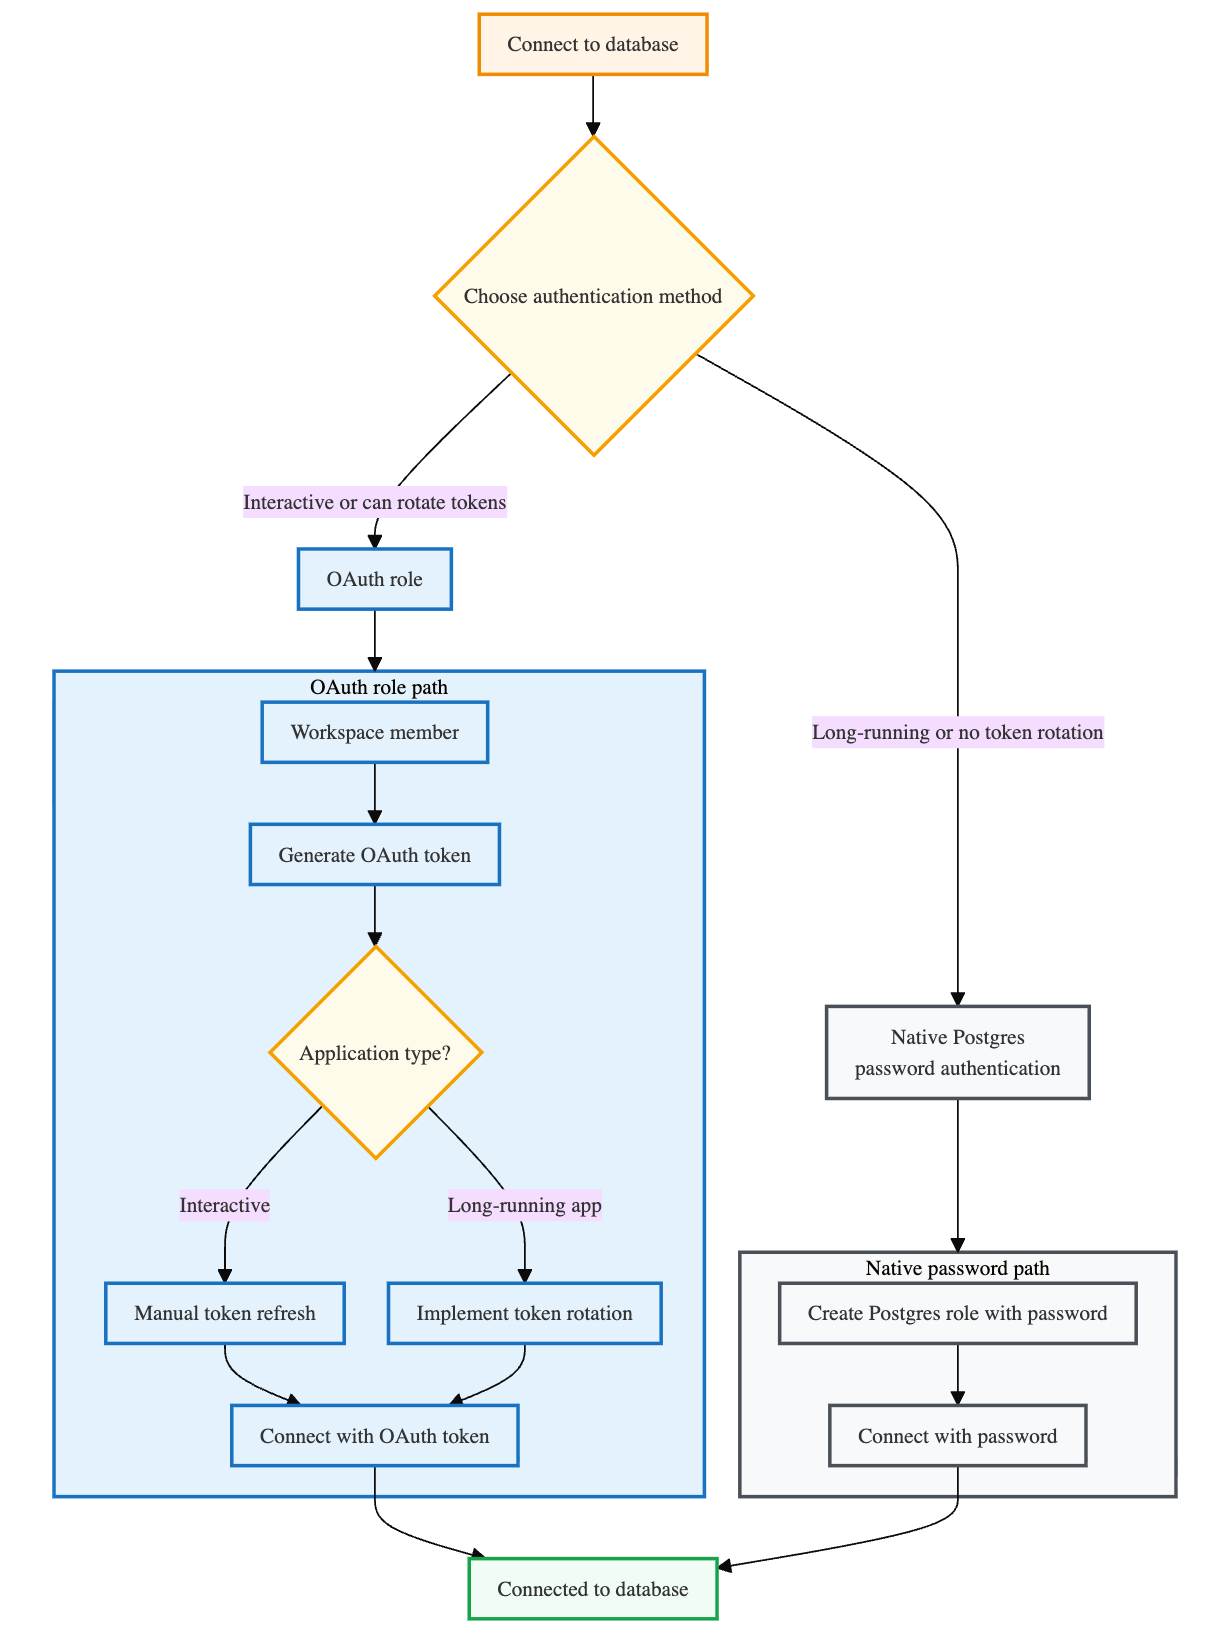
Choose your authentication method
Before connecting, decide which authentication method works best for your use case:
- OAuth role: Authenticate using your Databricks identity with an OAuth token. The project owner can connect immediately. To allow other Databricks identities to use OAuth authentication, create their Postgres roles using the Lakebase UI, SQL, or REST API. See Create an OAuth role.
- Native Postgres password authentication: Authenticate using a Postgres role with a traditional database password. See Create a native Postgres password role.
OAuth provides automatic credential expiration and workspace identity integration but requires token rotation for long-running applications. Postgres passwords do not expire or require rotation but lack OAuth's automatic expiration and centralized security management.
Connect to your database
When connecting over the public internet, if you use a client-side firewall, add the IP addresses used by Lakebase Autoscaling to your allowlist. See IP addresses and domains for Databricks services.
The examples below use psql, a standard Postgres client. For more about using psql to connect, see Connect with psql. You can also access your database through Databricks Notebooks, the Lakebase SQL Editor, Tables Editor, or third-party tools like pgAdmin and other Postgres-compatible clients. See Query your data for more options.
Each project contains a default database named databricks_postgres that you can connect to. This database is owned by the Postgres role for your Databricks identity (for example, user@databricks.com), which is automatically created when you create a project. To create additional Postgres roles, see Manage Postgres roles.
All database connections are subject to a 24-hour idle timeout and 3-day maximum connection life. See Connection timeouts.
Connect with an OAuth role
OAuth roles let you connect using your Databricks identity with token-based authentication. The project owner's OAuth role is created automatically. To allow other Databricks identities to use OAuth authentication, create their Postgres roles using the Lakebase UI, SQL, or REST API. See Create an OAuth role.
To generate OAuth tokens programmatically or for automated workflows, see Obtain an OAuth token in a user-to-machine flow for interactive sessions or Obtain an OAuth token in a machine-to-machine flow for service principals.
OAuth tokens expire after one hour.
For applications that maintain long-running database connections, you must implement token rotation to automatically refresh credentials before they expire. Without token rotation, your application will lose database connectivity after one hour.
See Token rotation examples for code examples.
To connect with an OAuth role:
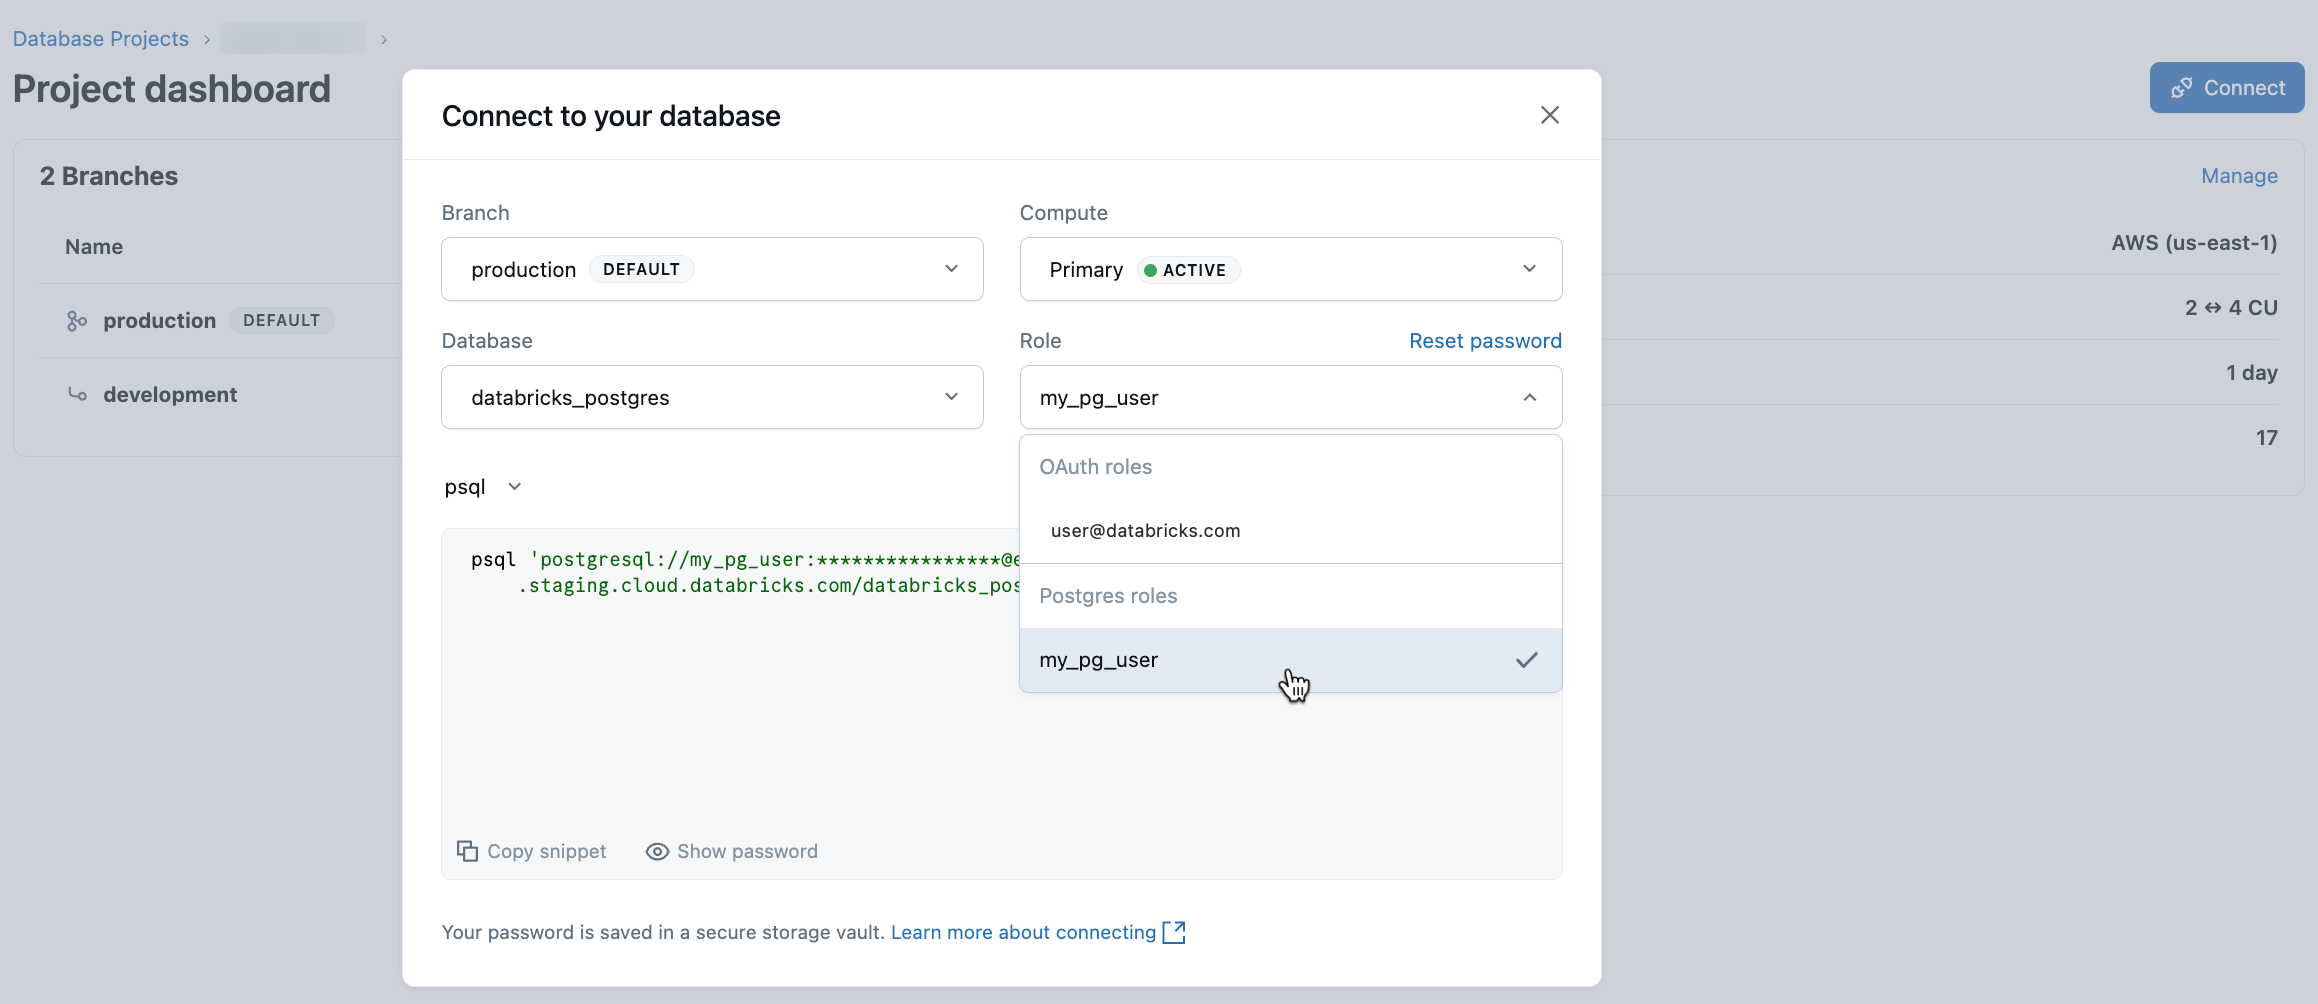
- From the Lakebase App, select your project and click Connect.
- Select the branch, compute, and database you want to connect to, then select your Databricks identity from the OAuth roles section of the Role drop-down menu.
- Copy the
psqlconnection snippet to your terminal and enter it. - When prompted for a password, click Copy OAuth token and enter it as your password:

Copy OAuth Token generates a token for your current login identity only, not for service principals or other users. To generate tokens for other identities, use the CLI or SDK.
Connect with native Postgres password
Native Postgres password authentication lets you connect using a Postgres role with a traditional database password.
To connect with native Postgres password authentication:
- From the Lakebase App, select your project and click Connect.
- Select the branch, compute, and database you want to connect to, then select a Postgres role from the Postgres roles section of the Role drop-down menu.
- Copy the
psqlconnection snippet to your terminal and enter it to connect.
Lakebase includes a built-in connection pooler for native Postgres password roles. To reduce connection overhead for high-throughput applications, see Use connection pooling.