Get a Postgres database
By the end of this guide, you'll have a running Postgres database with sample data, ready to connect to your application or integrate with the Databricks lakehouse.
Steps: ① Create a project → ② Connect → ③ Create a table
Step 1: Create your first project
Open the Lakebase App from the apps switcher.
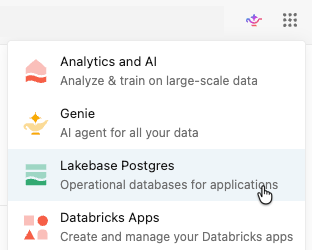
Select Autoscaling to access the Lakebase Autoscaling UI.
Click New project. Give your project a name and select your Postgres version. Your project is created with a single production branch, a default databricks_postgres database, and compute resources configured for the branch.
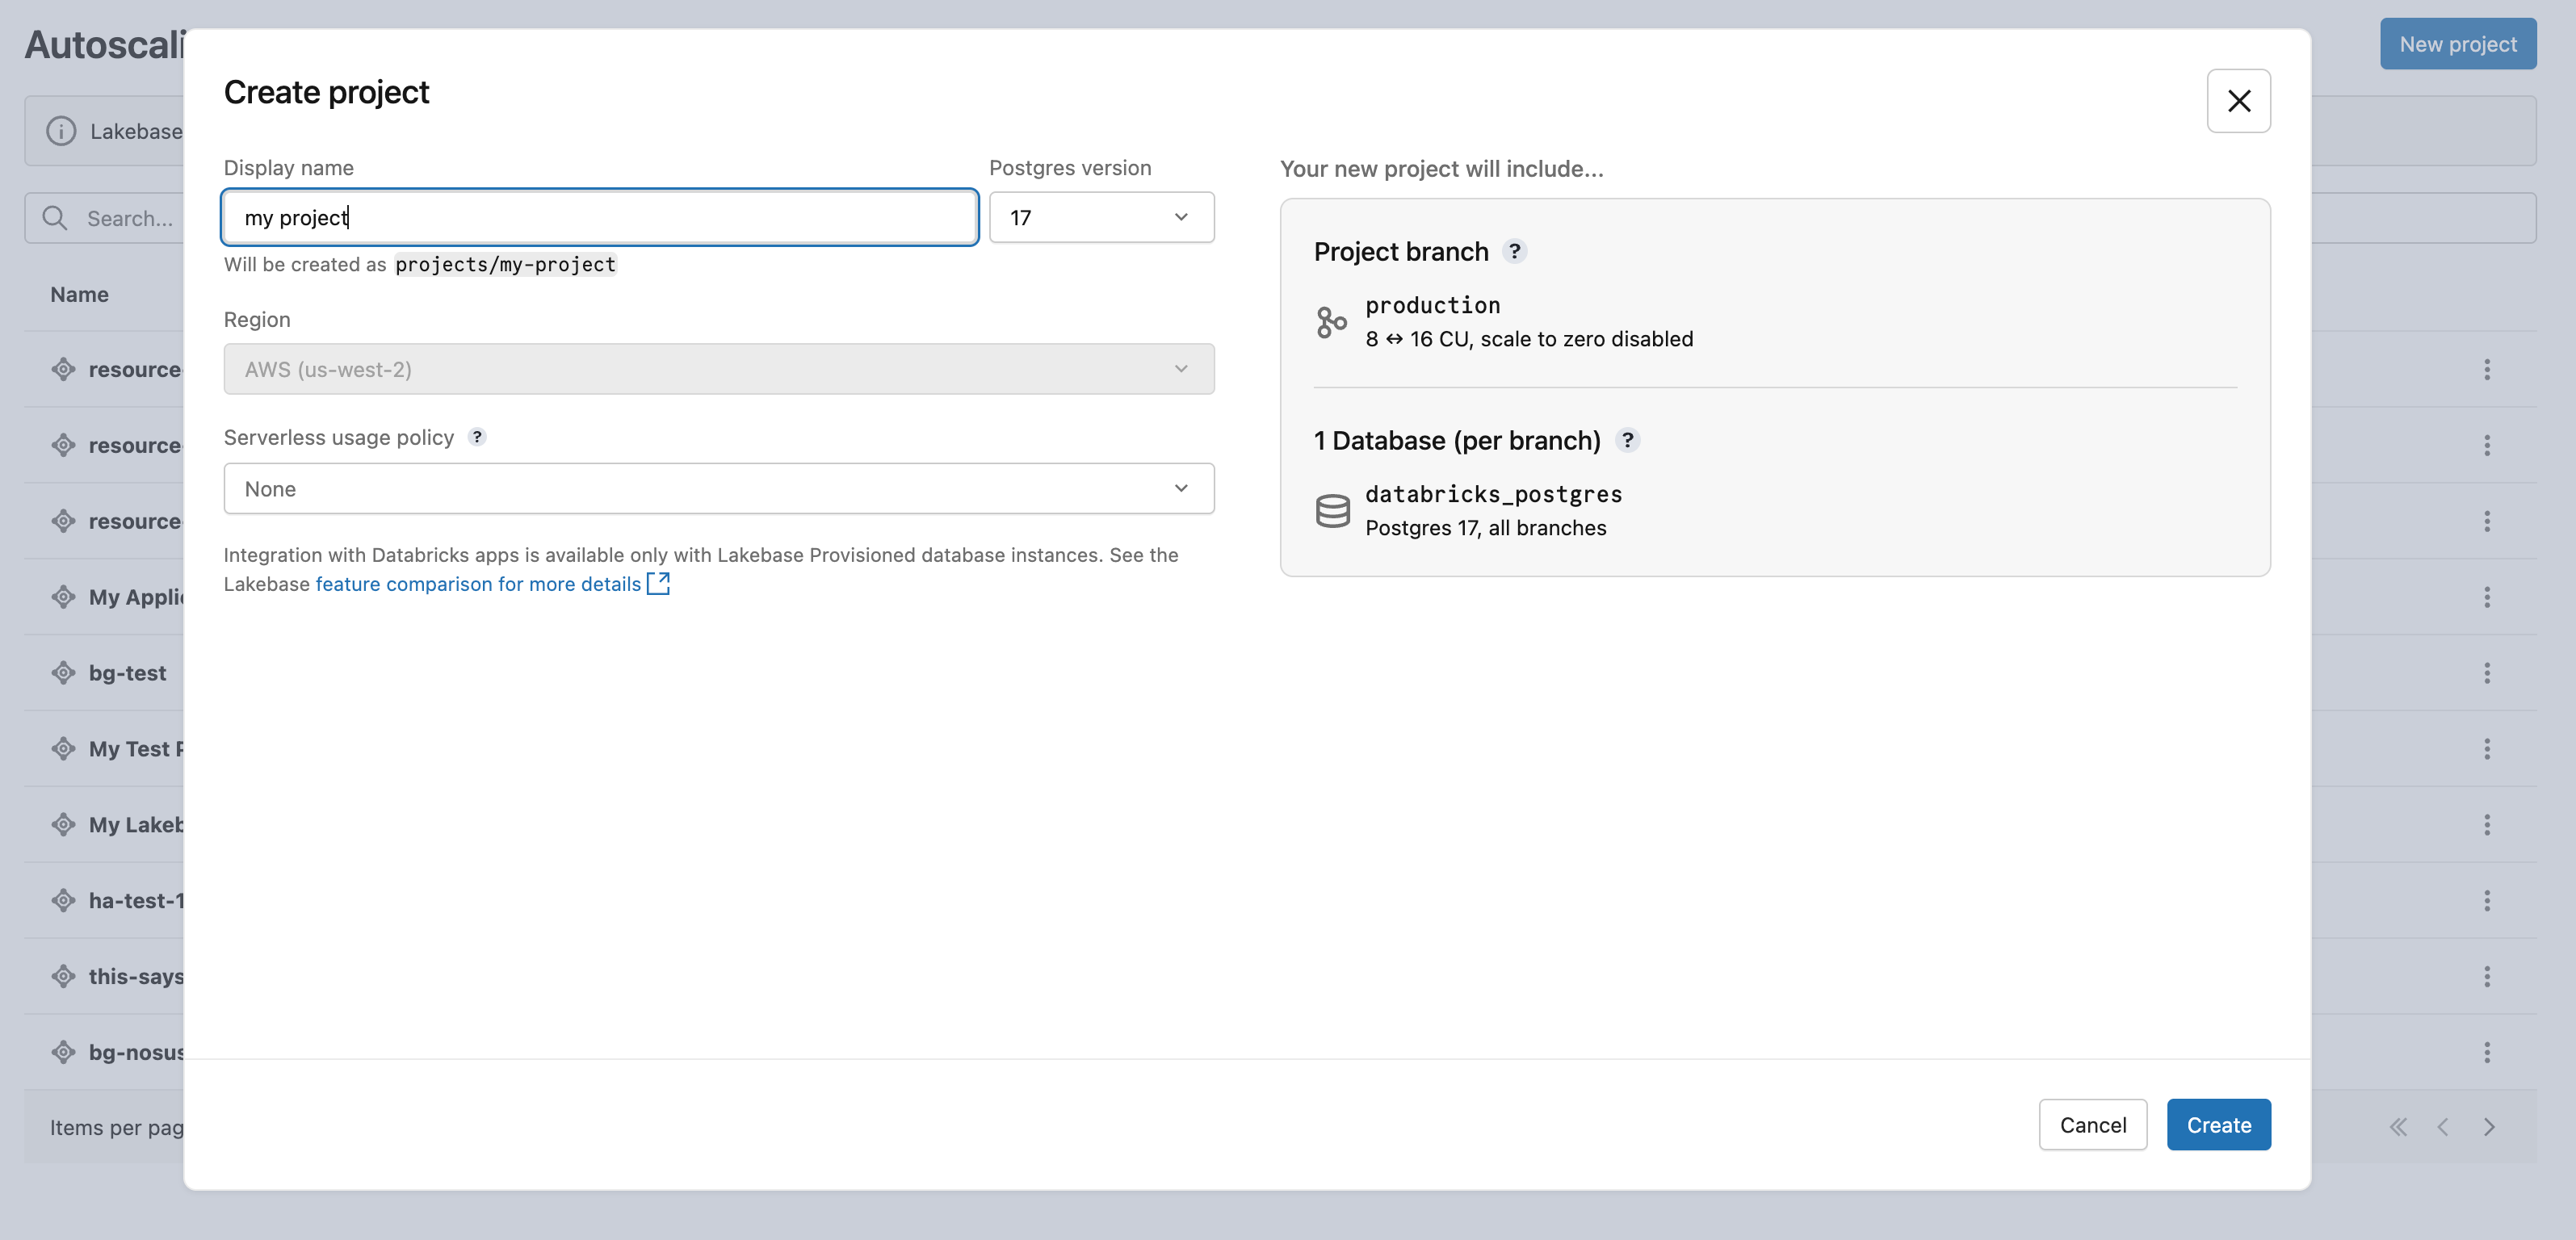
It may take a few moments for your compute to activate. The compute for the production branch has scale-to-zero enabled by default with a 24-hour inactivity timeout, but you can configure this setting if needed.
The region for your project is automatically set to your workspace region. See Region availability.
Learn more: Create a project | Autoscaling | Scale to zero
Step 2: Connect to your database
From your project, select the production branch and click Connect. Connection strings work with any standard Postgres client (psql, pgAdmin, DBeaver, or application frameworks).

To connect with your Databricks identity, copy the psql snippet from the connection dialog and paste the OAuth token when prompted:
psql 'postgresql://your-email@databricks.com@ep-abc-123.databricks.com/databricks_postgres?sslmode=require'
Learn more: Connection quickstart | psql | pgAdmin | Postgres clients
Step 3: Create your first table
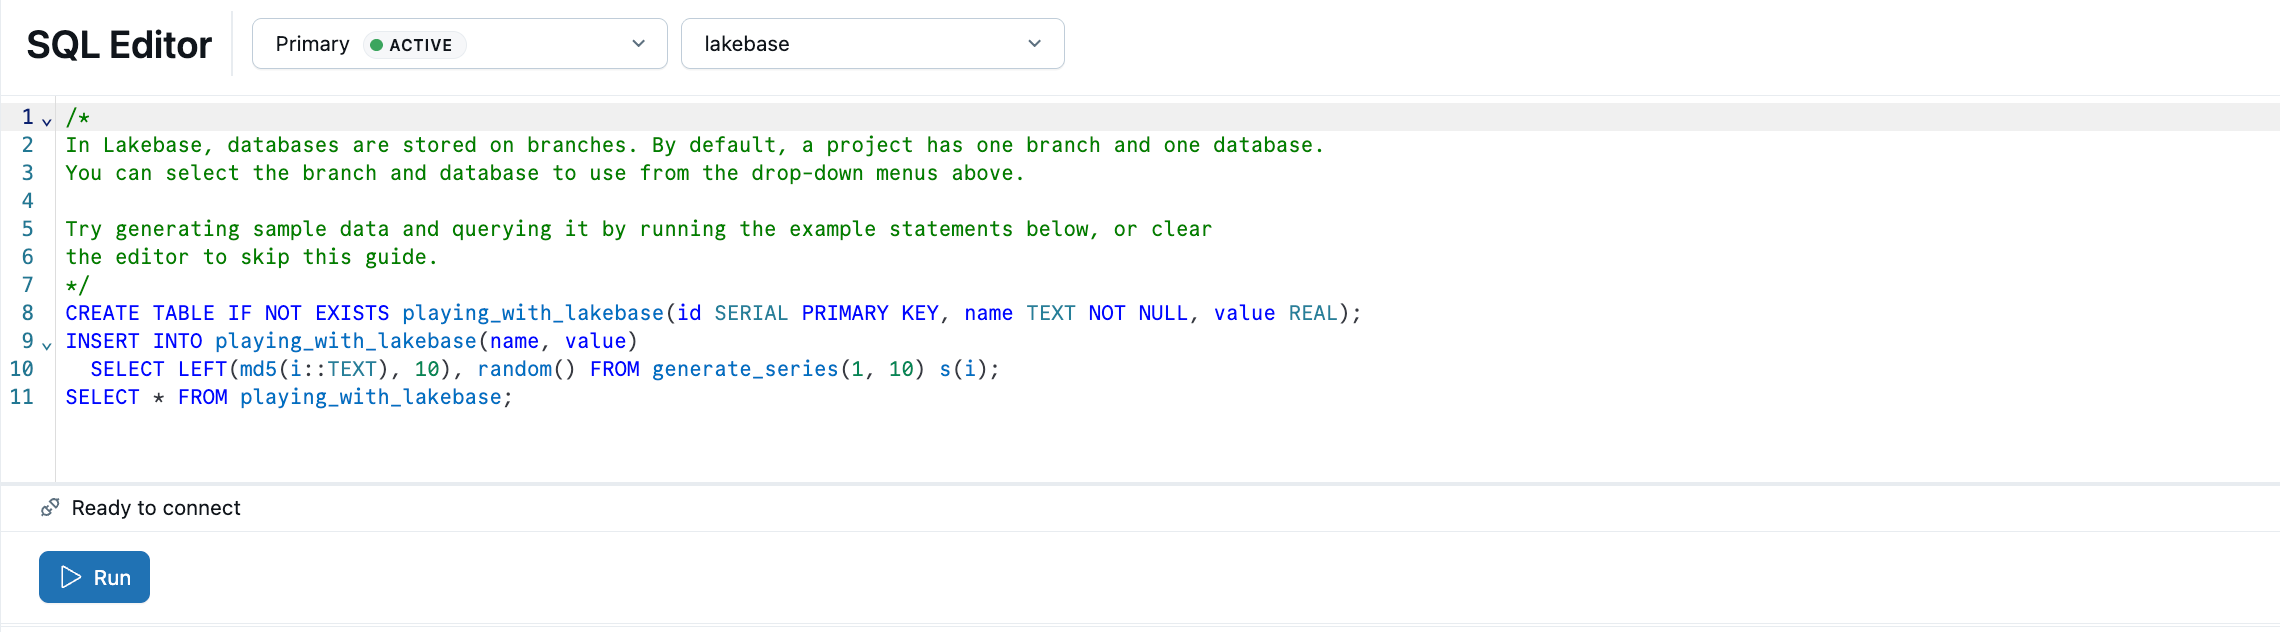
The Lakebase SQL Editor comes preloaded with sample SQL. From your project, select the production branch, open the SQL Editor, and run the provided statements to create a playing_with_lakebase table and insert sample data.
Learn more: SQL Editor | Tables Editor | Postgres clients
Next steps
Next step | Description |
|---|---|
Sync Unity Catalog tables into Postgres for low-latency app reads. | |
Store Postgres changes as Delta with Lakebase CDF. (Public Preview) |
Learn more
-
- Build an app
- Deploy a Databricks App with automatic Lakebase connection.
-
- Register in Unity Catalog
- Unified governance, lineage, and cross-source queries.
-
- Core concepts
- Autoscaling, scale-to-zero, branching, and how they work.
-
- Projects
- Architecture, branching model, and product overview.