Manage disaster recovery
Disaster recovery is in Private Preview. During Private Preview, it provides cross-region replication, and you manage it from the project's settings in the UI. To enable it for your account, ask your workspace admin to reach out to your Databricks account representative.
During the Private Preview, disaster recovery is not intended for production use.
This guide covers enabling disaster recovery for a project, triggering a failover or failback, and inspecting recovery branches. For background on how disaster recovery works and how it differs from high availability, see Disaster recovery.
Only a Lakebase Project Admin (someone with the CAN_MANAGE Access Control List (ACL)) can enable or disable disaster recovery, or trigger a failover. To see who has CAN_MANAGE, check the Project permissions section of the project's settings.
Disaster recovery spans two Workspaces, so each task is performed in a specific one:
Task | Where you perform it |
|---|---|
Enable or disable | The primary project, in the Primary Workspace |
Trigger a failover | The secondary project, in the Secondary Workspace |
Fail back | The original primary project, in the original Primary Workspace (now the Secondary) |
Inspect recovery branches | The original primary project, in the original Primary Workspace, after failback |
Prerequisites
- A Lakebase project.
- Two Workspaces in different regions. Workspaces in the same region aren't supported as a replication pair.
- The Secondary Workspace as an eligible replication target. The Secondary Workspace must be on your account's list of eligible replication targets. During Private Preview, your Databricks account representative sets this up when they enable disaster recovery.
During Private Preview, provide your account representative with the following so they can set up your replication group:
- Account ID: find it in the account console
- Primary Workspace ID: the Workspace where the primary Lakebase project is located
- Secondary Workspace ID: the Workspace where the secondary Lakebase project runs
- Lakebase Project ID: the project must already exist before disaster recovery can be enabled
To find a Workspace ID, see Get identifiers for workspace objects. The Lakebase Project ID is the project's project_id, shown in the project list in the Lakebase console.
Disaster recovery works with customer-managed keys (CMK): CMK-encrypted projects replicate across regions like any other project.
Enable disaster recovery
A Project Admin turns on replication from the primary project, in the Workspace that hosts it.
- In the Primary Workspace, open your project and select Settings.
- In the Cross-Workspace Replication section, confirm the Primary workspace. This is set to the Workspace that hosts the project and can't be changed.
- Under Secondary, select the Workspace where the secondary project runs.
- Select Save and Enable.
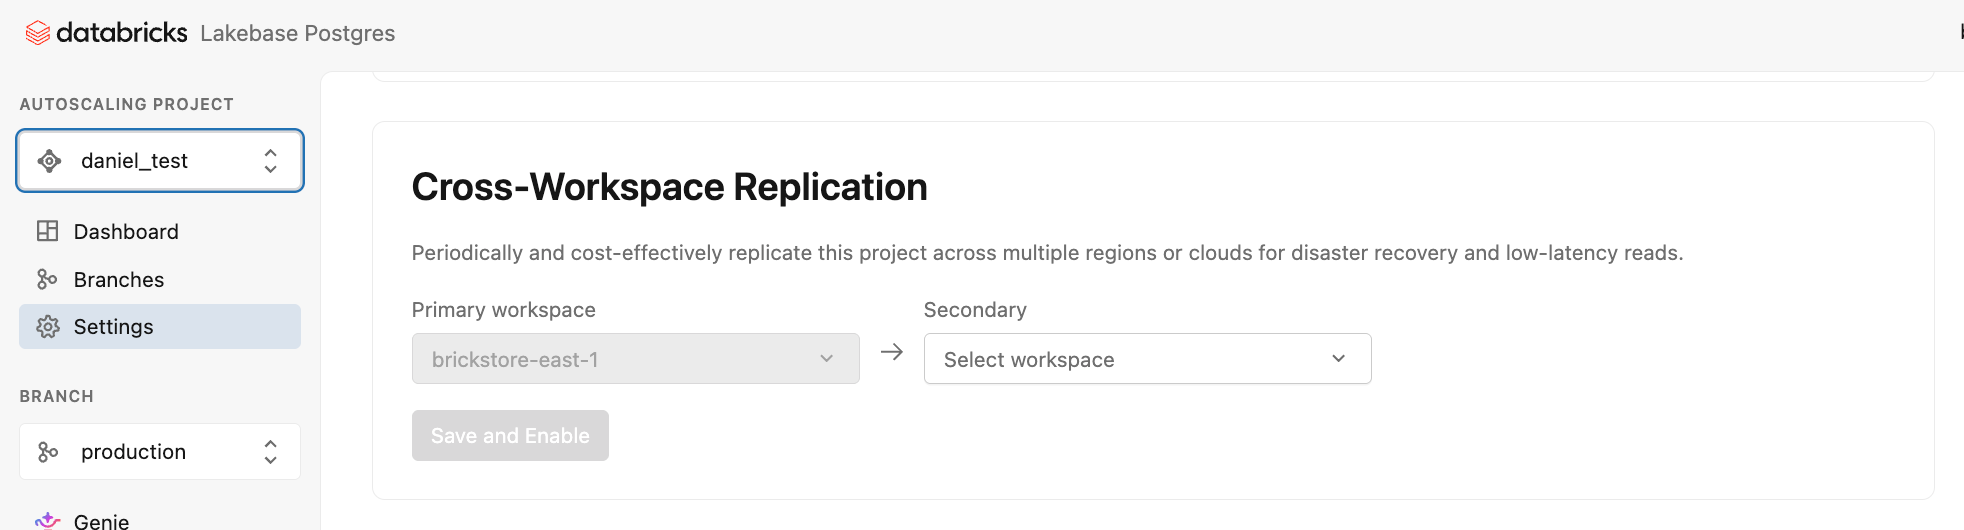
Lakebase creates the replication group and begins periodic replication from the Primary to the Secondary.
In the Secondary Workspace, Lakebase creates a secondary project with the same name as the Primary. To find it, switch to the Secondary Workspace and open the Lakebase console. The new project appears in the Autoscaling Database Projects list.

The secondary project includes all of the primary project's branches, and each branch has its own regional endpoints. During periodic replication, this secondary project is read-only. Its compute stays idle and you can't connect to it until a failover promotes it. The branch configuration, including compute ranges and high availability, is copied from the Primary so that matching compute can start immediately on failover.
Trigger a failover
A Project Admin triggers a failover from the Secondary Workspace, so you can start it even when the primary region is unavailable. Failover is immediate: Lakebase promotes the Secondary to be the new Primary and stops accepting writes on the original Primary.
To trigger a failover:
- In the Secondary Workspace, open the secondary project and go to its Project dashboard.
- Under Project settings, select Promote secondary.
- In the Promote dialog, select Failover. Failover promotes this copy immediately. Transactions that hadn't replicated to this Workspace yet aren't promoted with it. Lakebase preserves them as a recovery branch that you reconcile later, after failback.
- Select I confirm I want to promote this project and this operation may cause downtime, then select Promote.
Failover involves downtime. The original Primary stops accepting writes immediately, and the new Primary is unavailable until it starts compute and becomes queryable. Your application stays down until you configure it to connect to the new Primary using the new Primary's connection string. Specifically, after a failover:
- The secondary project becomes the new Primary. Lakebase activates its regional endpoints and starts compute for each branch, using the branch configuration copied from the original Primary.
- The original Primary stops accepting writes. When its Workspace is available, Lakebase shuts down its compute. Any synced tables or Lakebase CDF pipelines on it are terminated.
- Your application must reconnect to the new Primary's endpoint. Each region has its own endpoints, so update your application's connection configuration and get a new authentication token before resuming traffic. Get the new Primary's connection string and token from the Connect dialog in the secondary project. See Connect to your database.
You can trigger a failover at any time, not only during an actual outage. Use this to run DR drills and rehearse your reconnection process, updating your application's connection string and getting a new token, so it's proven before a real outage.
Fail back to your original region
Failback returns your workload to its original region after that region recovers. In the disaster recovery lifecycle, failover is the emergency move that gets you running in the secondary region during an outage; failback is the planned move back once the original region is healthy again, so you can resume your normal topology. Failback is optional. Do it when you want the original region to be the Primary again.
Failback isn't a separate operation: it's a failover run in the opposite direction. Once the original primary region recovers, its project rejoins the replication group as a Secondary and replication resumes from the current Primary back to it. Because you run failback as a planned operation rather than during an outage, you can let replication fully catch up first, then fail back with no data loss (RPO=0). To do this, you stop writes on the current Primary and wait for replication lag to reach zero before promoting, as described in the steps that follow.
The Promote dialog also lists Switchover as a coming-soon option. Switchover will stop writes on the current Primary, wait for all transactions to replicate, and promote in a single step, so you won't need to stop writes and fail over as separate steps.
To fail back:
- Stop write traffic on the current Primary so no new transactions are created while the original region catches up. You do this from your application, for example by pausing the writer service or putting the application in read-only or maintenance mode. Lakebase doesn't stop writes for you.
- Monitor replication lag until it reaches zero, confirming all transactions have replicated to the original region.
- From the original Primary Workspace, open the project (now acting as the Secondary) and select Promote secondary on its dashboard, the same action you used for the failover. In the Promote dialog, select Failover and confirm.
- Configure your application to connect to the original Primary using its connection string and a new authentication token. Get these from the Connect dialog in the original primary project. See Connect to your database.
After failback:
- The original region is the Primary again, and the other region returns to being an idle Secondary.
- If any transactions didn't replicate before the original outage, Lakebase surfaces them as recovery branches on the original Primary. See Inspect and reconcile recovery branches.
Inspect and reconcile recovery branches
Recovery branches live on the original primary project, so you inspect them in the original Primary Workspace. When a project has recovery branches, its Branches page shows a banner reporting how many recovery branches exist from a recent failover, with a prompt to inspect their data divergence. Select View project branches to see them. Recovery branches are only surfaced when divergence is detected.
On the Branches page, a recovery branch appears with the name of the branch it diverged from, plus a -recovery suffix. Its status tag shows where it is in the sync process:
- Pending home sync: the branch hasn't replicated back to its home region yet, so divergence can't be determined. Hovering over the tag explains that inspection is premature. This is the state right after a failover, before failback. Wait for the branch to sync.
- Inspect: the branch has synced back to its home region and is ready to reconcile.
Once a recovery branch shows Inspect:
- In the original primary project, open the Branches page.
- Query the recovery branch to find the transactions that didn't replicate to the Secondary before the outage. A recovery branch is a regular branch, so you query it the same way you query any other branch.
- Reconcile the data manually. Lakebase doesn't automatically merge a recovery branch back into your production branch, because only you know how the data diverged. See How to reconcile.
- Delete the recovery branch when you're done.
Recovery branches are never automatically deleted. Lakebase preserves the divergence history until you delete the branch yourself.
How to reconcile
A recovery branch holds your data as it existed on the original Primary at the moment of failover, including the transactions that hadn't replicated yet. Your production branch holds the data that did replicate and any writes made after failover. Reconciliation means finding what's only on the recovery branch and deciding what to do with it.
The recovery branch and your production branch are separate databases with their own endpoints, so you compare them rather than query across them. A few ways to find the divergent data:
- Look at the most recent rows. The unreplicated transactions are the last ones written before the outage, so recent rows are where divergence concentrates. If your tables have a timestamp column, query the recovery branch for rows written in the minutes leading up to the failover.
- Compare high-water marks. For tables with a sequence or incrementing ID, compare the maximum value on the recovery branch against your production branch. A higher value on the recovery branch points to rows that never replicated.
- Compare row counts. A table with more rows on the recovery branch than on production has unreplicated inserts to investigate.
Once you've identified the divergent rows, decide per table how to reconcile them: reinsert missing rows into production, reapply updates, or intentionally discard changes you don't want.
Disable disaster recovery
A Project Admin disables disaster recovery from the primary project, in the Primary Workspace, the same place you enabled it.
- In the Primary Workspace, open your project and select Settings.
- In the Cross-Workspace Replication section, select Disable replication.
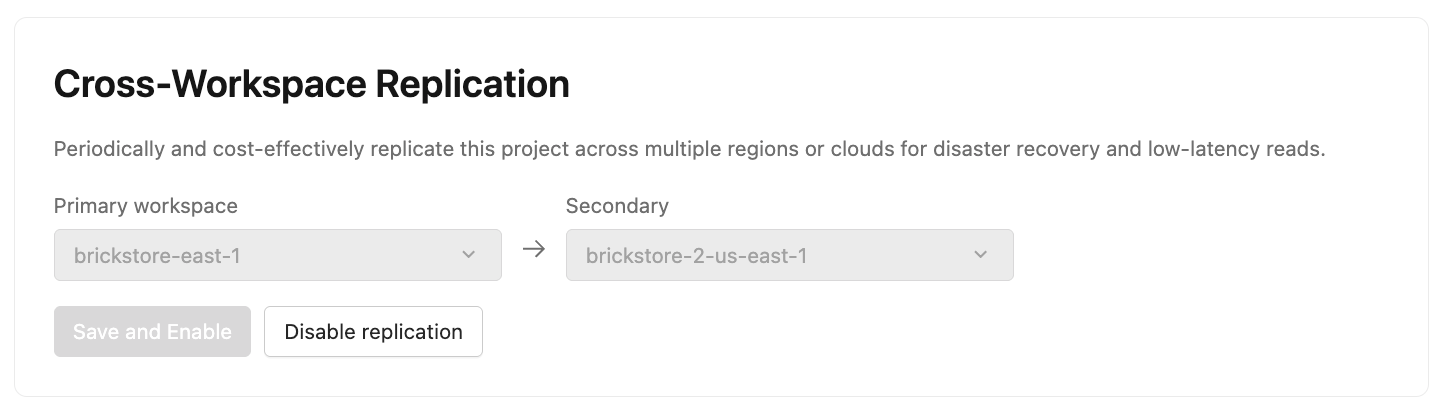
Disabling deletes the replication group and stops replication. Afterward, you keep access to the project in the Primary Workspace only. The secondary project is removed from the Secondary Workspace.
Additional resources
- Disaster recovery — concepts, failover behavior, and what's not supported
- High availability — automatic in-region failover
- Manage project permissions — the
CAN_MANAGEACL required to manage disaster recovery