Replicate to the lakehouse
Region availability
Lakebase Autoscaling is the latest version of Lakebase, with autoscaling compute, scale-to-zero, branching, and instant restore. For supported regions, see Region availability. If you are a Lakebase Provisioned user, see Lakebase Provisioned.
Lakehouse Sync is in Beta. Available on AWS only.
Replicate a Postgres table to Delta and watch row-level changes flow through.
Steps: ① Enable change capture → ② Start the sync → ③ Follow a row into the lakehouse → ④ Change the row, see it flow through
Before you begin
- Make sure you completed Get a Postgres database. You need a Lakebase project with the
playing_with_lakebasesample table. - A Unity Catalog catalog and schema where you have
CREATE TABLEpermission.
Step 1: Enable change capture
Postgres needs full row data in the write-ahead log for change data capture to work. Setting replica identity to full tells Postgres to record both the old and new row state for every change.
In the Lakebase SQL Editor, run:
ALTER TABLE playing_with_lakebase REPLICA IDENTITY FULL;
Learn more: Set replica identity on all tables in a schema and verify which are ready
Step 2: Start the sync
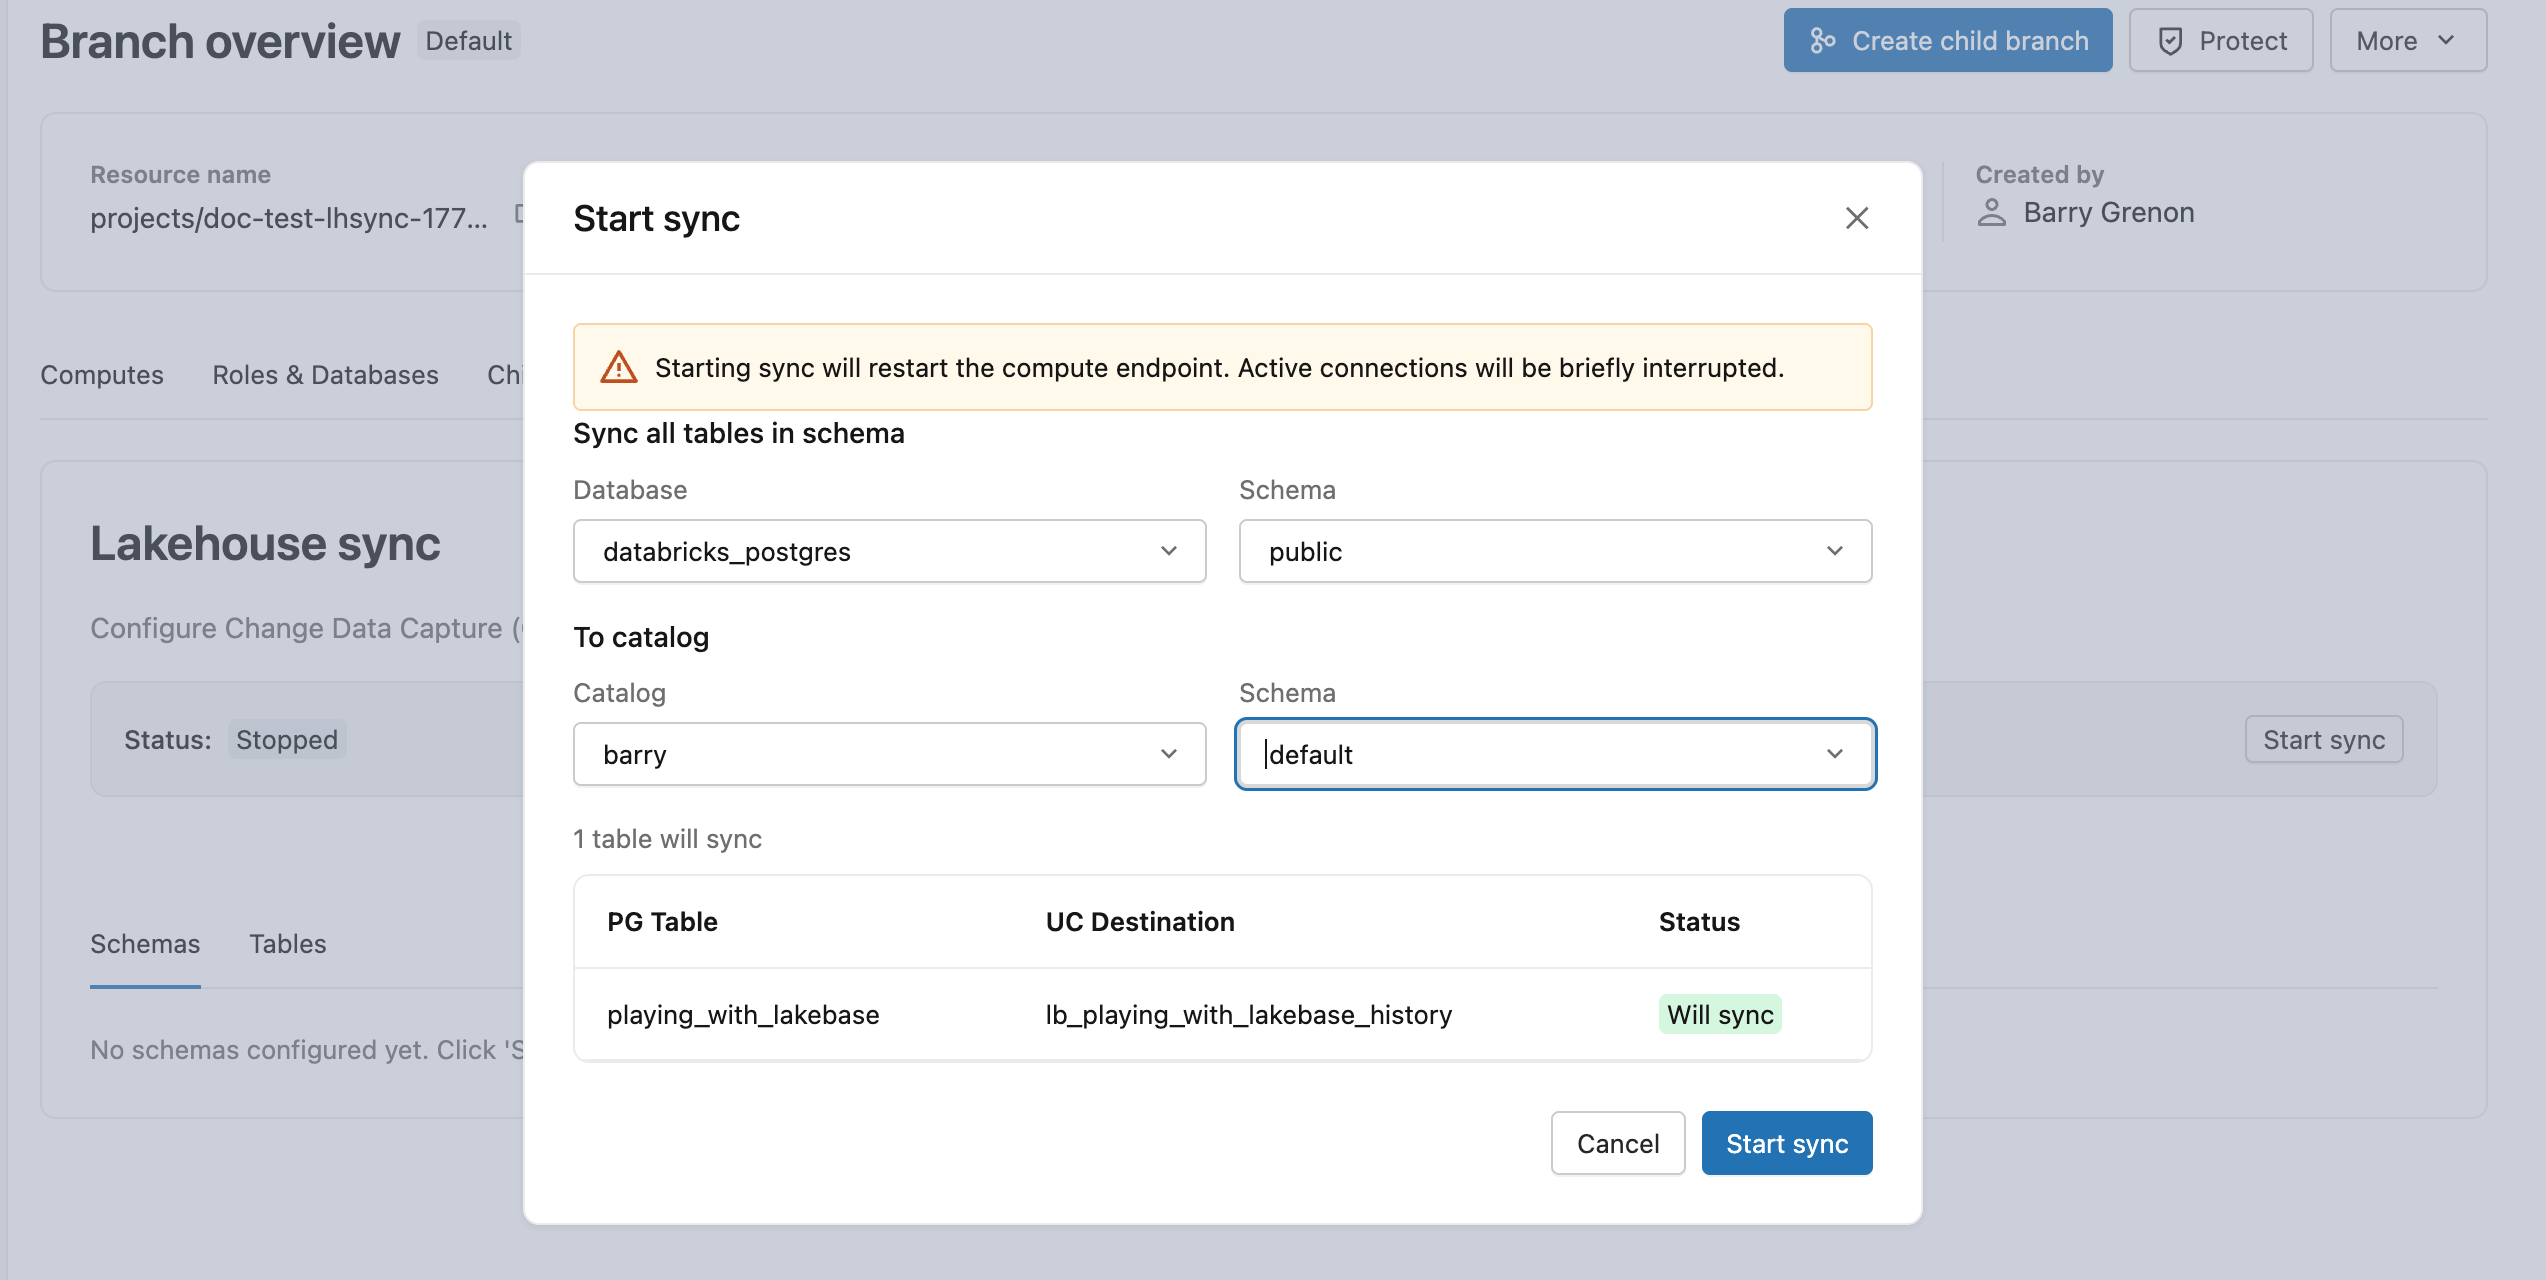
Lakehouse Sync is configured at the schema level. Every current and future table in the source schema replicates automatically, so you don't pick individual tables.
From your production branch, open the Lakehouse sync tab and click Start sync. Choose public as the source schema, then pick a destination Unity Catalog catalog and schema. The initial snapshot begins immediately, and lb_playing_with_lakebase_history appears as a Delta table in your destination.
Learn more: Start the Lakehouse Sync | Monitor sync status
Step 3: Follow a row into the lakehouse
Pick a row from Lakebase. Take a look at row id=2:
SELECT * FROM playing_with_lakebase WHERE id = 2;
Now find the same row in the Delta history table. Switch to a Databricks SQL warehouse or notebook and run:
SELECT * FROM <catalog>.<schema>.lb_playing_with_lakebase_history
WHERE id = 2;
Replace <catalog> and <schema> with the destination you chose in Step 2. You'll see row id=2 with the same name and value as in Lakebase, plus four extra columns. The initial snapshot wrote every existing row into Delta as an insert event, which is what that row represents.
Those extra columns describe what kind of event each row represents (_pg_change_type), when it happened (_timestamp), and the Postgres ordering info (_pg_lsn, _pg_xid).
Learn more: Destination Delta table schema | Data type mapping
Step 4: Change the row, see it flow through
Back in the Lakebase SQL Editor, update row id=2:
UPDATE playing_with_lakebase SET value = 55.5 WHERE id = 2;
Wait a few seconds for the change to replicate, then re-query the history table:
SELECT id, value, _pg_change_type, _timestamp
FROM <catalog>.<schema>.lb_playing_with_lakebase_history
WHERE id = 2
ORDER BY _pg_lsn DESC;

Row id=2 now appears three times: the original insert, an update_preimage with the old value, and an update_postimage with the new value. Every change to the row becomes a new history row, so you always have a complete audit trail. Deletes work the same way, appending one row with _pg_change_type = 'delete'.
Learn more: Common change patterns | Derive a current-state mirror
Next steps
- Run analytics: Query your Delta history tables with Databricks SQL.
- Build pipelines: Use the history table as a bronze layer in a medallion architecture.
- Review production limits: See limitations and troubleshooting and schema change management.
- Explore Lakebase: Core concepts | What is Lakebase?