Snapshots
A snapshot is a point-in-time capture of a project's root branch, including the schema and all data. Lakebase creates snapshots instantly with minimal performance impact. Use them as a backup or restore point.
Starting June 1, 2026, snapshot storage is billable for Lakebase Autoscaling. See Snapshot storage costs.
When to use snapshots
Snapshots are useful for regular backups or before making schema changes or other potentially destructive operations. They provide a quick way to create restore points that you can restore from if needed.
Create snapshots manually
Snapshots capture the state of your branch at a point in time. You can create snapshots manually on root branches only. Manual snapshots are limited to 10 per project (see Project limits). You can restore to these snapshots from any branch in your project.
Create a snapshot
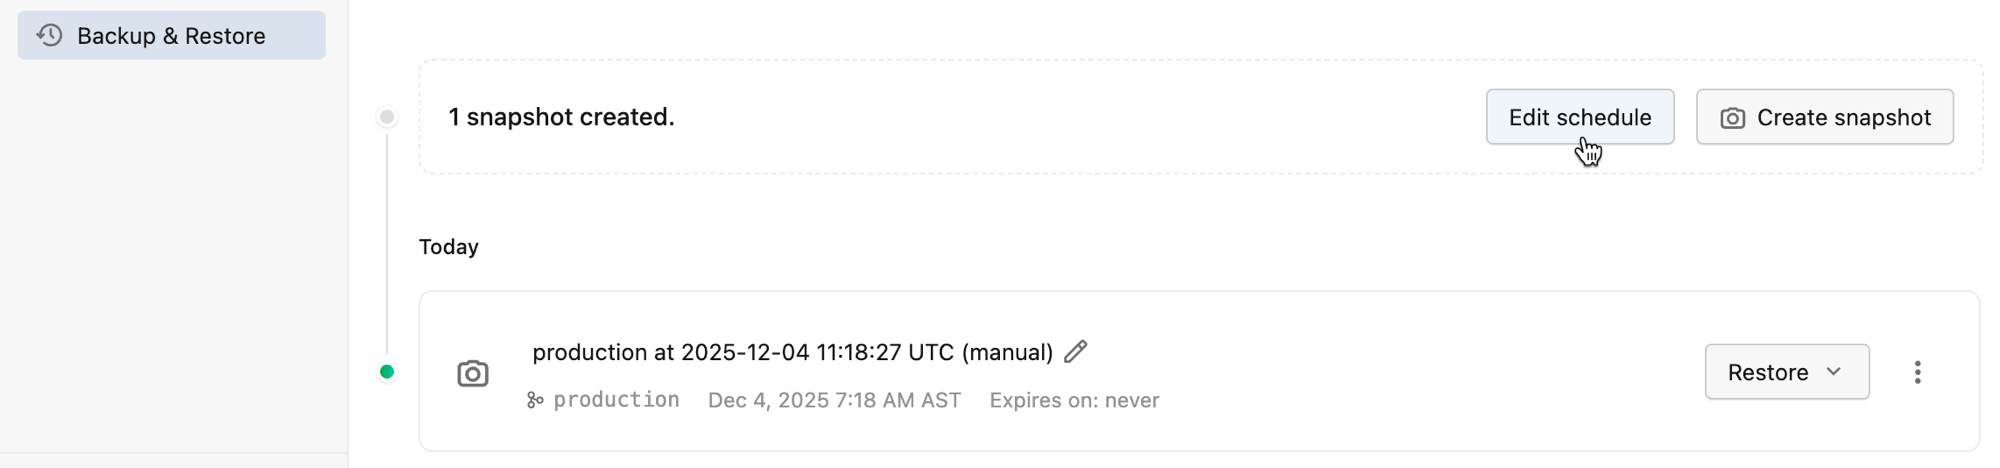
Navigate to your project in the Lakebase App and select Backup & Restore in the branch navigation. Click Create snapshot to capture the current state of your data. Snapshots are created instantly and are useful before making significant changes to your schema or data.

Create a backup schedule
Schedule automated snapshots to run at regular intervals (daily, weekly, or monthly) to ensure consistent backups without manual intervention. Backup schedules are configured per branch and only apply to root branches. The limit on manual snapshots (see Project limits) does not apply to scheduled snapshots.
To create or modify a backup schedule:
-
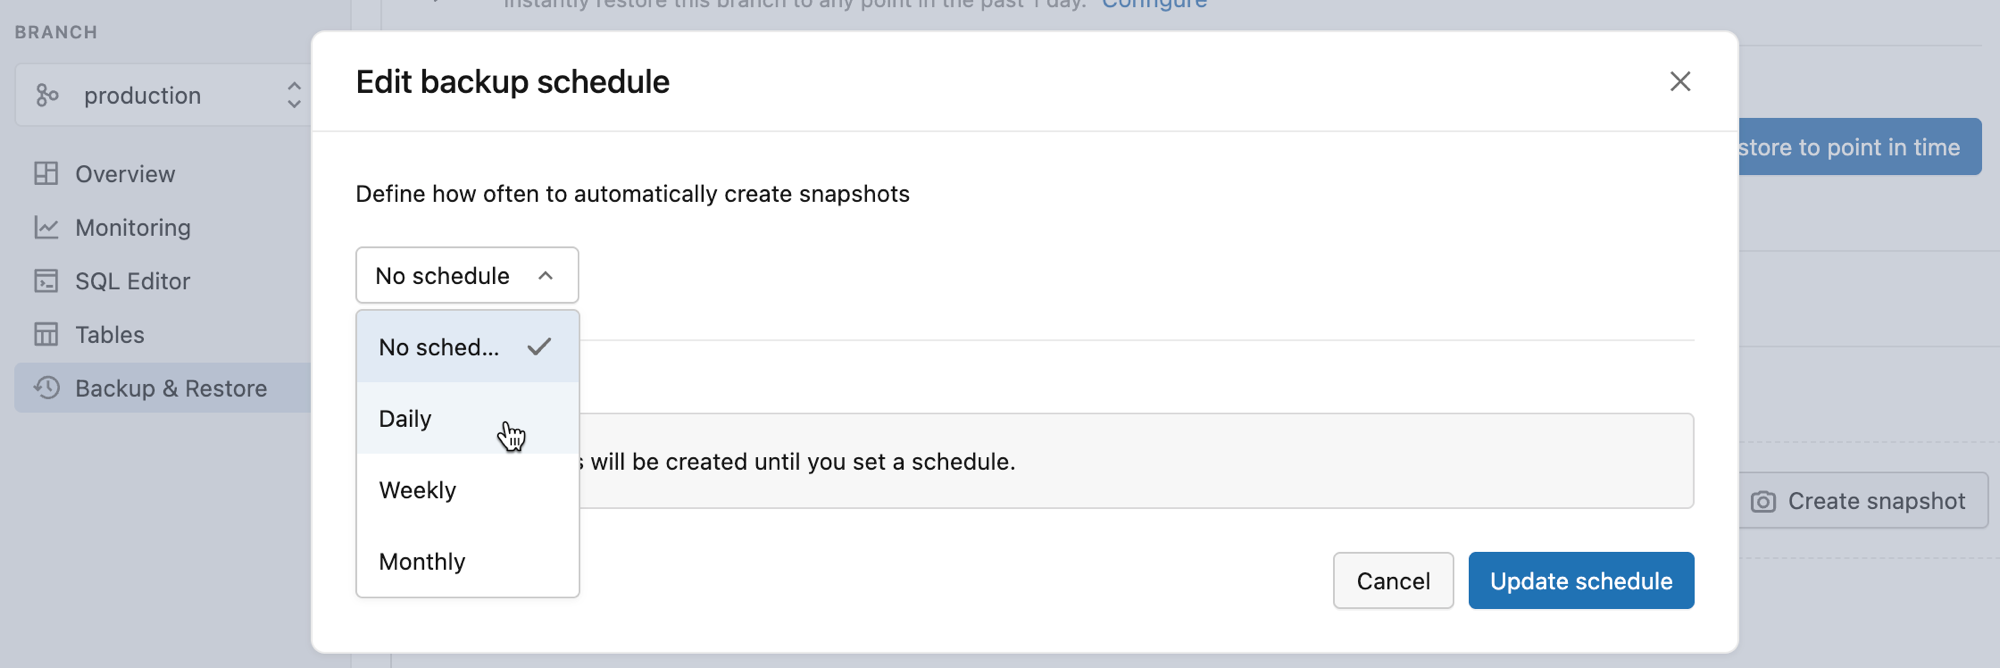
From the Backup & Restore page in your project, click Edit schedule to open the backup schedule configuration dialog.
-
Select a schedule frequency from the following options:
- No schedule – Disables automated snapshots (default)
- Daily – Creates a snapshot every day at a specified time
- Weekly – Creates a snapshot on a specific day of the week
- Monthly – Creates a snapshot on a specific day of the month
-
Configure the schedule details based on your selected frequency. Specify how often you want to create snapshots and how long to keep them.
Once configured, snapshots created by the schedule appear on the Backup & Restore page with a label indicating they were created automatically.
Snapshot retention
Snapshots are automatically deleted after their retention period expires. You can adjust retention settings at any time by editing the schedule. Keep in mind:
- Shorter retention periods help manage how many scheduled snapshots are retained.
- Deleted snapshots can't be recovered
- Manual snapshots aren't affected by backup schedule retention settings
Restore from a snapshot
On the Backup & Restore page in the Lakebase App, snapshots are listed by date. Find the snapshot you want to restore and click Restore. A confirmation dialog appears explaining what will happen: the restore occurs instantly, your current branch remains unchanged, and a new branch will be created with a name like branch_from_snapshot_ followed by the snapshot date and time. Confirm that you want to perform the operation by clicking Restore. A new root branch is created with the snapshot data. Your current branch is left unchanged.
After the restore completes, you see a success message and the Branch overview page for the new branch. The section titled Connect to the new branch to preview restored data explains that you can connect from your application or client to verify the restored data.
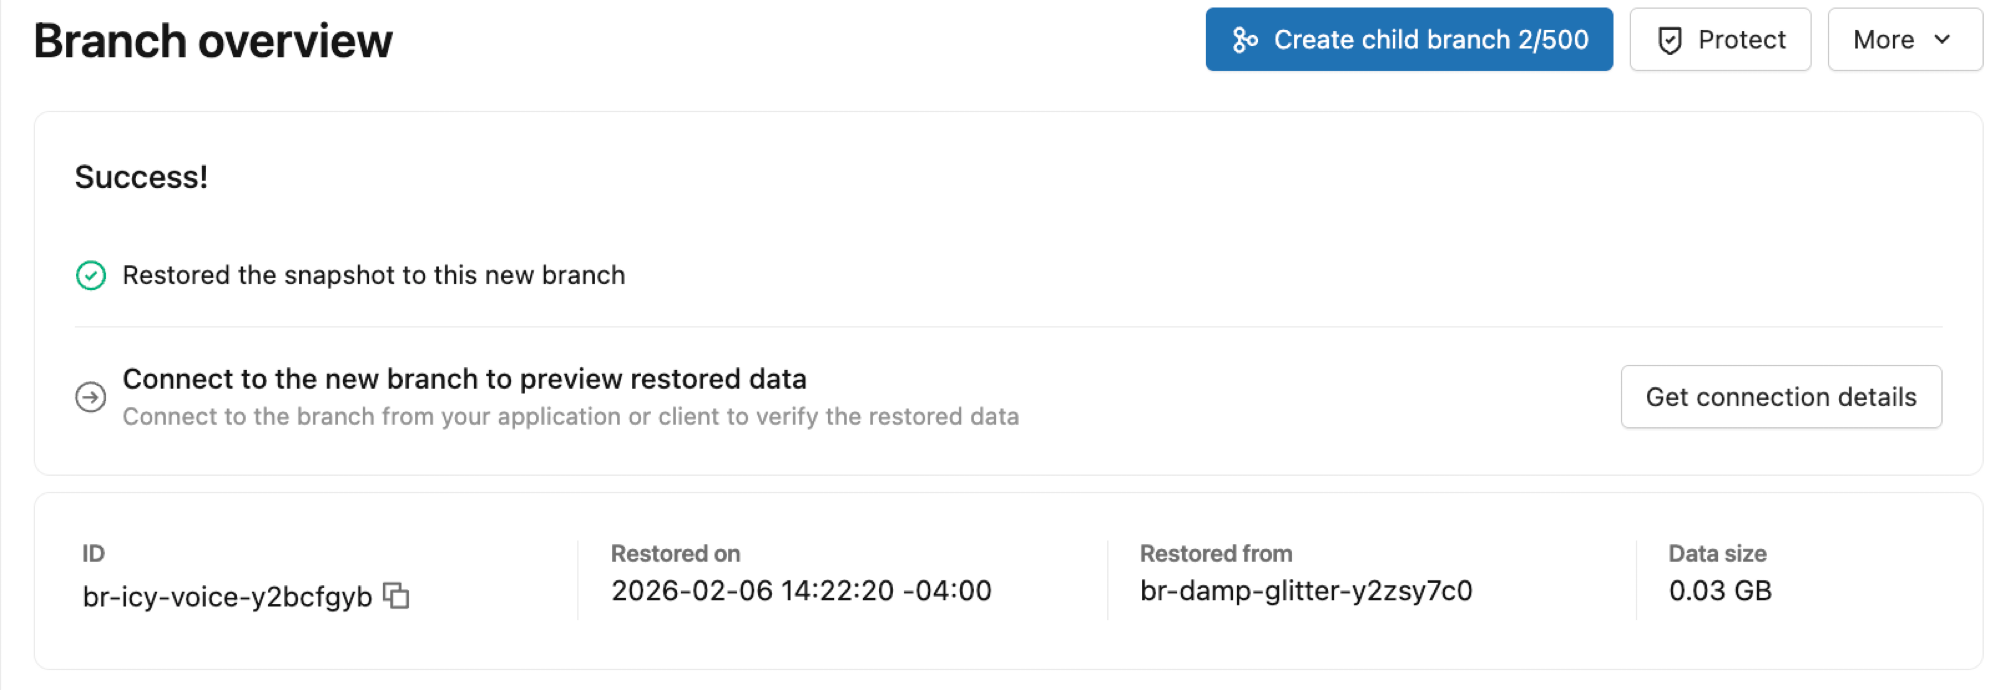
Click Get connection details to open a dialog with the new branch's connection information: branch, compute, database, role, and a connection string you can copy. The branch's compute may show as "Pending" while it starts. Once it is active, you can use the connection string to connect.
Other things you can do with your new branch:
- Preview the data. Use the new branch's connection details to check the data and confirm the restore before changing your application configuration. See Connect to your database.
- Rename the branch. Give the branch a clearer name from the branch overview or branches list. See Update branch settings.
- Set as default. If you are satisfied with the restored data, you can make this branch the project's default branch. See Set as default.
- Point your application to the new branch. Once you are sure the data is correct, update your application's connection settings to use this branch's connection details.
- Remove or keep the previous branch. You can delete the branch you were using before if you no longer need it, or keep it as a backup. See Delete a branch.
You can manage the new branch and all project branches from the project's Branches page, where the restored branch appears as a root branch alongside your other branches.
Snapshot storage costs
Starting June 1, 2026, snapshot storage is billable for Lakebase Autoscaling.
Billing is based on the type of snapshot:
- Manual snapshots are charged as full snapshots.
- Scheduled snapshots are charged as full snapshots for the first snapshot in a schedule, then as incremental (delta) storage for subsequent scheduled snapshots.
The size of each snapshot is shown on the Backup & Restore page. For pricing details, see the Lakebase pricing page.