Create and edit prompts
This feature is in Beta. Workspace admins can control access to this feature from the Previews page. See Manage Databricks previews.
This page shows you how to create new prompts and manage their versions in the MLflow Prompt Registry using the MLflow Python SDK. It includes instructions for using the MLflow Python SDK and the Databricks MLflow UI. All of the code on this page is included in the example notebook.
Prerequisites
-
Install MLflow and required packages
Bashpip install --upgrade "mlflow[databricks]>=3.1.0" openai -
Create an MLflow experiment by following the set up your environment quickstart.
-
Create or identify a Unity Catalog schema for storing prompts. You must have the
CREATE FUNCTION,EXECUTE, andMANAGEprivileges on the Unity Catalog schema.
A Unity Catalog schema with CREATE FUNCTION, EXECUTE, and MANAGE permissions is required in order to view or create prompts. If you are using a Databricks trial account, you have the required permissions on the Unity Catalog schema main.default.
Step 1. Create a new prompt
You can create prompts in the Databricks MLflow UI, or programmatically using the MLflow Python SDK.
Use the Databricks MLflow UI
To create a prompt in the UI:
-
Navigate to your MLflow experiment.
-
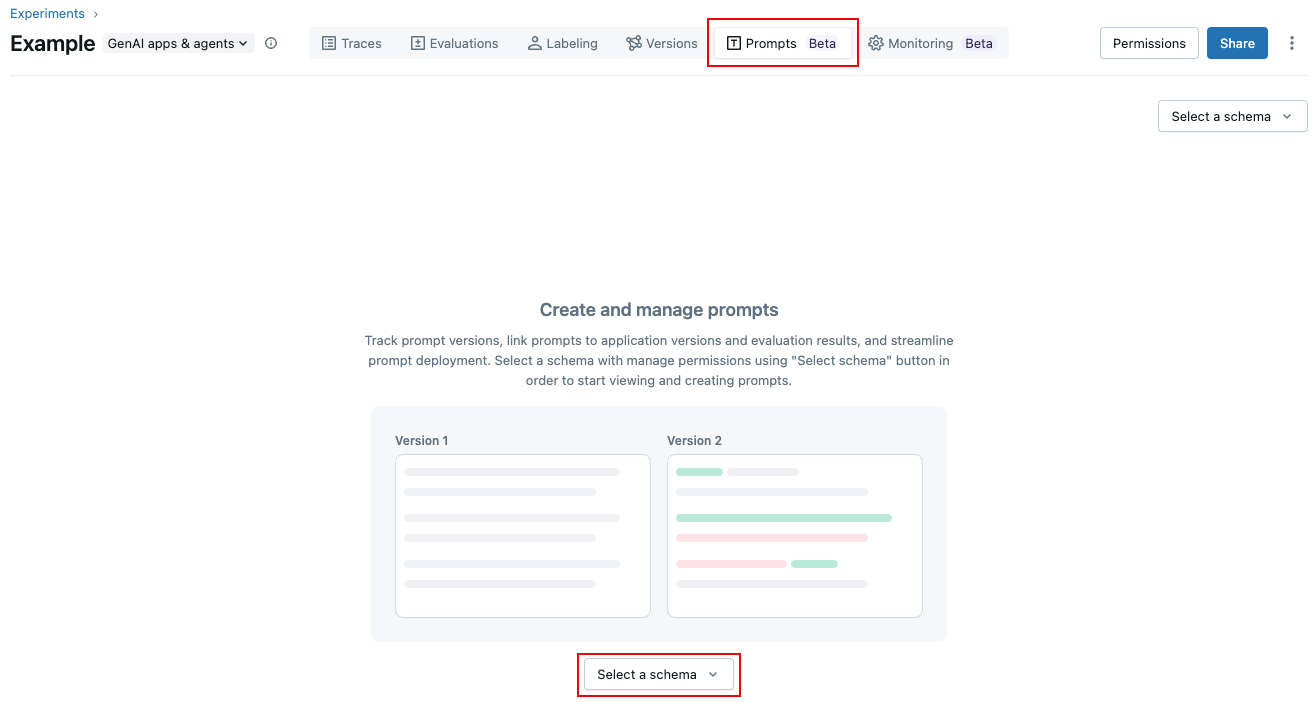
Click the Prompts tab.
-
Click Select a schema and click the catalog and schema where you want to store the prompt.
-
Click Confirm.
-
Click
 .
. -
Enter a name for the prompt, and click Create.
-
Click Create new version.
-
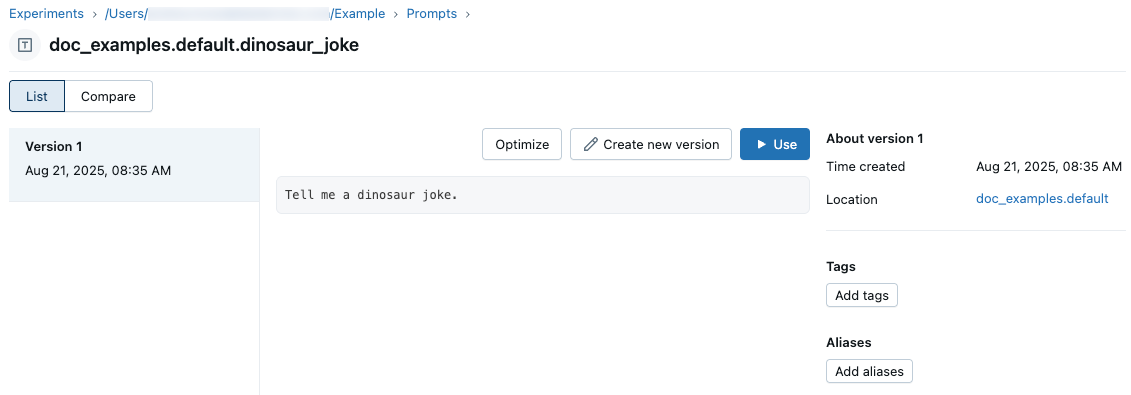
Type your prompt and click Save. You can use variables in the prompt text by using
{{variable_name}}syntax.
The prompt appears in the UI:
Use the Python SDK
-
Link your MLflow experiment to a default Prompt Registry location by setting an experiment tag using
mlflow.set_experiment_tags. This lets SDKs and tools infer your Unity Catalog prompt schema automatically.Use the
mlflow.promptRegistryLocationtag with the valuecatalog.schema:Pythonimport mlflow
# Link the current MLflow experiment to a UC schema for prompts
mlflow.set_experiment_tags({
"mlflow.promptRegistryLocation": "main.default"
}) -
Create prompts using
mlflow.genai.register_prompt(). Prompts use double-brace syntax ({{variable}}) for template variables.
# Replace with a Unity Catalog schema where you have CREATE FUNCTION, EXECUTE, and MANAGE privileges
uc_schema = "main.default"
# This table is created in the UC schema specified in the previous line
prompt_name = "summarization_prompt"

# Define the prompt template with variables
initial_template = """\
Summarize content you are provided with in {{num_sentences}} sentences.

Content: {{content}}
"""

# Register a new prompt
prompt = mlflow.genai.register_prompt(
    name=f"{uc_schema}.{prompt_name}",
    template=initial_template,
    # all following parameters are optional
    commit_message="Initial version of summarization prompt",
    tags={
        "author": "data-science-team@company.com",
        "use_case": "document_summarization",
        "task": "summarization",
        "language": "en",
        "model_compatibility": "gpt-4"
    }
)

print(f"Created prompt '{prompt.name}' (version {prompt.version})")
Step 2: Use the prompt in your application
The following steps create a simple application that uses your prompt template using the Python SDK.
Load the prompt from the registry
# Load a specific version using URI syntax
prompt = mlflow.genai.load_prompt(name_or_uri=f"prompts:/{uc_schema}.{prompt_name}/1")

# Alternative syntax without URI
prompt = mlflow.genai.load_prompt(name_or_uri=f"{uc_schema}.{prompt_name}", version="1")
Use the prompt in your application
-
Initialize an OpenAI client to connect to either Databricks-hosted LLMs or LLMs hosted by OpenAI.
- Databricks-hosted LLMs
- OpenAI-hosted LLMs
Use MLflow to get an OpenAI client that connects to Databricks-hosted LLMs. Select a model from the available foundation models.
Pythonimport mlflow
from databricks.sdk import WorkspaceClient
# Enable MLflow's autologging to instrument your application with Tracing
mlflow.openai.autolog()
# Set up MLflow tracking to Databricks
mlflow.set_tracking_uri("databricks")
mlflow.set_experiment("/Shared/docs-demo")
# Create an OpenAI client that is connected to Databricks-hosted LLMs
w = WorkspaceClient()
client = w.serving_endpoints.get_open_ai_client()
# Select an LLM
model_name = "databricks-claude-sonnet-4"Use the native OpenAI SDK to connect to OpenAI-hosted models. Select a model from the available OpenAI models.
Pythonimport mlflow
import os
import openai
# Ensure your OPENAI_API_KEY is set in your environment
# os.environ["OPENAI_API_KEY"] = "<YOUR_API_KEY>" # Uncomment and set if not globally configured
# Enable auto-tracing for OpenAI
mlflow.openai.autolog()
# Set up MLflow tracking to Databricks
mlflow.set_tracking_uri("databricks")
mlflow.set_experiment("/Shared/docs-demo")
# Create an OpenAI client connected to OpenAI SDKs
client = openai.OpenAI()
# Select an LLM
model_name = "gpt-4o-mini" -
Define your application:
Python# Use the trace decorator to capture the application's entry point
@mlflow.trace
def my_app(content: str, num_sentences: int):
# Format with variables
formatted_prompt = prompt.format(
content=content,
num_sentences=num_sentences
)
response = client.chat.completions.create(
model=model_name, # This example uses a Databricks hosted LLM. You can replace this with any AI Gateway or Model Serving endpoint, or with a valid OpenAI model like gpt-4o.
messages=[
{
"role": "system",
"content": "You are a helpful assistant.",
},
{
"role": "user",
"content": formatted_prompt,
},
],
)
return response.choices[0].message.content
result = my_app(content="This guide shows you how to integrate prompts from the MLflow Prompt Registry into your GenAI applications. You'll learn to load prompts, format them with dynamic data, and ensure complete lineage by linking prompt versions to your MLflow Models.", num_sentences=1)
print(result)
Step 3. Edit the prompt
Prompt versions are immutable after you create them. To edit a prompt, you must create a new version. This Git-like versioning maintains complete history and enables rollbacks.
Use the Databricks MLflow UI
To create a new version:
-
Navigate to the prompt you want to edit.
-
Click Create new version.
-
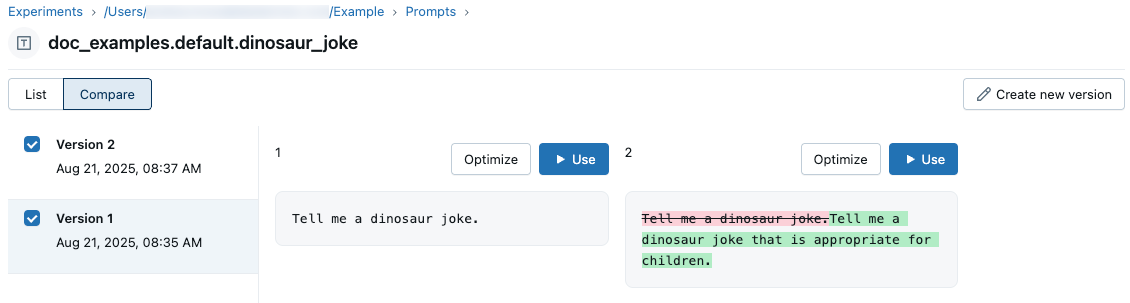
Type your prompt and click Save. The new prompt version appears in the UI.
To compare prompt versions, click Compare at the upper left and select the versions to compare.
Use the Python SDK
Create a new version by calling mlflow.genai.register_prompt() with an existing prompt name:
import mlflow

# Define the improved template
new_template = """\
You are an expert summarizer. Condense the following content into exactly {{ num_sentences }} clear and informative sentences that capture the key points.

Content: {{content}}

Your summary should:
- Contain exactly {{num_sentences}} sentences
- Include only the most important information
- Be written in a neutral, objective tone
- Maintain the same level of formality as the original text
"""

# Register a new version
updated_prompt = mlflow.genai.register_prompt(
    name=f"{uc_schema}.{prompt_name}",
    template=new_template,
    commit_message="Added detailed instructions for better output quality",
    tags={
        "author": "data-science-team@company.com",
        "improvement": "Added specific guidelines for summary quality"
    }
)

print(f"Created version {updated_prompt.version} of '{updated_prompt.name}'")
Step 4. Use the new prompt
The following code shows how to use the prompt.
# Load a specific version using URI syntax
prompt = mlflow.genai.load_prompt(name_or_uri=f"prompts:/{uc_schema}.{prompt_name}/2")

# Or load from specific version
prompt = mlflow.genai.load_prompt(name_or_uri=f"{uc_schema}.{prompt_name}", version="2")
Step 5. Search and discover prompts
To find prompts in your Unity Catalog schema:
# REQUIRED format for Unity Catalog - specify catalog and schema
results = mlflow.genai.search_prompts("catalog = 'main' AND schema = 'default'")

# Using variables for your schema
catalog_name = uc_schema.split('.')[0]  # 'main'
schema_name = uc_schema.split('.')[1]   # 'default'
results = mlflow.genai.search_prompts(f"catalog = '{catalog_name}' AND schema = '{schema_name}'")

# Limit results
results = mlflow.genai.search_prompts(
    filter_string=f"catalog = '{catalog_name}' AND schema = '{schema_name}'",
    max_results=50
)
Example notebook
Create and edit prompts example notebook
Next steps
- Evaluate prompt versions - Compare different prompt versions to identify the best performer.
- Track prompts with app versions - Link prompt versions to your application versions.
- Use prompts in deployed apps - Deploy prompts to production with aliases.