Create and manage schemas (databases)

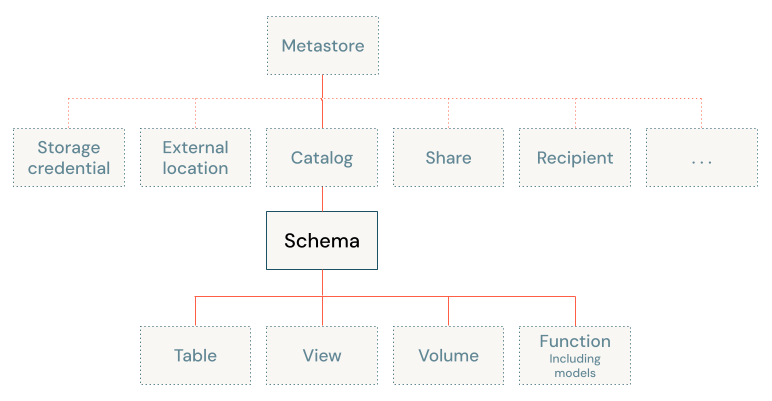
This article shows how to create and manage schemas (databases) in Unity Catalog. A schema contains tables, views, volumes, models, and functions. You create schemas inside catalogs.

Requirements

  • You must have a Unity Catalog metastore linked to the workspace where you perform the schema creation.

  • You must have the USE CATALOG and CREATE SCHEMA data permissions on the schema’s parent catalog. Either a metastore admin or the owner of the catalog can grant you these privileges. If you are a metastore admin, you can grant these privileges to yourself.

  • The cluster that you use to run a notebook to create a schema must use a Unity Catalog-compliant access mode. See Access modes.

    SQL warehouses always support Unity Catalog.

Create a schema

To create a schema, you can use Catalog Explorer or SQL commands.

  1. Log in to a workspace that is linked to the metastore.

  2. Click Catalog icon Catalog.

  3. In the Catalog pane on the left, click the catalog you want to create the schema in.

  4. In the detail pane, click Create schema.

  5. Give the schema a name and add any comment that would help users understand the purpose of the schema.

  6. (Optional) Specify a managed storage location. Requires the CREATE MANAGED STORAGE privilege on the target external location. See Specify a managed storage location in Unity Catalog.

  7. Click Create.

  8. Assign permissions for your catalog. See Unity Catalog privileges and securable objects.

  9. Click Save.

  1. Run the following SQL commands in a notebook or Databricks SQL editor. Items in brackets are optional. You can use either SCHEMA or DATABASE. Replace the placeholder values:

    • <catalog-name>: The name of the parent catalog for the schema.

    • <schema-name>: A name for the schema.

    • <location-path>: Optional. Requires additional privileges. See Specify a managed storage location in Unity Catalog.

    • <comment>: Optional description or other comment.

    • <property-key> = <property-value> [ , ... ]: Optional. Spark SQL properties and values to set for the schema.

    For parameter descriptions, see CREATE SCHEMA.

    USE CATALOG <catalog>;
    CREATE { DATABASE | SCHEMA } [ IF NOT EXISTS ] <schema-name>
        [ MANAGED LOCATION '<location-path>' ]
        [ COMMENT <comment> ]
        [ WITH DBPROPERTIES ( <property-key = property_value [ , ... ]> ) ];
    

    You can optionally omit the USE CATALOG statement and replace <schema-name> with <catalog-name>.<schema-name>.

  2. Assign privileges to the schema. See Unity Catalog privileges and securable objects.

You can also create a schema by using the Databricks Terraform provider and databricks_schema. You can retrieve a list of schema IDs by using databricks_schemas

Delete a schema

To delete (or drop) a schema, you can use Catalog Explorer or a SQL command. To drop a schema you must be its owner.

You must delete all tables in the schema before you can delete it.

  1. Log in to a workspace that is linked to the metastore.

  2. Click Catalog icon Catalog.

  3. In the Catalog pane, on the left, click the schema that you want to delete.

  4. In the detail pane, click the three-dot menu in the upper right corner and select Delete.

  5. On the Delete schema dialog, click Delete.

Run the following SQL command in a notebook or Databricks SQL editor. Items in brackets are optional. Replace the placeholder <schema-name>.

For parameter descriptions, see DROP SCHEMA.

If you use DROP SCHEMA without the CASCADE option, you must delete all tables in the schema before you can delete it.

DROP SCHEMA [ IF EXISTS ] <schema-name> [ RESTRICT | CASCADE ]

For example, to delete a schema named inventory_schema and its tables:

DROP SCHEMA inventory_schema CASCADE

Next steps

Now you can add tables or volumes to your schema. See Create tables in Unity Catalog and Create and work with volumes.