Create clean rooms
This page describes how to create a Databricks clean room using the UI. A clean room is a secure environment for collaborative data analysis.
Key features and limitations:
- Secure collaboration: Clean rooms enable multiple parties to work together on sensitive enterprise data without direct access to each other's raw data.
- Collaborator capacity: A clean room can have ten parties, including the creator and up to nine other collaborators.
- Metastore limit: Databricks enforces resource quotas on all clean room securable objects. See Resource limits.
To use the REST API, see Create a clean room.
Before you begin
The privileges needed to use clean rooms vary depending on the task:
Task | Required privileges |
|---|---|
View a clean room | Must be the owner of the clean room, or have one of the following privileges on the clean room: |
Update the owner of a clean room | Must be the owner of the clean room, or have the |
Add or remove data assets in a clean room | Must be the owner of the clean room or have the |
Add or remove notebooks in a clean room | For the notebook's uploader:
|
Update a comment in a clean room | Must be the owner of the clean room or have the |
Grant access to a clean room | Must be the owner, or have the |
Delete a clean room | Must be the owner or have the |
Beyond the task-specific privileges, when a clean room is shared, the email address attached to the sharing identifier automatically becomes the owner in your collaborator's organization. See Step 1. Request the collaborator's sharing identifier.
To learn about permission requirements for updating clean rooms and running tasks (notebooks) in clean rooms, see Manage clean rooms and Run notebooks in clean rooms.
The central clean room can have a maximum of two other non-AWS regions among its collaborators.
Step 1. Request the collaborator's sharing identifier
Before you can create a clean room, you must have the Clean Room sharing identifier of the organizations you will be collaborating with. The sharing identifier is a string that consists of the organization's global metastore ID + workspace ID + the contact's username (email address). Your collaborators can be in any cloud or region.
Reach out to your collaborators to request their sharing identifier. They can get the sharing identifier using the instructions in Find your sharing identifier.
Step 2. Create a clean room
To create a clean room, you must use Catalog Explorer.
-
In your Databricks workspace, click
 Catalog.
 -
Click the Clean Rooms > button.
-
Click Create Clean Room.
-
On the Create Clean Room page, enter a user-friendly name for the clean room.
The name cannot use spaces, periods, or forward slashes (/).
Once it's saved, the clean room name cannot be changed. Use a name that potential collaborators will find useful and descriptive.
-
Select the cloud provider and region where the central clean room will be created.
The cloud provider must match your current workspace, but the region can be different. Consider your organization's data residency or other policies when you make your selection.
-
Each clean room can have up to ten collaborators. Enter the Clean Room sharing identifier for each collaborator. See Step 1. Request the collaborator's sharing identifier.

You can test your clean room before full deployment by using either your sharing identifier or the identifier of another user in your current metastore. Doing so creates two clean rooms in your current metastore. For example, if you create a clean room titled
test_clean_room, a second clean room namedtest_clean_room_collaboratoralso appears. Running notebooks with a collaborator in the same metastore functions the same as with an external collaborator. See Run notebooks in clean rooms. -
Make a note of the catalog names assigned to you and your collaborators.
All data assets added to the clean room will appear under that catalog in the central clean room, and can be referenced using that catalog in the Unity Catalog three-level namespace (
<catalog>.<schema>.<table-etc>). -
Select the network access policy type. This cannot be changed after the clean room is created.
- Full Access: Unrestricted outbound internet access.
- Restricted Access: This limits outbound access to internet destinations that you specify. See Network policy overview and Manage network policies for serverless egress control.
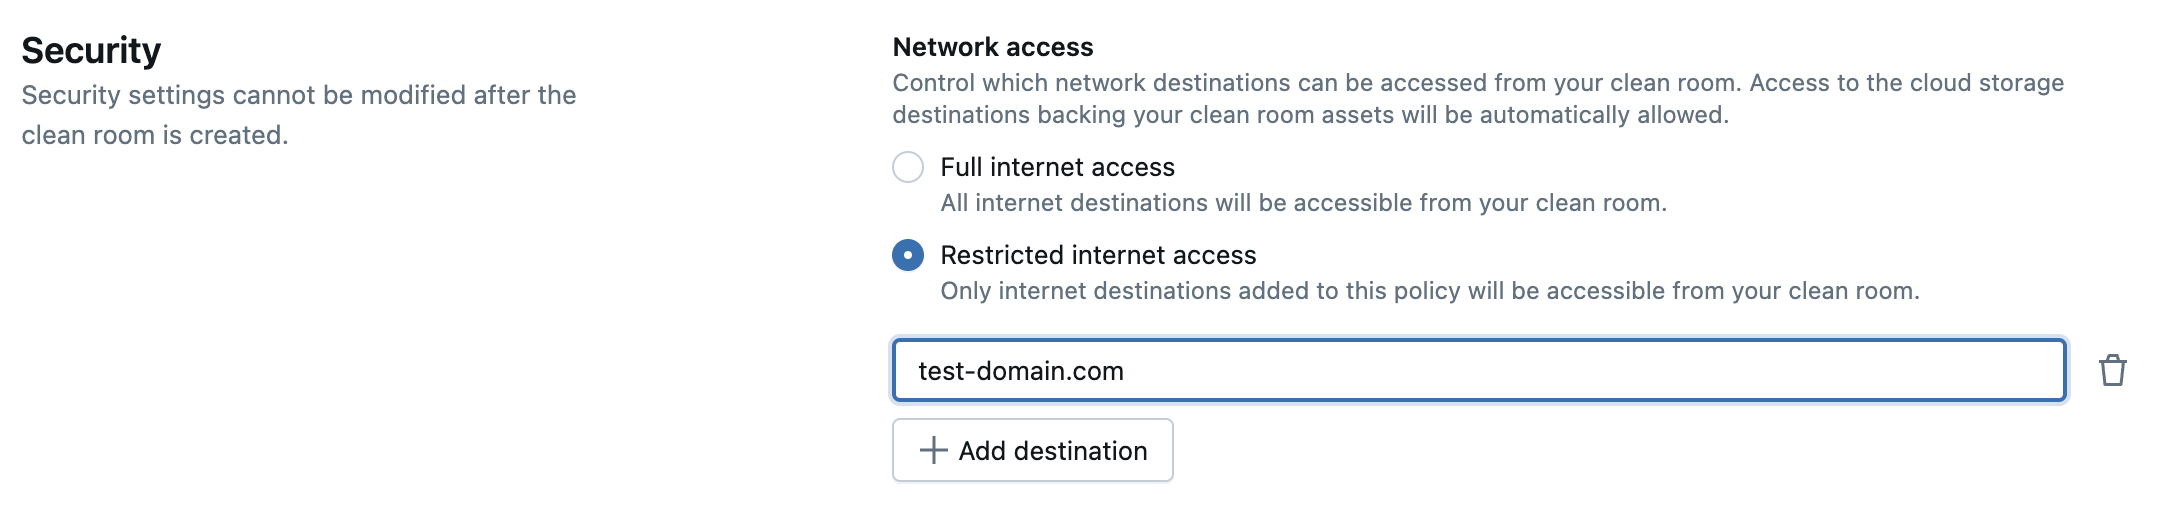
Restricted access can delay asset availability for up to ten minutes.
After you create the clean room, you can view the network access policy in the Security tab.
- Click Create Clean Room.
If your current workspace is set to the HIPAA compliance security profile, then when you create a clean room, that setting is applied to the central clean room. Collaborators must access the clean room from a workspace with the same security profile. See Compliance security profile.
When creating a clean room, its security profile is inherited from your current workspace settings. This applies if your workspace is configured for HIPAA or FedRAMP Moderate compliance. FedRAMP Moderate is supported only when the clean room region is set to us-west-2 or us-east-1. All collaborators must access the clean room from a workspace configured with the identical security profile to ensure consistent compliance.
Step 3. Add data assets and notebooks to the clean room
Both the creator and the collaborators can add tables, volumes, views, and notebooks to the clean room.
The following instructions assume you are returning to an already-created clean room to add assets. If you just created a clean room for the first time, a wizard walks you through adding data assets and notebooks. The actual UI for adding these assets is the same, regardless of whether you are guided by the wizard or not.
To add notebooks:
-
Click the + Add notebooks button and browse for the notebook you want to add.
-
Name the notebook.
-
Select which collaborator can run the notebook. Select You to run the notebook yourself.
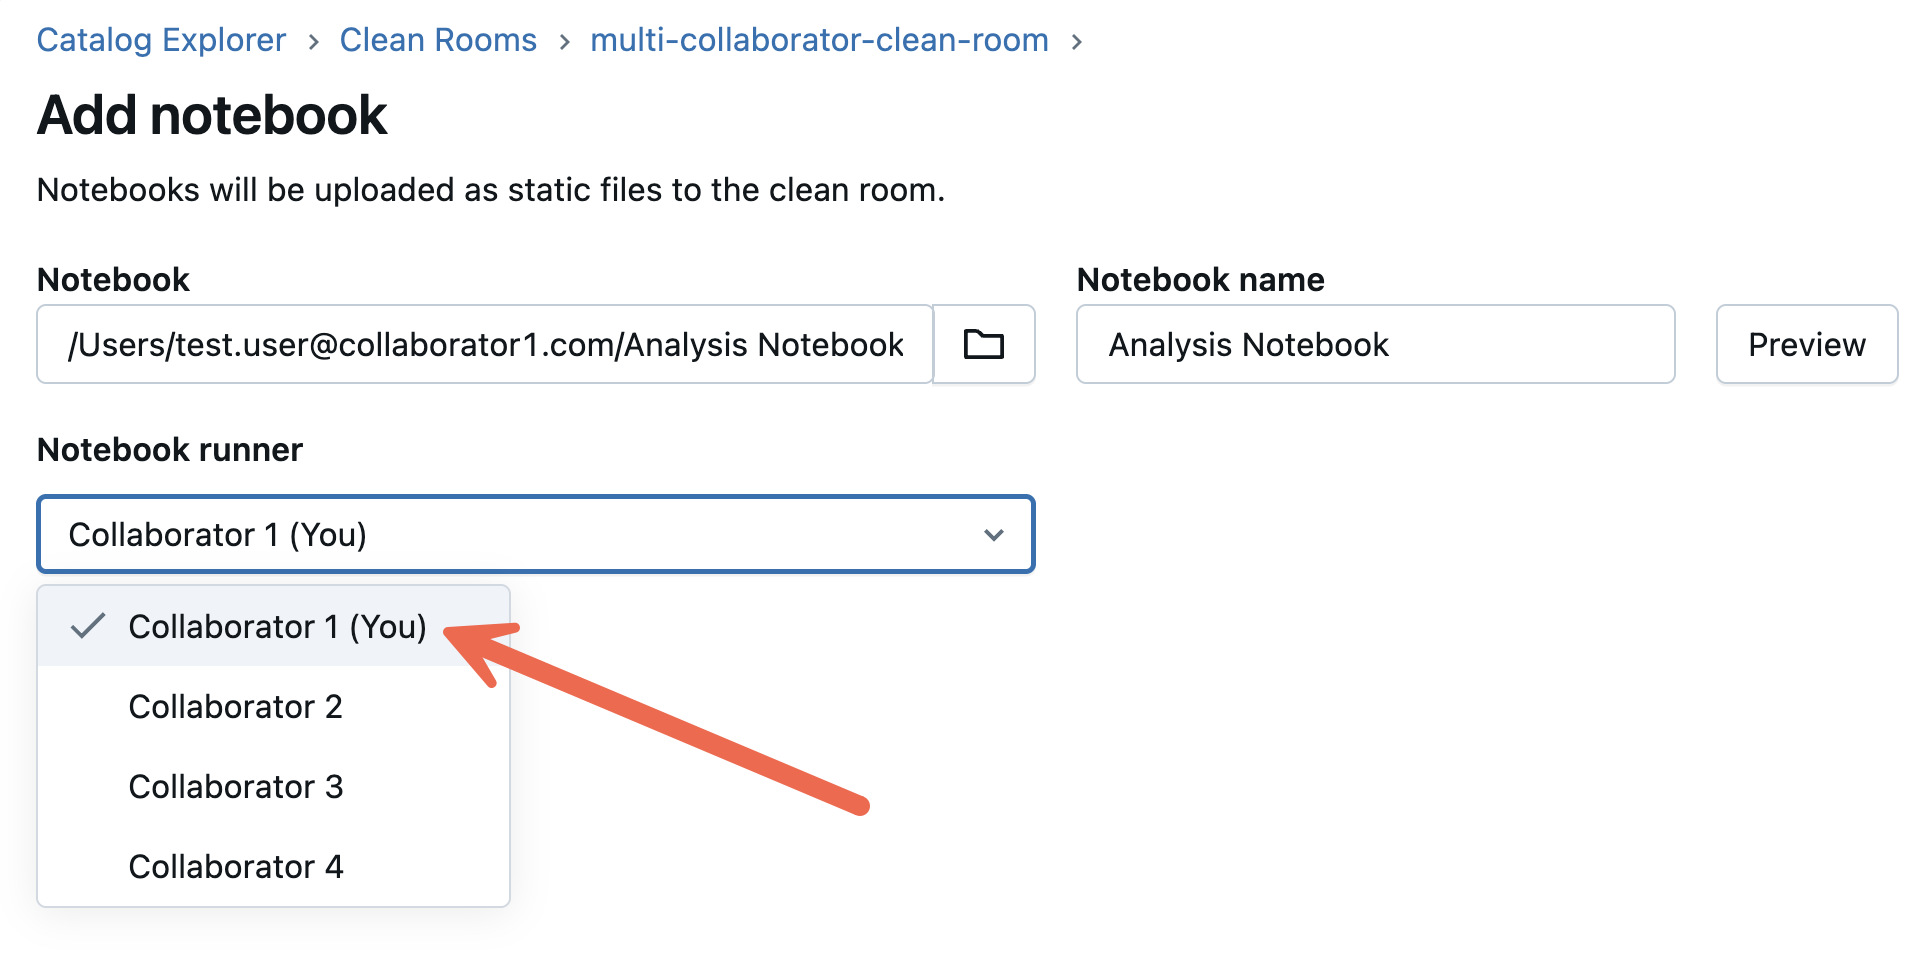
You can optionally give the notebook an alternative Notebook name.
Notebooks that you share in clean rooms query data and run data analysis workloads on the tables, views, and volumes that you and any other collaborators have added to the clean room.
If you share a notebook that includes results, those results are shared with your collaborators.
You can use a notebook to create output tables that are temporarily shared to your collaborator's metastore when they run the notebook. See Create and work with output tables in Databricks Clean Rooms.
To use a test dataset, download our sample notebook.
importantAny notebook references to tables, views, or volumes that were added to the clean room must use the catalog name assigned when the clean room was created (“creator” for data assets added by the clean room creator, and “collaborator” for data assets added by the invited collaborator). For example, a table added by the creator could be named
creator.sales.california.Likewise, verify that the notebook uses any aliases assigned to data assets that were added to the clean room.
To add assets:
-
In your Databricks workspace, click
Catalog. -
Click the Clean Rooms > button.
-
Find and click the name of the clean room you want to update.
-
Click + Add data assets to add tables, volumes, or views.
-
Select the data assets you want to share and click Add data assets.
When you share a table, volume, or view, you can optionally add an alias. The alias name is the only name visible in the clean room.
When you share a table, you can optionally add partition clauses that enable you to share only part of the table. For details about how to use partitions to limit what you share, see Specify table partitions to share.
noteIf you're using default storage, you can't share table partitions. See Default storage in Databricks.
Federated table sharing is in Beta. See Add foreign schemas or tables to a share.