Get started with Unity Catalog
Unity Catalog is the unified governance layer for data and AI in Databricks. It provides centralized access control, lineage, auditing, and data discovery across your workspaces. See What is Unity Catalog?.
Unity Catalog is automatically enabled for all Databricks workspaces created after November 8, 2023. If your workspace already has Unity Catalog enabled, follow the setup tutorial. If your workspace predates Unity Catalog or was not enabled at creation, follow the upgrade guide.
-
- Unity Catalog setup guide
- For workspaces with Unity Catalog already enabled. Configure admin roles, users, compute, permissions, and catalogs.
-
- Upgrade to Unity Catalog
- For existing workspaces not yet on Unity Catalog. Enable Unity Catalog and migrate your data.
Extend your Unity Catalog setup
After your workspace is set up, you can apply more advanced governance capabilities to your data and AI workflows.
Attribute-based access control
Attribute-based access control (ABAC) lets you define dynamic, fine-grained access policies based on attributes of the data and the user accessing it. Instead of managing permissions table by table, you write policies that automatically enforce row-level filtering and column-level masking. For example, you can hide sensitive columns from users outside a specific region or mask PII for non-privileged roles.

Data classification
Data classification uses an AI agent to automatically scan your catalog and tag sensitive data such as PII, financial information, and credentials. After classification, tags can integrate directly with ABAC policies, allowing you to apply governance controls based on what the data actually contains rather than managing access object by object.

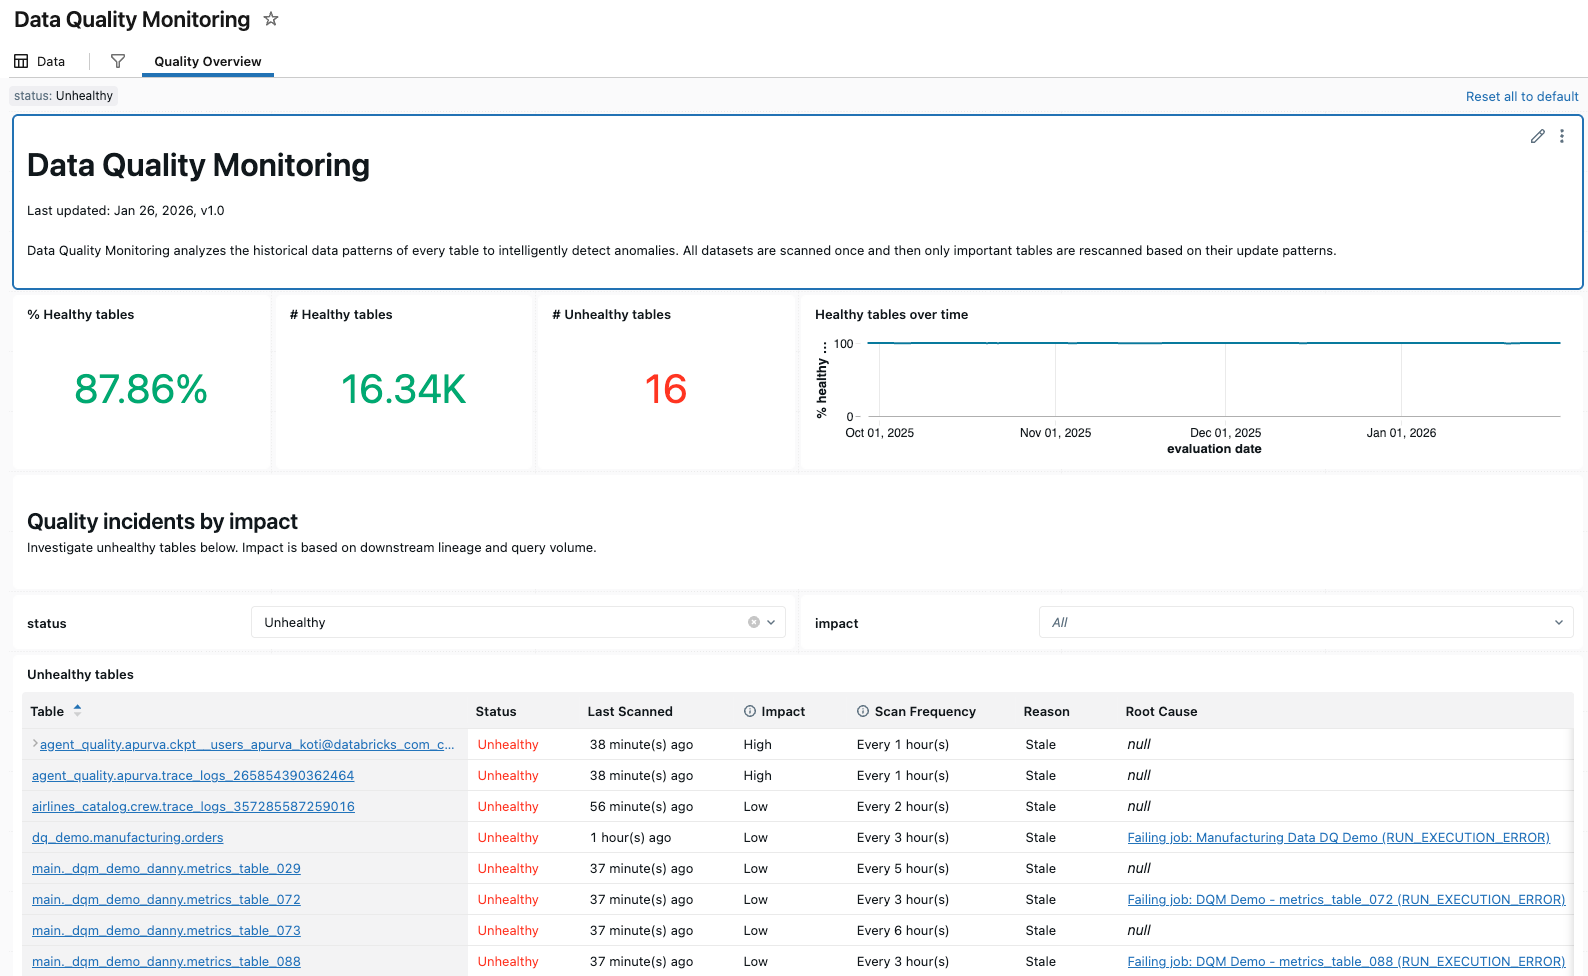
Data quality monitoring
Data quality monitoring provides anomaly detection across all tables in a schema and data profiling at the table level. Anomaly detection automatically monitors freshness and completeness using historical data patterns, surfacing issues without manual configuration. Data profiling captures statistical distributions over time, enabling you to track data integrity and set alerts for unexpected changes.
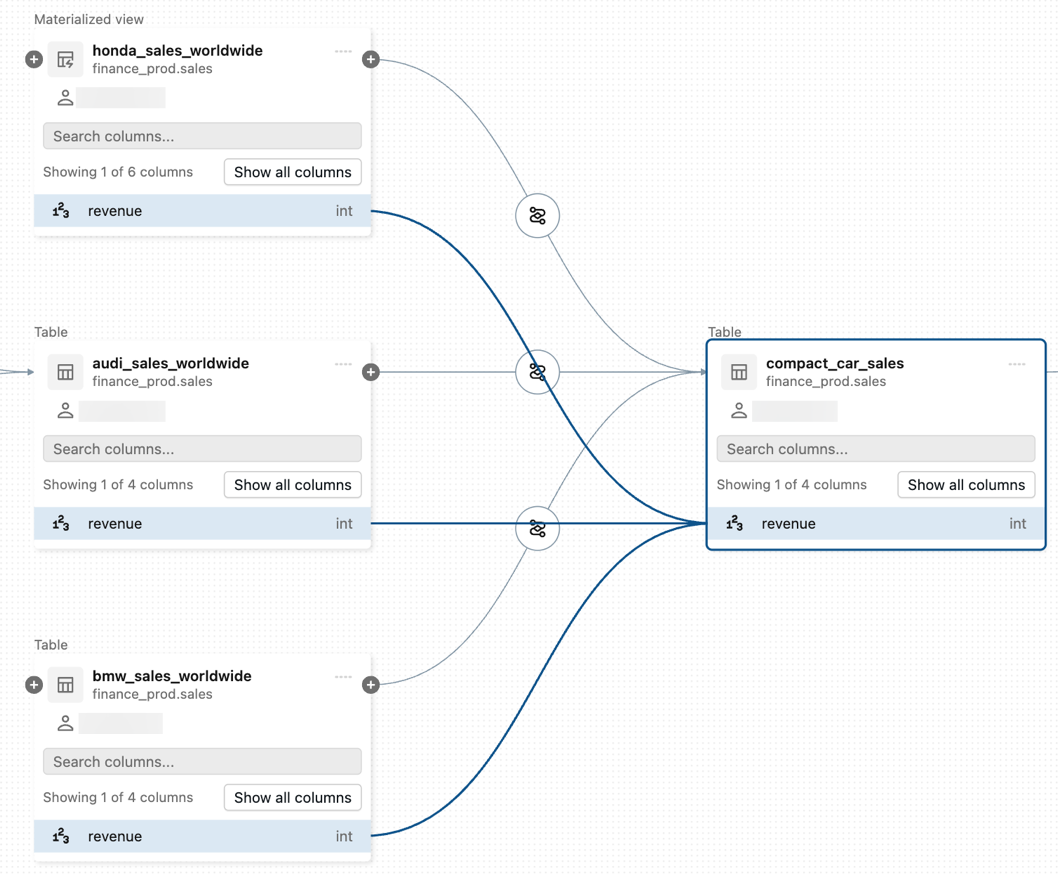
Data lineage
Data lineage automatically captures how data flows across tables, notebooks, jobs, and pipelines — down to the column level. You can trace the origin of any column, see what downstream assets depend on it, and understand the full impact of a schema change before making it.
AI governance with Unity AI Gateway
Unity AI Gateway extends Unity Catalog governance to AI. It provides enterprise governance for LLM endpoints, agents, and MCP servers, allowing you to implement access control, audit logging, and observability across all AI interactions in a unified UI.
For a complete overview of Unity Catalog capabilities, see What is Unity Catalog?. For governance best practices, see Unity Catalog best practices.