Configure Workday reports for ingestion
This page describes how to configure Workday reports for ingestion.
Get the Workday report URL
-
In Workday, navigate to the report.
-
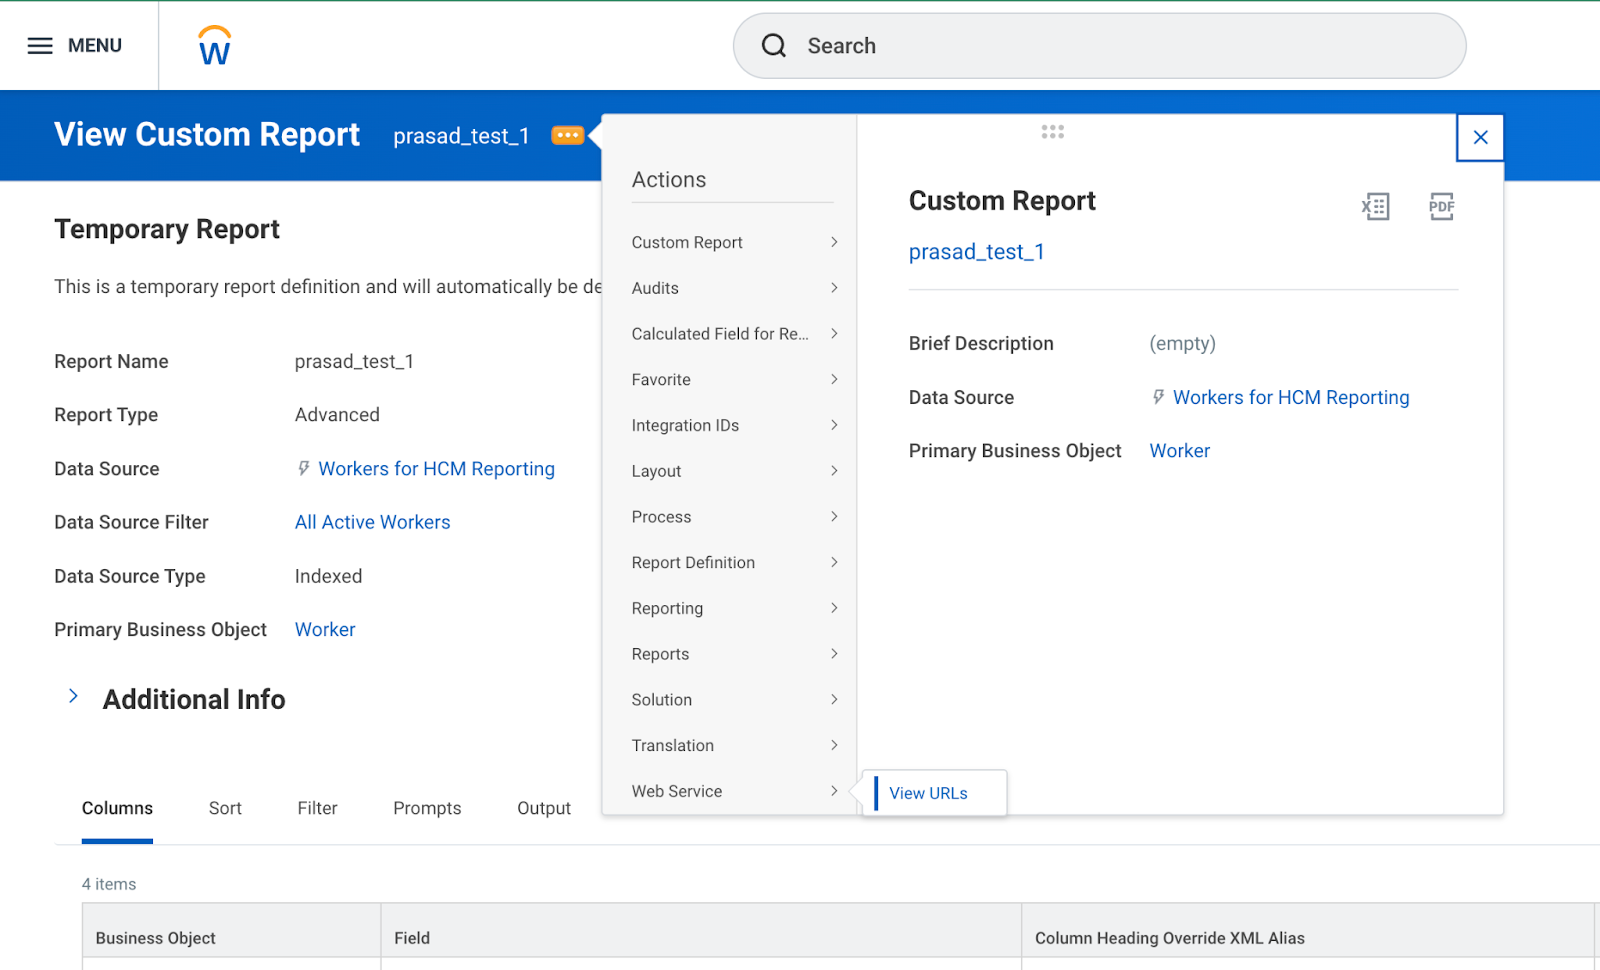
In the top blue bar, click the three dots next to the report name, then click Web Service > View URLs.
-
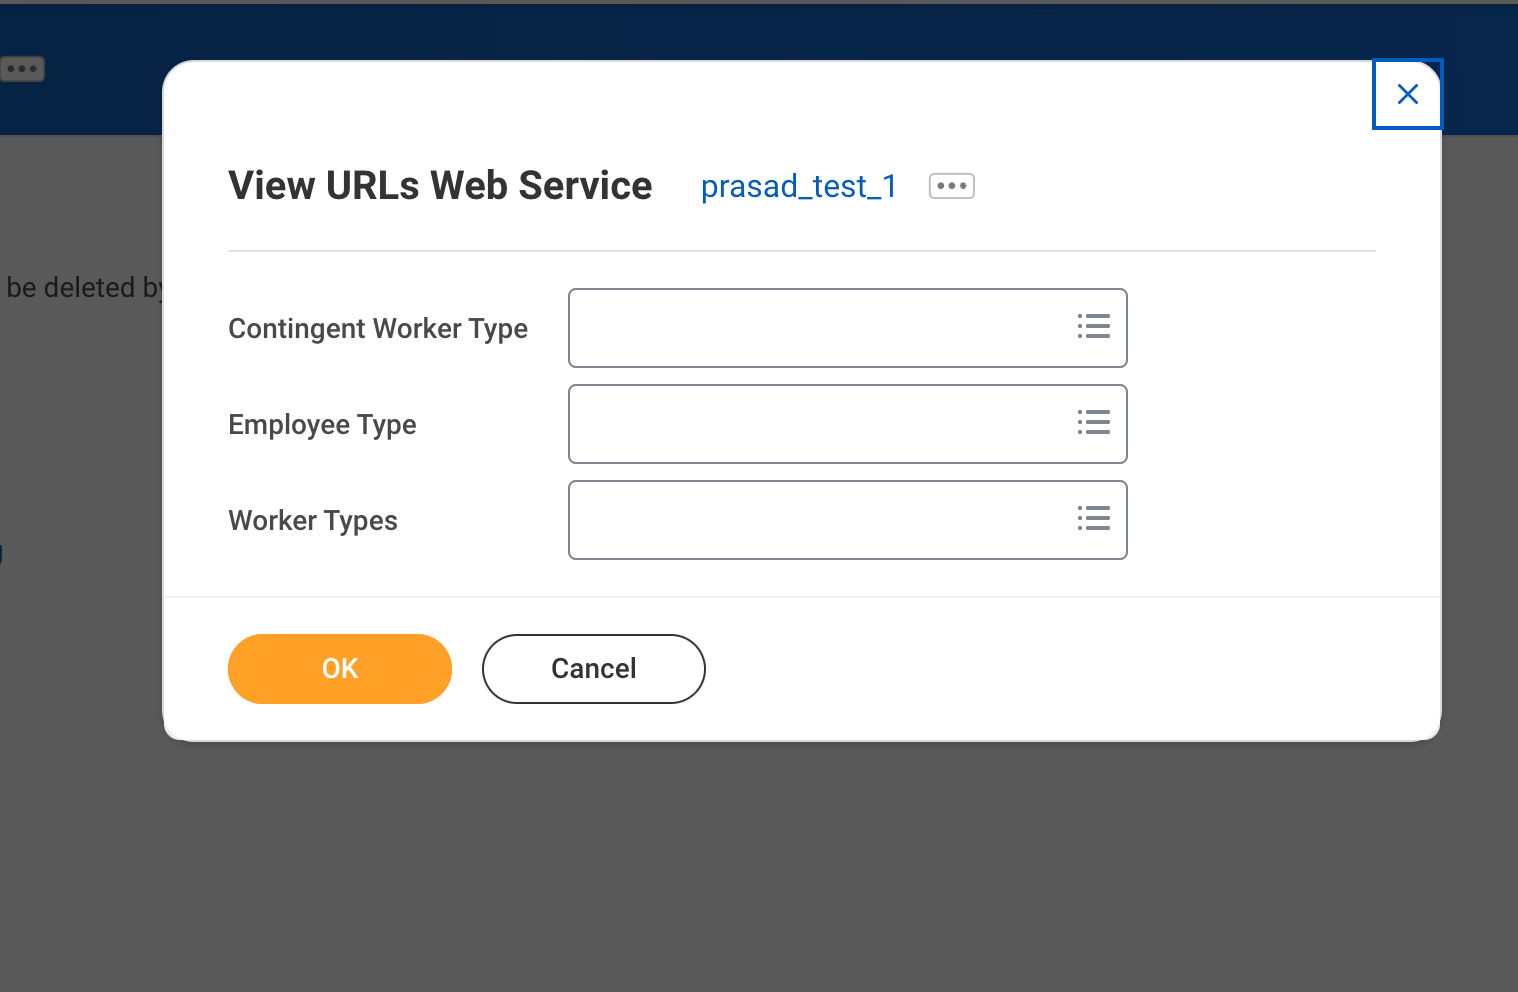
Optionally add any parameter (for example, prompt) values. Then click OK.
-
Next to the JSON section, click the three dots, then click Copy URL. This gives you the report URL. Ensure that you don't truncate
format=jsonat the end of the URL.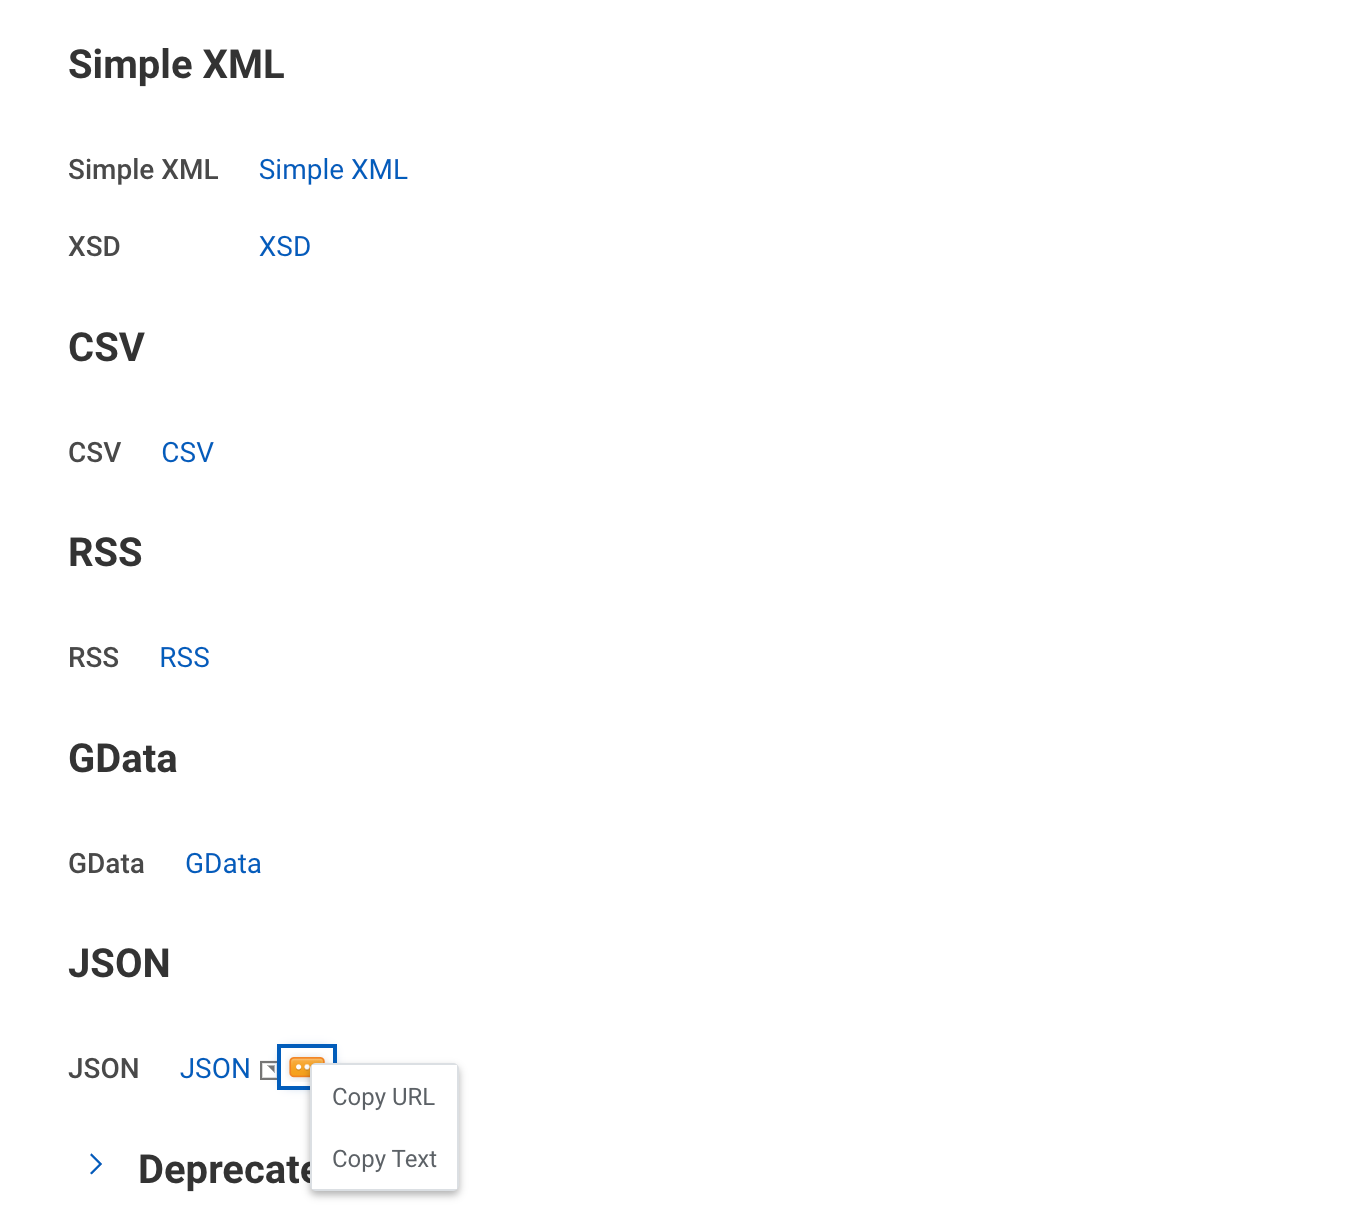
(Optional) Create an integrated system user (ISU) in Workday
- In the Workday search bar, type Create user.
- Click Create Integration System User : Task.
- Enter a username and password.
- Select the Do Not Allow UI Sessions checkbox. This user will only access the RaaS API.
(Optional) Create a security group and add the user to it
- In the Workday search bar, type Create Security Group.
- Click Create Security Group : Task.
- Set the type to Integration System Security Group (Unconstrained).
- Enter a name.
- Add the ISU user to the group: Type the prefix, press Enter, and pick the correct user. Then click OK.
Add domain security policies to the security group
- In the Workday search bar, type View Security Group.
- Click View Security Group : Report.
- In the View Security Group form, type the prefix of the previously created security group, select it, and then click OK.
- In the top blue bar, click the three dots next to the report name, then click Web Service > View URLs.
- Select Security Group > Maintain Domain Permission for the security group.
- Under Integration Permission, add the required domain security policies for
GETaccess. For each policy, type a differentiating prefix in the search bar, press Enter, and select the appropriate options. The exact policies that you need depend on the chosen report. Some useful policies to start with include:Worker Data: Current Staffing InformationWorker Data: Public Worker ReportsWorker Data: Active and Terminated WorkersWorker Data: All PositionsWorker Data: Business Title on Worker ProfilePerson Data: Work Contact InformationWorker Data: WorkersWorkday Accounts
- Click OK.
- Click Done.
- In the Workday search bar, type Activate Pending Security Policy Changes and select it. When the form appears, type a comment and click OK.
- Click Confirm and click OK.
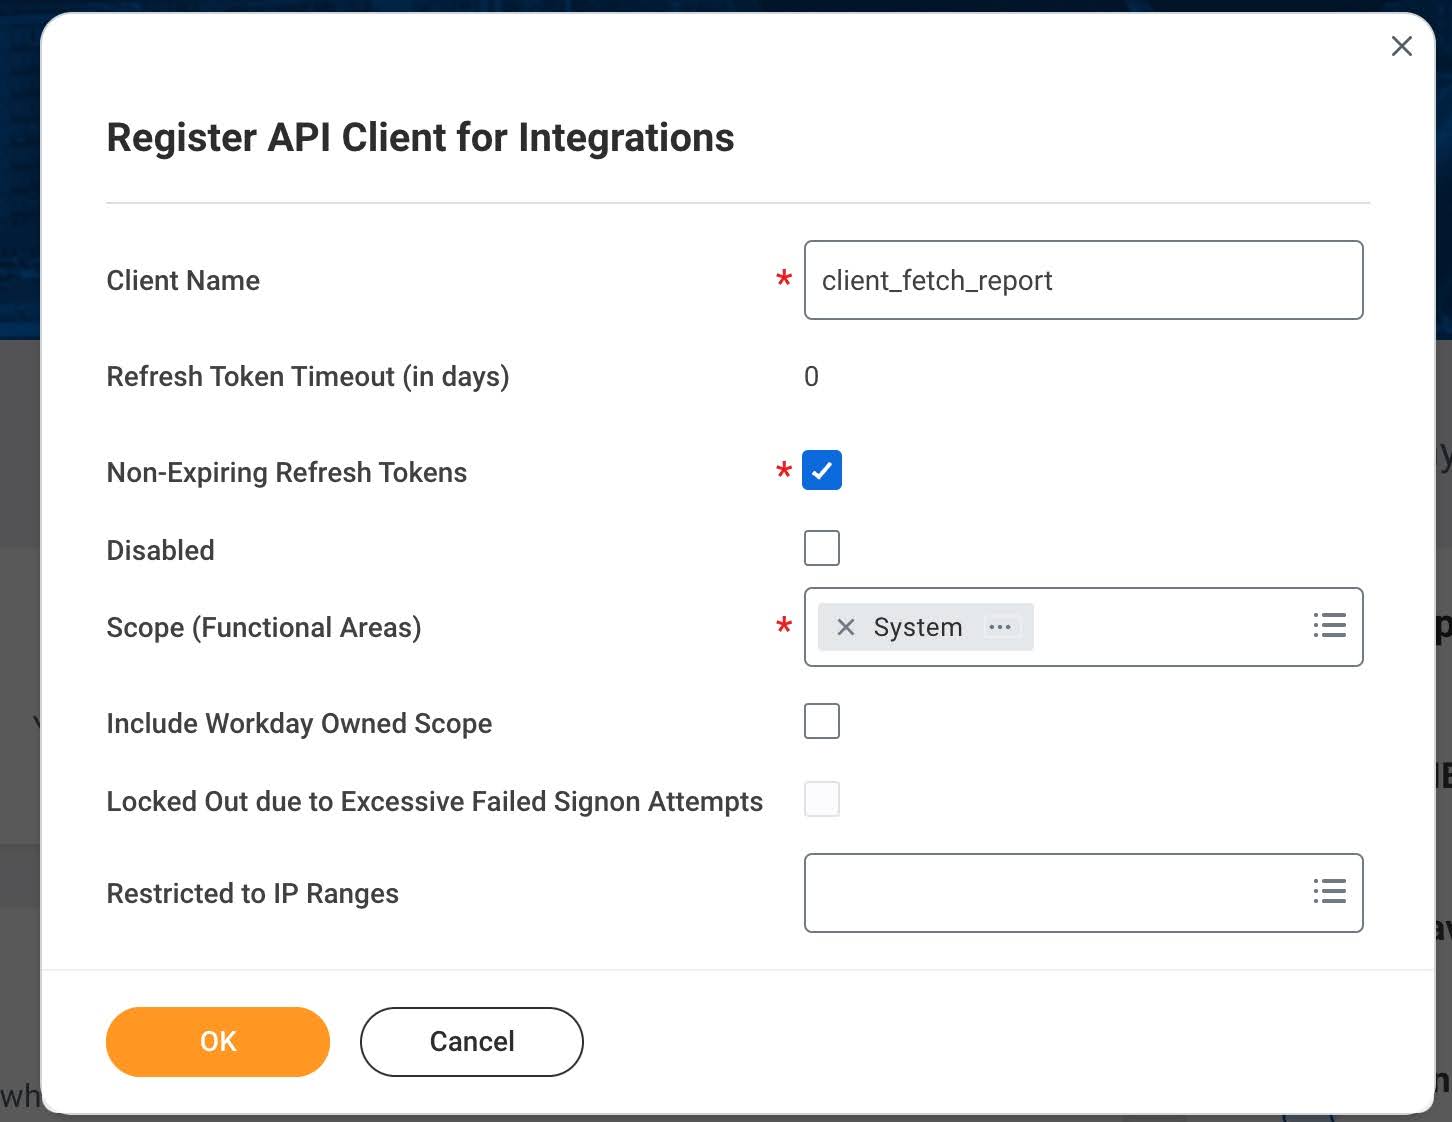
Create an API client, add functional scopes, and generate a refresh token for the ISU user
-
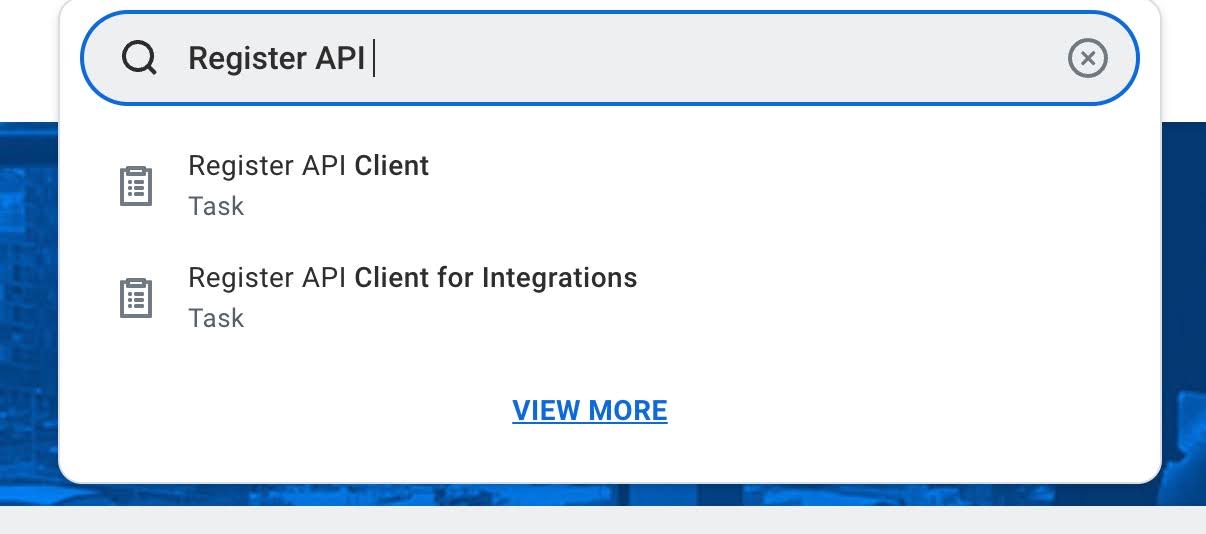
In the Workday search bar, type Register API Client.
-
Click Register API Client for Integrations : Task.
-
Enter a Client Name.
-
Click Non Expiring Refresh Token.
-
In the Scope search bar, type System and select it.
-
Click OK.
-
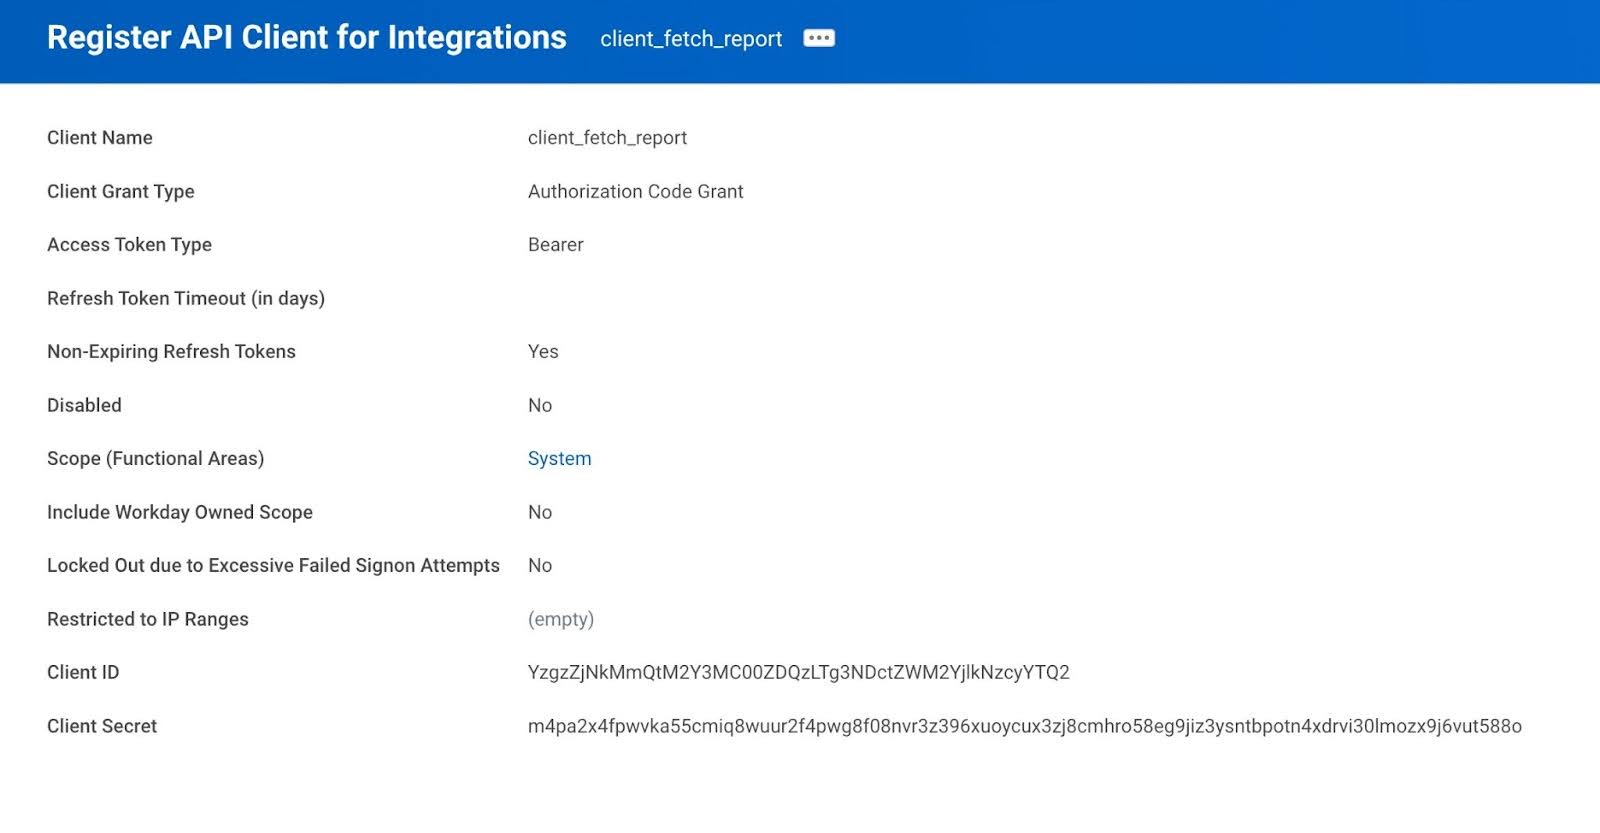
Copy the Client ID and Client Secret, then click Done.
-
In the View Integration System Security Group page, note the functional areas under Domain Security Policy Permissions.
Then, add these as Scopes/Functional Areas in the API Client:
a. In the search bar, type View API Client. a. Choose your API client from the list.
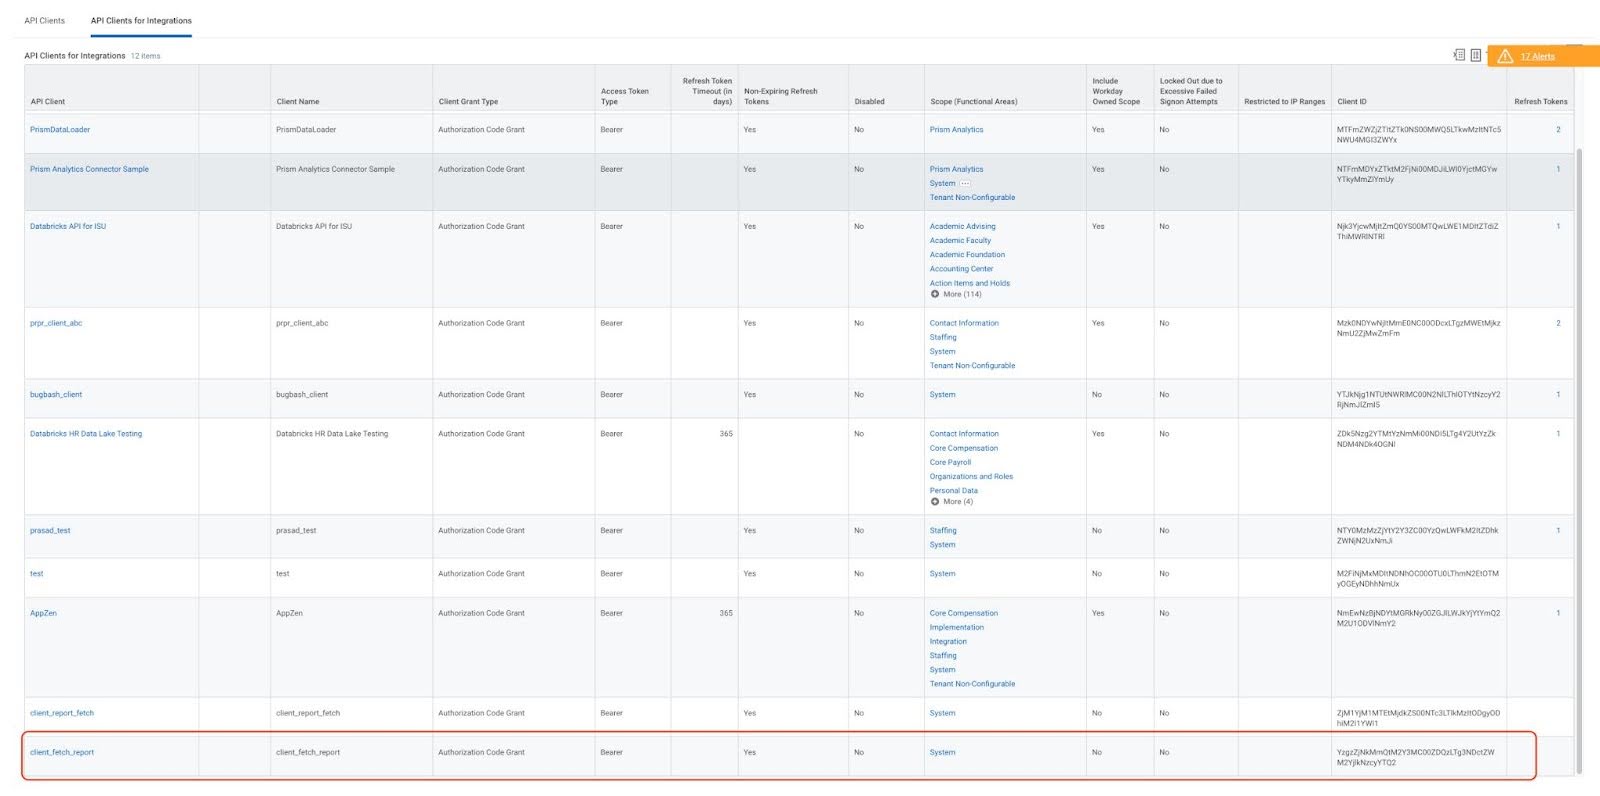
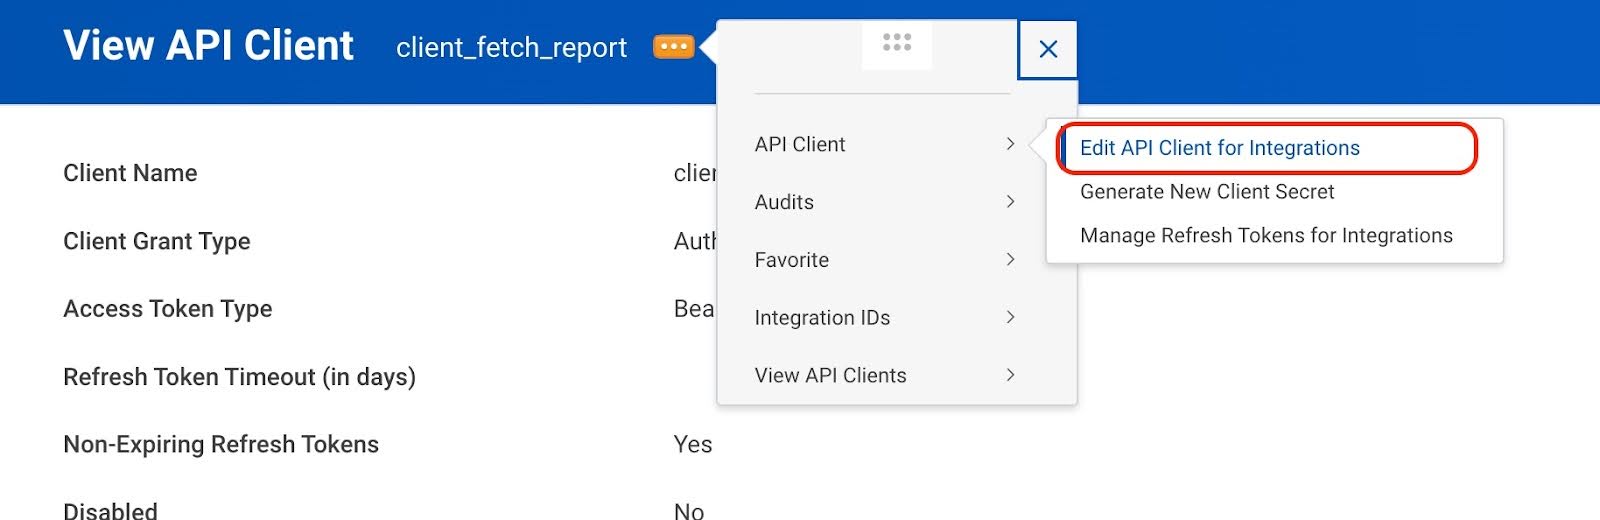
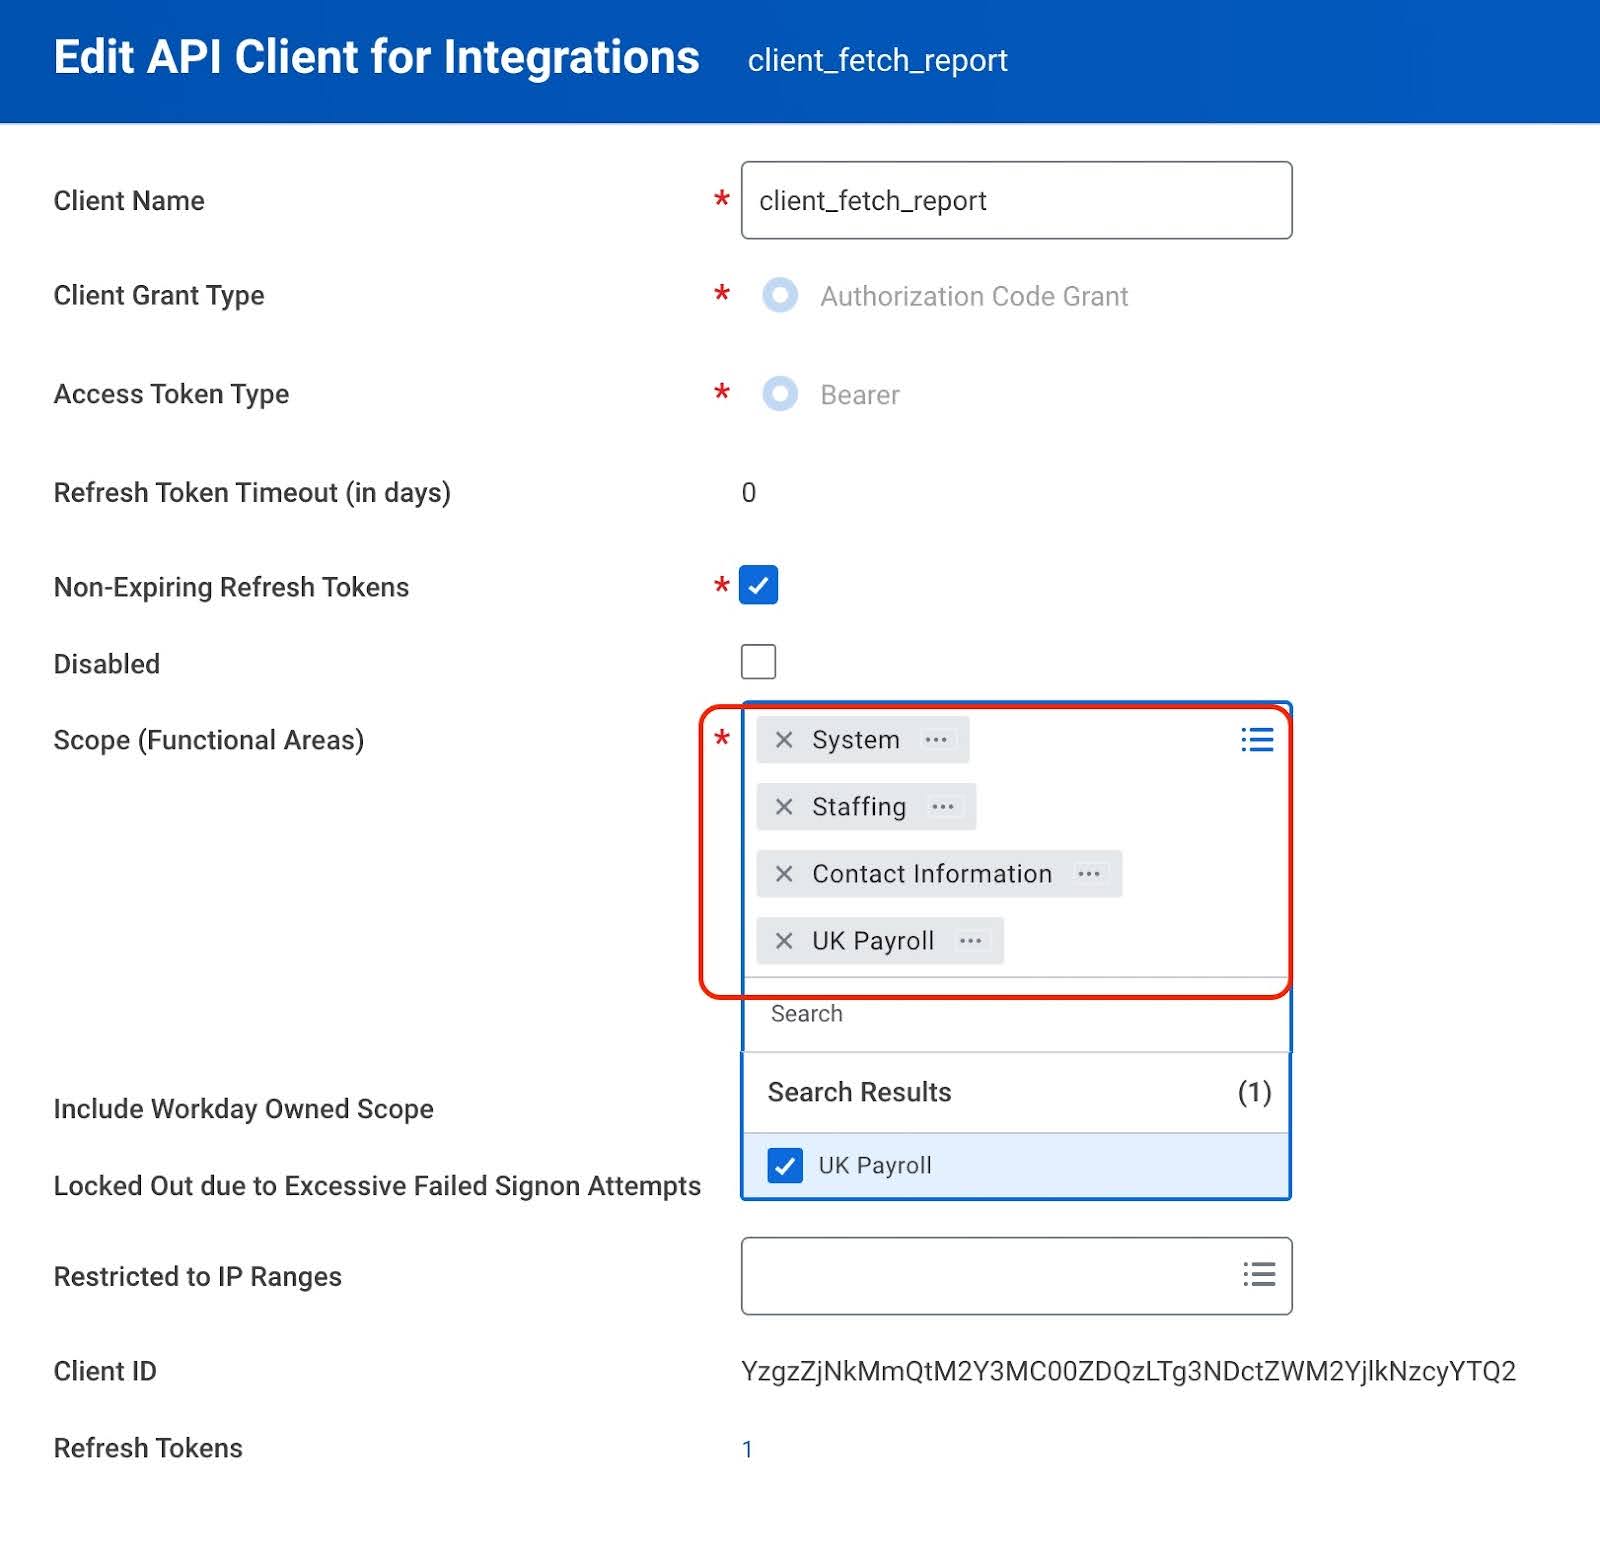
a. In the top blue bar, click the three dots, then click API Client and Edit API Clients for Integrations.
a. In the Scope (Functional Areas) field, search for and add the functional areas that you noted.
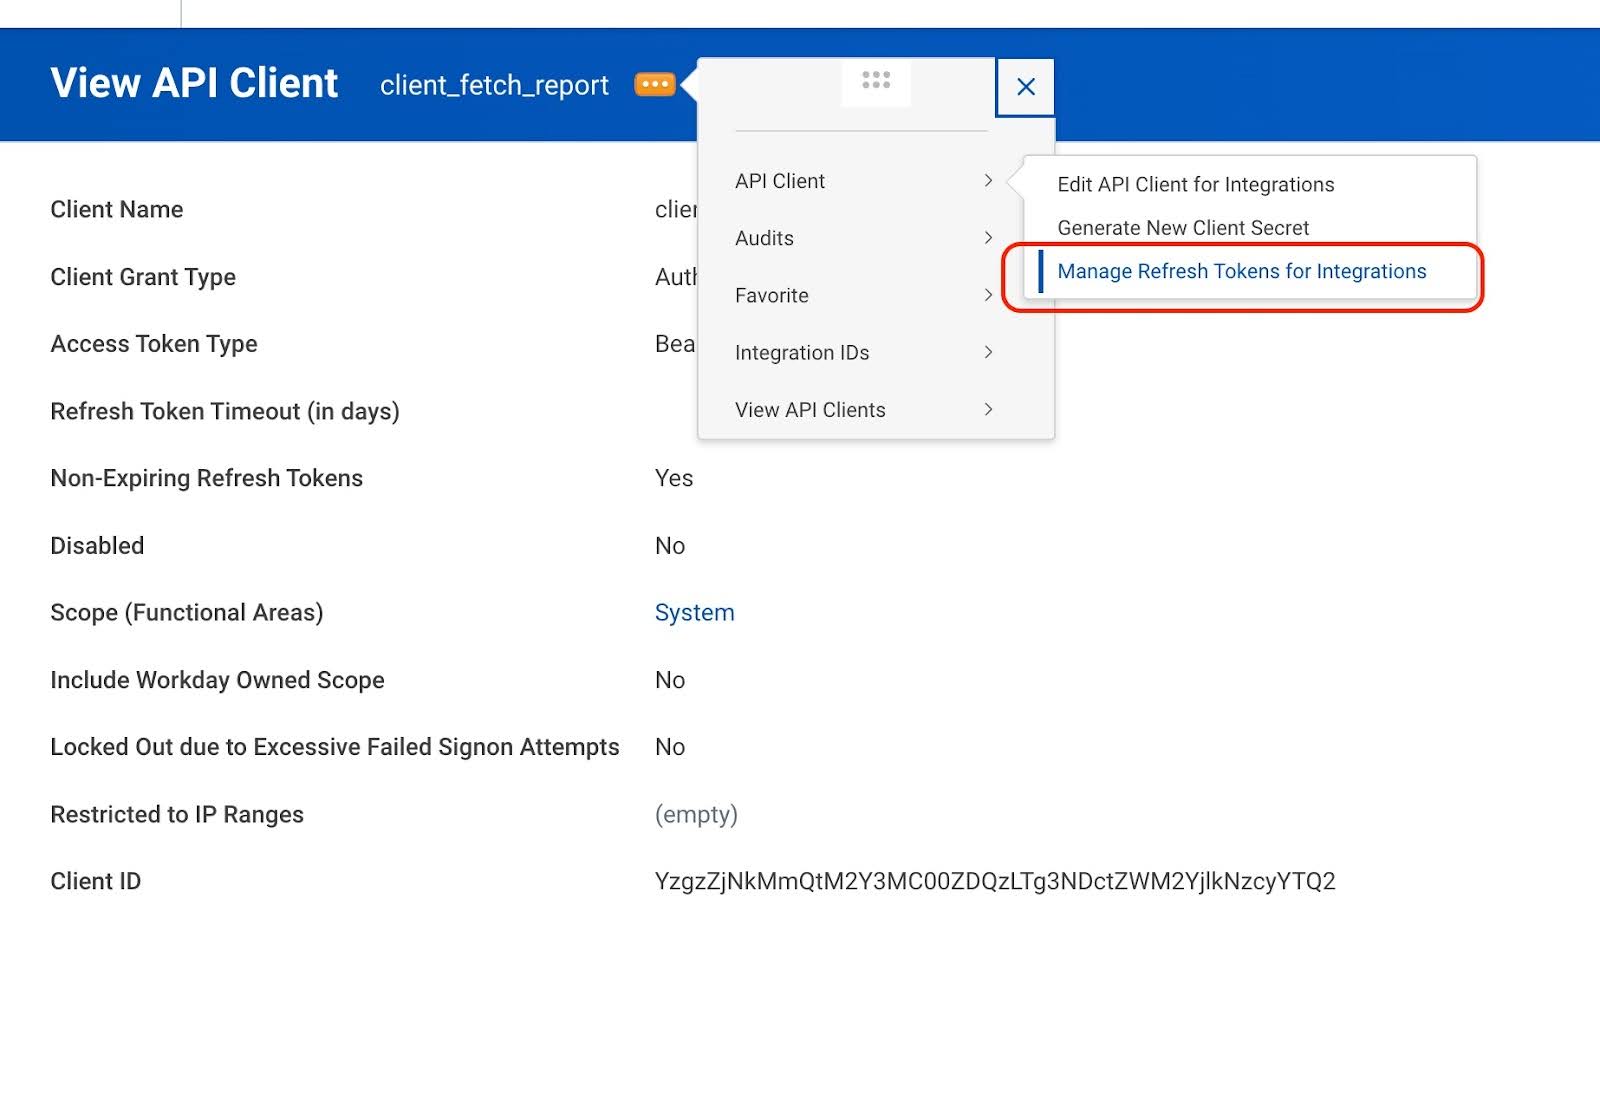
a. In the same menu as before, select Manage Refresh Token for Integrations.
a. In the form, search for the ISU user and select it.
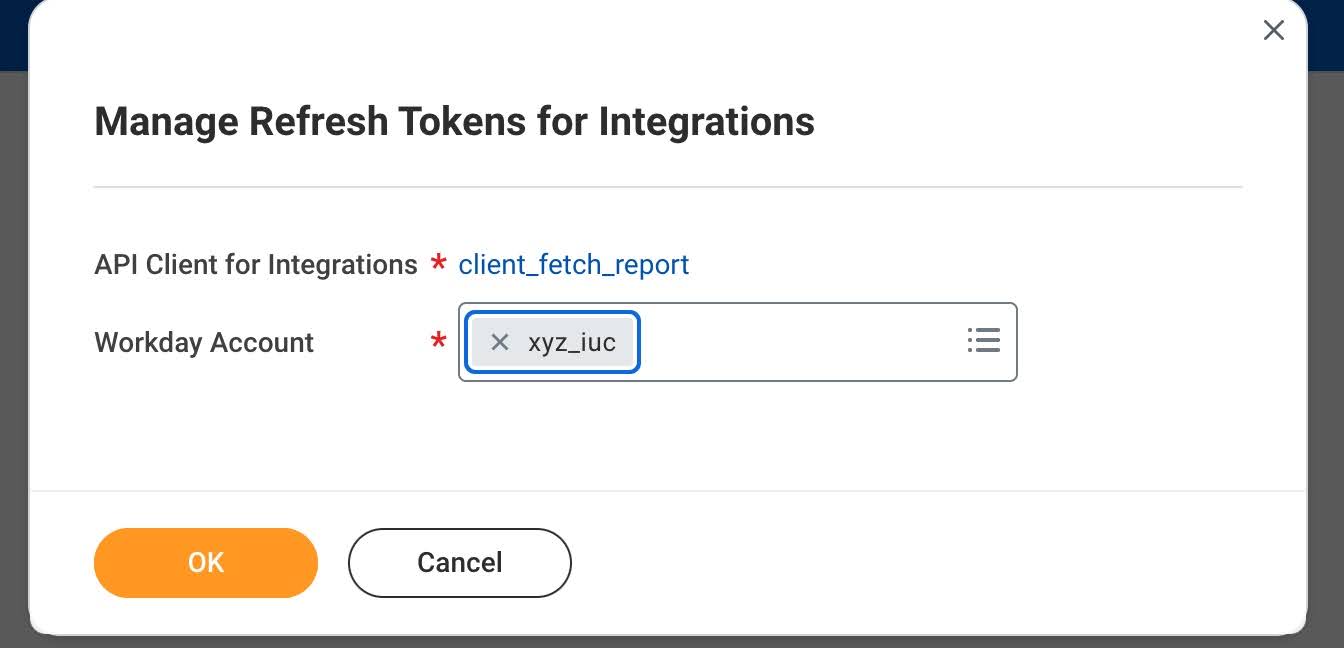
a. Click OK.
-
Click Generate New Refresh Token and Confirm Delete.
-
Copy the refresh token for later use in the pipeline.
