Create and manage governed tags
This feature is in Public Preview.
This page explains how to create and manage governed tags across your account. For an overview of governed tags, see Governed tags.
Tag data is stored as plain text and may be replicated globally. Do not use tag names, values, or descriptors that could compromise the security of your resources. For example, do not use tag names, values or descriptors that contain personal or sensitive information.
Create a governed tag
To create a governed tag, you must have the CREATE permission at the account level. Account and workspace admins have CREATE by default.
-
In your Databricks workspace, click
 Catalog.
 -
Click the Governed Tags > button.
-
Click Create governed tag.
-
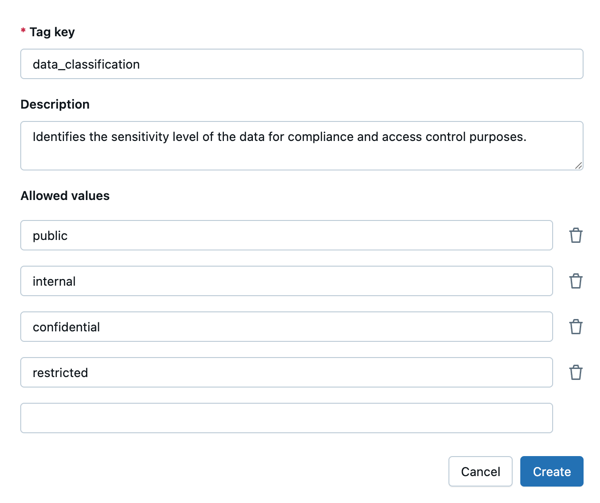
Enter a tag key.
Tag keys are case sensitive. For example,
Salesandsalesare two distinct tags. -
Optionally, enter a description for the governed tag.
-
Optionally, enter one or more allowed values for the tag. Only these values can be assigned to this tag key.
-
Click Create.
Edit a governed tag
To edit a governed tag, you must have the MANAGE permission on that governed tag.
- In your Databricks workspace, click Catalog.
- Click the Governed Tags > button.
- Select the governed tag.
- To edit the description, click the pencil icon
 .
. - To add an allowed value, click Add value.
- To remove an allowed value, select the checkbox next to the value and click Remove value.
Delete a governed tag
When you delete a governed tag, the tag itself is not removed from objects. Instead, it becomes ungoverned. This means:
- The tag key and any existing tag values remain on objects.
- The tag is no longer subject to a tag policy.
- Anyone with the ability to apply tags can assign or modify the tag without requiring special permissions.
To delete a governed tag, you must have the MANAGE permission on that governed tag.
- In your Databricks workspace, click Catalog.
- Click the Governed Tags > button.
- Select the governed tag.
- Click Delete.