Create and edit metric views
This page explains how to create and edit metric views using the Catalog Explorer UI or SQL. The Catalog Explorer UI includes a low-code editor and a YAML editor. The low-code UI is a good starting point if you prefer not to write SQL.
For a more complex example, see Tutorial: Build a complete metric view with joins.
Prerequisites
Before you create or edit a metric view, verify that you have the following permissions:
SELECTprivileges on the table-like asset or SQL query used as the source.CREATE TABLEandUSE SCHEMAprivileges in the schema where you want to create the metric view.USE CATALOGprivilege on the parent catalog.CAN USEpermission on a SQL warehouse or other compute resource running Databricks Runtime 17.3 or above.
A metastore admin or catalog owner can grant all of these privileges. A schema owner or user with MANAGE privilege can grant USE SCHEMA and CREATE TABLE privileges on the schema.
Create a metric view
You can create a metric view using the Catalog Explorer UI, SQL, or the YAML editor.
- Catalog Explorer UI
- SQL
- YAML editor
The Catalog Explorer low-code UI enables you to define fields and measures interactively without writing YAML directly.
-
Click
 Catalog in the workspace sidebar.
 -
Use the search bar to find your source table. For example, search for
samples.tpch.orders. -
Click the table name to show table details.
-
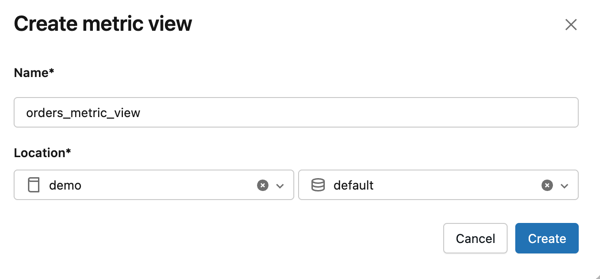
Click Create > Metric view. In the Create metric view dialog, enter a name and select a catalog and schema destination. Then click Create.
-
Click UI to open the low-code editor, if necessary.
Define fields
Fields are metric view columns that behave like regular table columns. They can be categorical attributes used for grouping and filtering (such as order month or order status), or unaggregated numeric columns (such as price or quantity) that can be aggregated at query time. All source columns are added as fields automatically.
- Click
 Add under Fields.
 - To define a field expression, type a SQL expression in the expression field. For example, type
DATE_TRUNC('month', o_orderdate)to group orders by month. - Optionally, click
 Generate with AI to use Genie Code to suggest a field expression.
 - Optionally, enter a Display name, Comment, Synonyms, Format, or Tags. Format is only available for numeric, date, and datetime columns.
Define measures
Measures are aggregate expressions that produce business metrics, such as total revenue or order count.
-
Click
Add under Measures. -
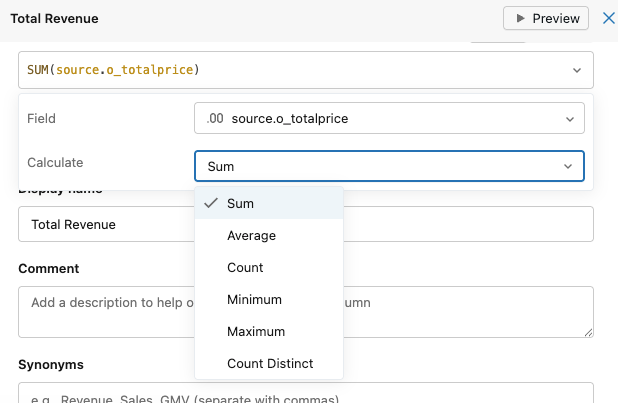
Enter a SQL aggregate expression in the expression field. Supported aggregations include Sum, Count, Average, Min, Max, Median, and Percentile. For example, type
SUM(o_totalprice)to calculate total revenue. -
Optionally, click
Generate with AI to use Genie Code to suggest a measure expression. -
Optionally, enter a Display name, Comment, Synonyms, Format, or Tags.
To preview a measure, click
 Preview next to the measure name. The preview shows the measure results for a selected time window and field.
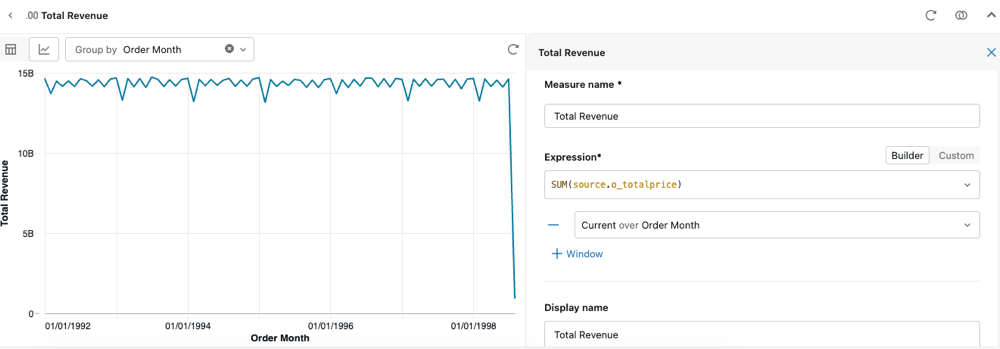
-
Click Save.
Use CREATE VIEW with the WITH METRICS clause to create a metric view. Specify the YAML definition between $$ delimiters:
CREATE OR REPLACE VIEW orders_metric_view WITH METRICS LANGUAGE YAML AS
$$
  version: 1.1
  comment: "Orders KPIs for sales analysis"
  source: samples.tpch.orders
  filter: o_orderdate > '1990-01-01'

  fields:
    - name: Order Month
      expr: DATE_TRUNC('MONTH', o_orderdate)
      comment: "Month of order"

    - name: Order Status
      expr: CASE
        WHEN o_orderstatus = 'O' THEN 'Open'
        WHEN o_orderstatus = 'P' THEN 'Processing'
        WHEN o_orderstatus = 'F' THEN 'Fulfilled'
        END
      comment: "Status of order"

    - name: o_orderdate
      expr: o_orderdate
      comment: "Original order date"

    - name: o_orderkey
      expr: o_orderkey
      comment: "Order key"

    - name: o_custkey
      expr: o_custkey
      comment: "Customer key"

    - name: o_orderpriority
      expr: o_orderpriority
      comment: "Order priority"

    - name: o_clerk
      expr: o_clerk
      comment: "Clerk"

    - name: o_shippriority
      expr: o_shippriority
      comment: "Ship priority"

    - name: o_comment
      expr: o_comment
      comment: "Order comment"

  measures:
    - name: Order Count
      expr: COUNT(1)
      comment: "Total number of orders"

    - name: Total Revenue
      expr: SUM(o_totalprice)
      comment: "Sum of all order prices"

    - name: Total Revenue per Customer
      expr: SUM(o_totalprice) / COUNT(DISTINCT o_custkey)
      comment: "Average revenue per unique customer"
$$
For complete YAML syntax details, see Metric view YAML syntax reference.
-
Click
Catalog in the workspace sidebar. -
Use the search bar to find your source table. For example, search for
samples.tpch.orders. -
Click the table name to show table details.
-
Click Create > Metric view. In the Create metric view dialog, enter a name and select a catalog and schema destination. Then click Create.
-
Click YAML to open the YAML editor.
-
Enter your YAML definition and click Create. The following definition is used in the example on the SQL tab.
YAMLversion: 1.1
comment: 'Orders KPIs for sales analysis'
source: samples.tpch.orders
filter: o_orderdate > '1990-01-01'
fields:
- name: Order Month
expr: DATE_TRUNC('MONTH', o_orderdate)
comment: 'Month of order'
- name: Order Status
expr: CASE
WHEN o_orderstatus = 'O' THEN 'Open'
WHEN o_orderstatus = 'P' THEN 'Processing'
WHEN o_orderstatus = 'F' THEN 'Fulfilled'
END
comment: 'Status of order'
- name: o_orderdate
expr: o_orderdate
comment: 'Original order date'
- name: o_orderkey
expr: o_orderkey
comment: 'Order key'
- name: o_custkey
expr: o_custkey
comment: 'Customer key'
- name: o_orderpriority
expr: o_orderpriority
comment: 'Order priority'
- name: o_clerk
expr: o_clerk
comment: 'Clerk'
- name: o_shippriority
expr: o_shippriority
comment: 'Ship priority'
- name: o_comment
expr: o_comment
comment: 'Order comment'
measures:
- name: Order Count
expr: COUNT(1)
comment: 'Total number of orders'
- name: Total Revenue
expr: SUM(o_totalprice)
comment: 'Sum of all order prices'
- name: Total Revenue per Customer
expr: SUM(o_totalprice) / COUNT(DISTINCT o_custkey)
comment: 'Average revenue per unique customer'
For complete YAML syntax details, see Metric view YAML syntax reference.
Metric view fields are always STRING, even when the source column is CHAR or VARCHAR. The CHAR(n) space-padding applied at the table boundary is lost, so comparisons can differ from the source table. For example, a CHAR(10) value 'COLLEGE' is stored as 'COLLEGE ', so column = 'COLLEGE' returns true on the table but false on the metric view field.
Any user with at least SELECT privileges can now query the metric view. To learn more about managing permissions, see Set permissions.
Generate a metric view with Genie Code
Genie Code can generate a metric view definition from a plain-language description:
- Click the Genie Code icon
 in the upper-right corner of your workspace.
 - Describe the metric view you want to create. Genie Code returns SQL DDL.
- Copy the SQL and paste it into the SQL editor. Click Run.
- Edit the SQL or open the metric view editor to make adjustments. See Edit a metric view.
Edit a metric view
You must be the owner of a metric view to edit its definition. To enable collaborative editing, transfer ownership to a group. See Enable collaborative editing.
- Catalog Explorer UI
- SQL
- YAML editor
- Find the metric view in Catalog Explorer.
- Click Edit to open the editor.
- Click UI to view the low-code UI.
- Click the measure or field you want to edit. Make your changes and click Save.
- To add a new field or measure, click Add in the section you want to edit. See Create a metric view for detailed instructions about defining new measures and fields.
Use ALTER VIEW with an updated YAML definition:
ALTER VIEW catalog.schema.orders_metric_view
AS $$
version: 1.1
comment: "Orders KPIs for sales analysis"
source: samples.tpch.orders
filter: o_orderdate > '1990-01-01'

fields:
 - name: Order Month
   expr: DATE_TRUNC('MONTH', o_orderdate)
   comment: "Month of order"

 - name: Order Status
   expr: CASE
     WHEN o_orderstatus = 'O' THEN 'Open'
     WHEN o_orderstatus = 'P' THEN 'Processing'
     WHEN o_orderstatus = 'F' THEN 'Fulfilled'
     END
   comment: "Status of order"

measures:
 - name: Order Count
   expr: COUNT(1)
   comment: "Total number of orders"

 - name: Total Revenue
   expr: SUM(o_totalprice)
   comment: "Sum of all order prices"

 - name: Total Revenue per Customer
   expr: SUM(o_totalprice) / COUNT(DISTINCT o_custkey)
   comment: "Average revenue per unique customer"

 - name: Total Revenue for Open Orders
   expr: SUM(o_totalprice) FILTER (WHERE o_orderstatus='O')
   comment: "Revenue from open orders"
$$
- Navigate to the metric view in Catalog Explorer.
- Click Edit and then click YAML to open the YAML editor.
- Modify the YAML definition and click Save.
Additional resources
After creating a metric view, use the following resources to query, manage, and extend your work.
Query and consume
Manage and govern
Advanced features
- Model metric views
- Advanced techniques for metric views
- Agent metadata in metric views
- Metric view YAML syntax reference