Manage access requests
This feature is in Public Preview.
The request for access (RFA) feature allows users to request privileges for securable objects in Unity Catalog. This page explains how to configure access request destinations as an administrator. These destinations determine where access requests are sent when users request access to data objects.
What are access request destinations?
When users request access to an object in Unity Catalog (such as a table or view), the request is sent to one or more configured destinations. Destinations can be any of the following:
-
Email addresses
-
Slack channels
-
Microsoft Teams channels
-
Webhook endpoints
-
A redirect URL (to your organization's external access request system)
Only one redirect URL can be configured per object. If a URL is set, no other destinations can be set, and users are redirected to that URL instead of seeing the in-product request form.
Request permissions right from where you work in Databricks
After destinations are configured, users can request permissions from several in-product surfaces: Catalog Explorer, SQL editor and notebooks, AI/BI dashboards, and Genie Agents.
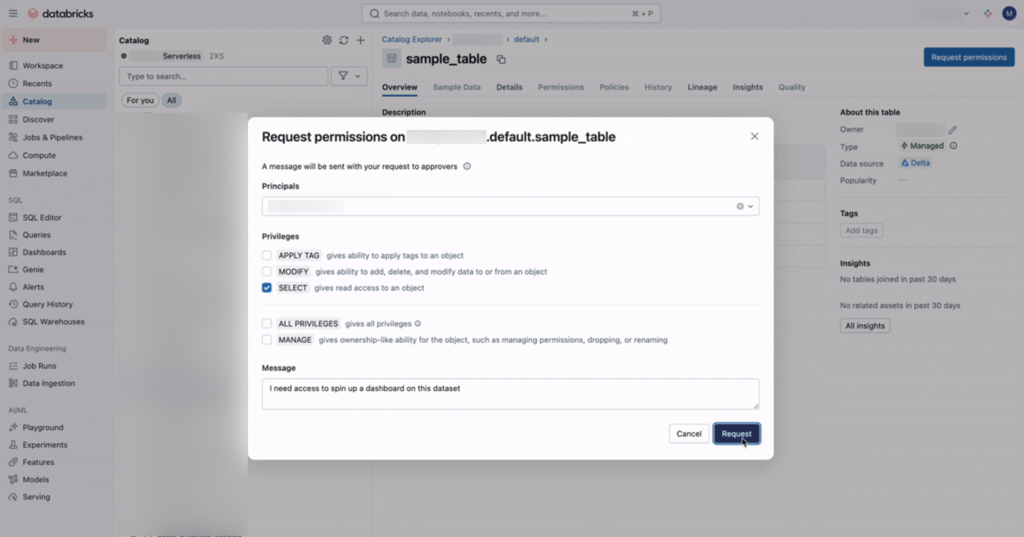
Catalog Explorer
Users with the BROWSE privilege can navigate the catalog tree, open an object's page, and request additional privileges (such as SELECT) from there. Users can also be sent a direct URL to an object's page and request access from the same surface, even without BROWSE.
SQL editor, notebooks, and other authoring surfaces
When a query or command fails with an INSUFFICIENT_PERMISSIONS error, the error message includes a Request access option that pre-fills the request with the referenced tables. This works anywhere the error surfaces, including the SQL editor and notebooks.

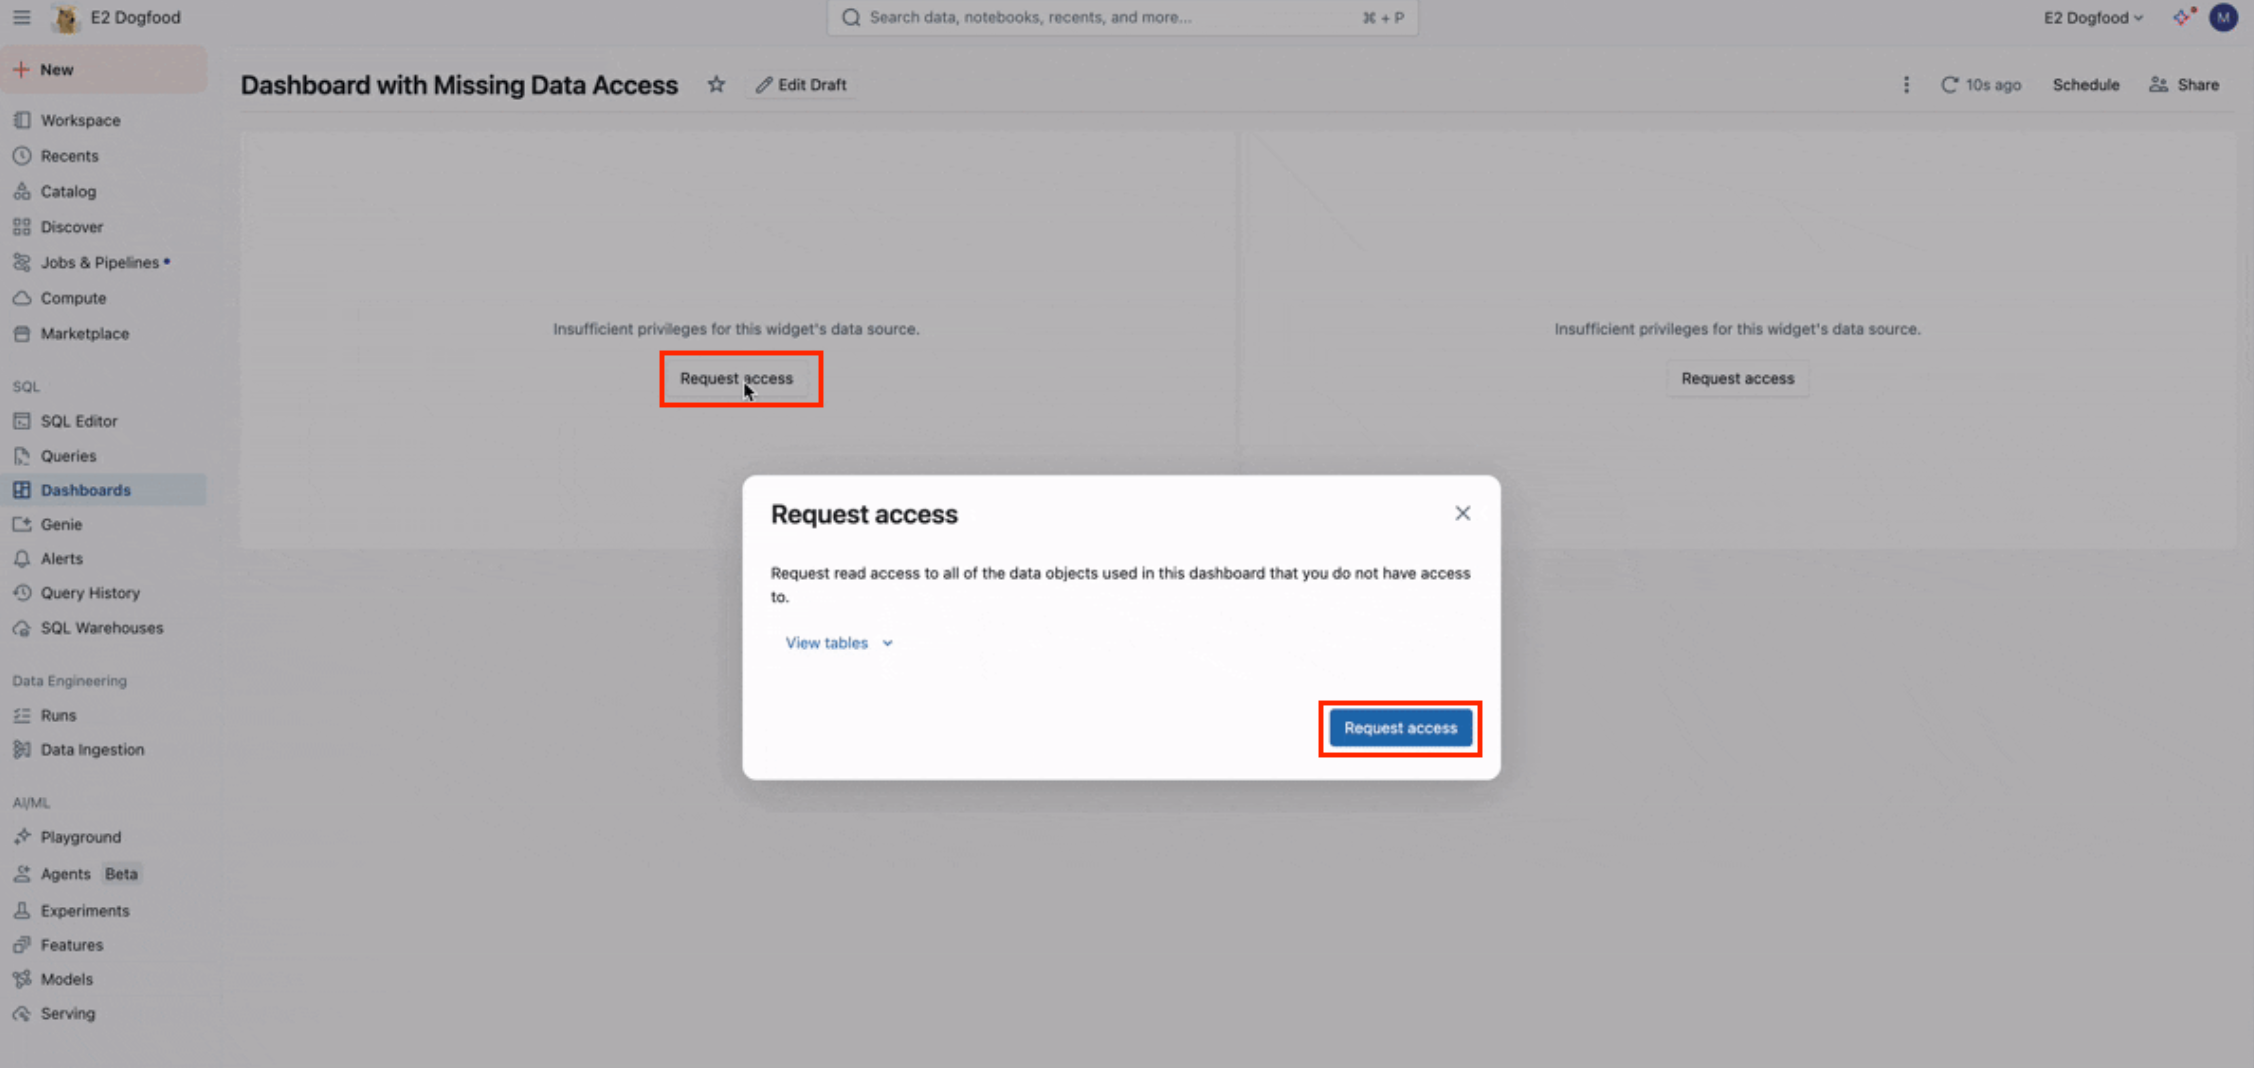
AI/BI dashboards
When a dashboard runs without embedded credentials and a widget references datasets the viewer can't read, the widget surfaces a Request access modal for the missing datasets.
Genie Agents
When a Genie Agent references tables the user lacks permissions on, the space displays a PERMISSION_DENIED banner with a Request access modal for the inaccessible tables.

How access request destinations work
Access request destinations can be configured on most objects in Unity Catalog, including metastores, catalogs, schemas, tables, views, volumes, functions, models, storage credentials, service credentials, external locations, and connections. Users can request access to an object if they have the BROWSE privilege or a direct URL to the object.
When submitting a request, users can request access for one or more principals. This includes themselves, service principals, other users, or groups. The request is routed to the configured destinations. If multiple destinations are configured on an object, the request is sent to all of them.
If a redirect URL is configured, users are taken to the URL and do not see the access request form. Workspace admins can configure external destinations by following the instructions in Manage notification destinations.
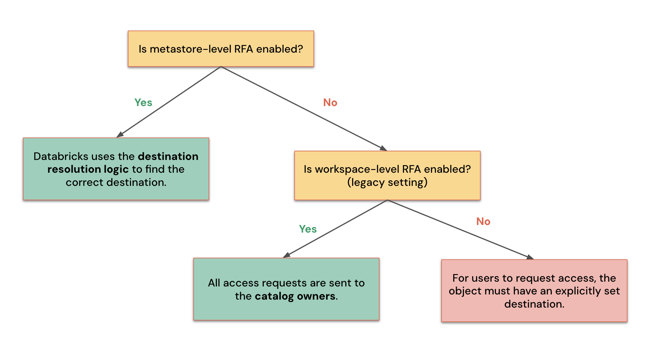
Databricks determines where to route access requests based on whether request for access (RFA) is enabled at the metastore or workspace level.
Destination resolution logic
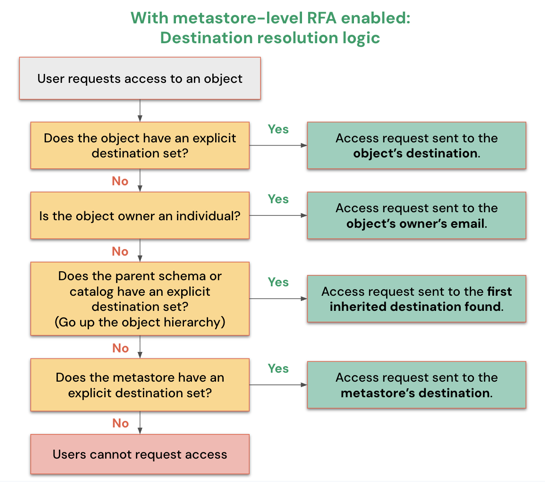
When metastore-level access requests are enabled, Databricks resolves the destination for a given request in the following order:
- Object-level explicit destination: If the object has an explicit destination set, the request is sent there.
- Object owner's email: If the object owner is an individual user, the request is sent to their email address.
- Parent object destination: If the object owner is a group or service principal, Databricks traverses up the object hierarchy and uses the first explicit destination found.
- Metastore-level destination: If no destination is found in the object hierarchy, the request falls back to the metastore-level destination. If no metastore-level destination is set, users cannot request access to the object. See Enable access requests across the metastore.
The flow chart below illustrates this order:
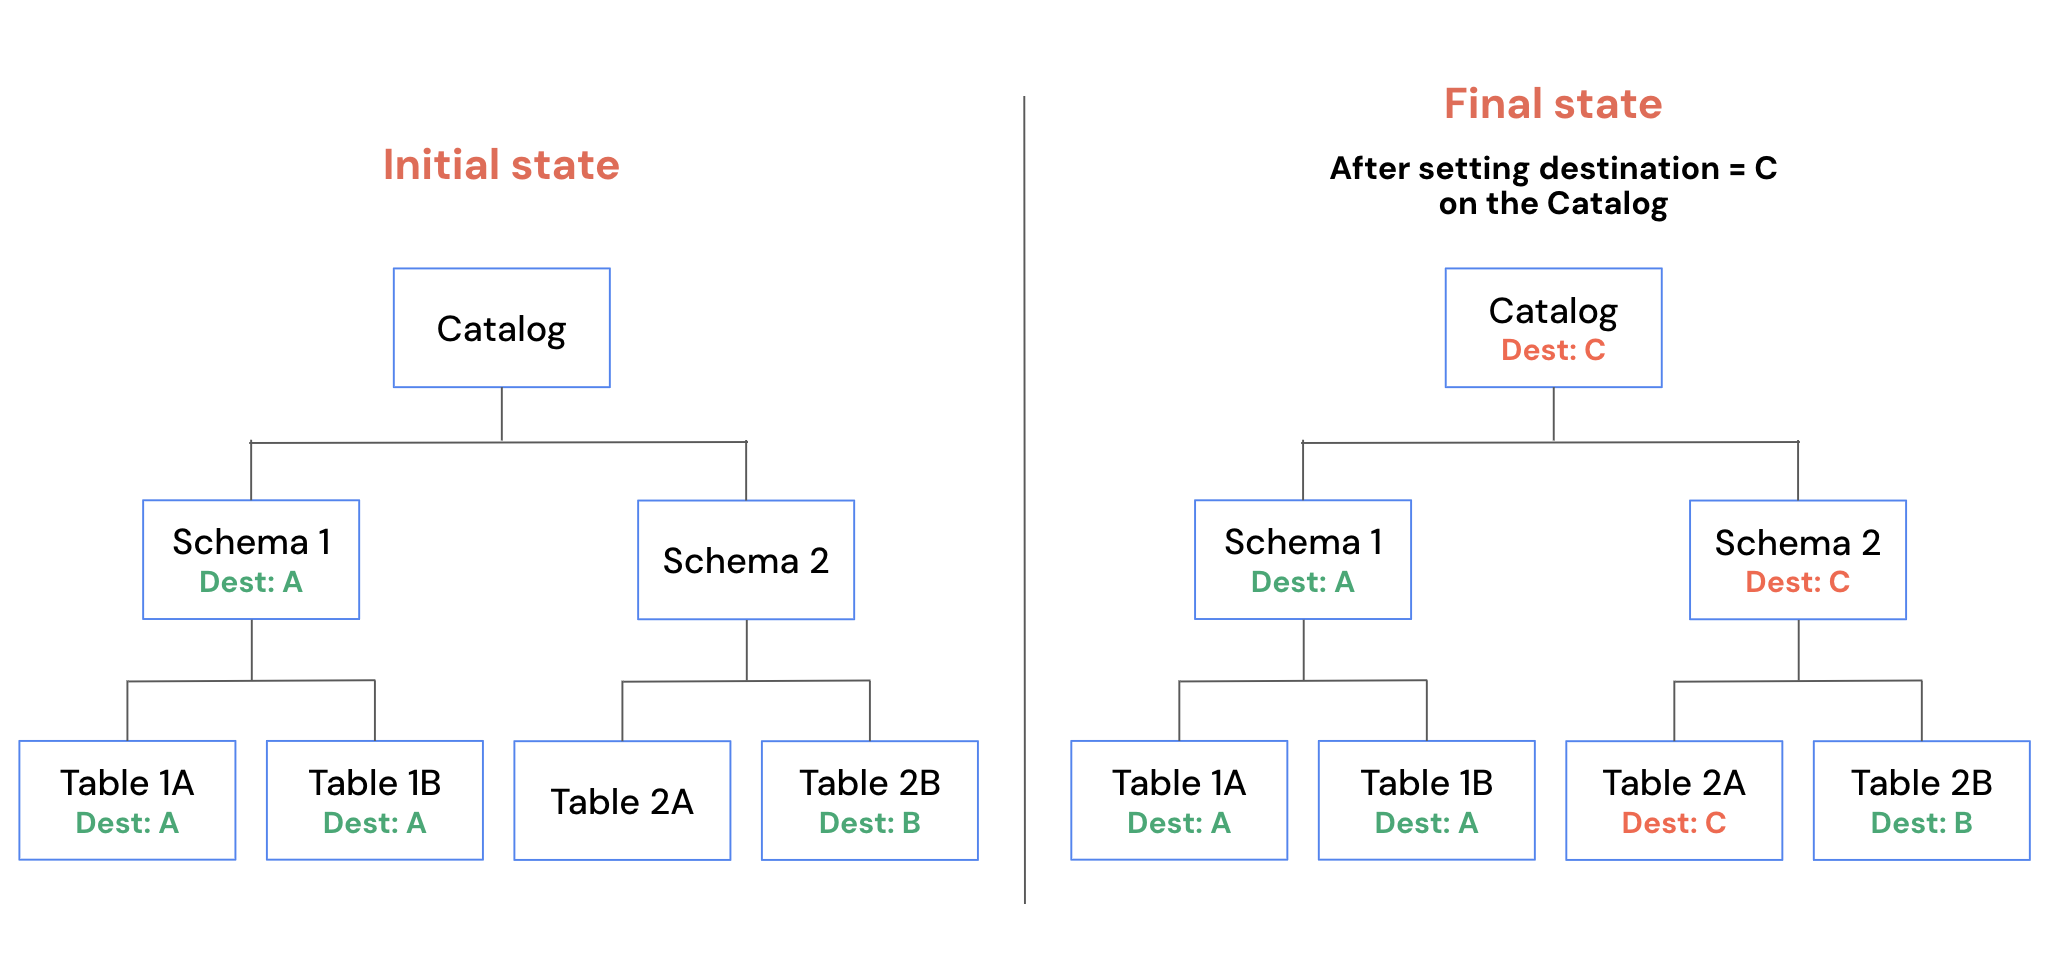
Destination inheritance behavior
When you configure a destination at higher levels of the Unity Catalog object hierarchy, it also applies to all child objects that don't already have a destination. For example, if you configure a destination on a catalog, this destination is inherited by all schemas and objects under the catalog, except for those that already have a destination.
Enable access requests across the metastore
Databricks recommends enabling access requests at the metastore level. This ensures that access requests are delivered even when no destination is manually configured. When enabled, requests for catalog objects are sent to the catalog owner's email address, and requests for objects outside a catalog, such as external locations, are sent to the object owner's email address.
To configure access requests across the metastore, you must be a metastore admin.
-
In your Databricks workspace, click
 Catalog.
 -
At the top of the Catalog pane, click the
 gear icon and select Metastore.
 -
On the Details tab, click the edit icon next to Access requests.

-
Configure the following options:
- Metastore access requests setting: Enable this option to automatically configure the owner’s email address as the destination for each object. This applies only to objects without an explicitly configured destination. You can manually change any configured destination.
- Metastore-level destination: You can set any email address, webhook, or redirect URL as the metastore-level destination. This destination is inherited by all child objects (catalogs, schemas, tables, and other securable objects) that don’t have a destination explicitly configured.
The Enable default email destinations for access requests in UC setting previously available in Settings > Notifications has been deprecated and replaced by the metastore-level configuration described above. Customers who have enabled the workspace-level default setting experience no behavior changes.
Configure access request destinations on an object
To configure access request destinations on an object, you must either be the object owner, have the MANAGE privilege on the object, or be a metastore admin.
You can configure destinations using Catalog Explorer, the REST API, or Terraform.
Configure destinations for existing objects
- Catalog Explorer
- REST API
- Terraform
-
In your Databricks workspace, click
Catalog. -
Select a securable object.
-
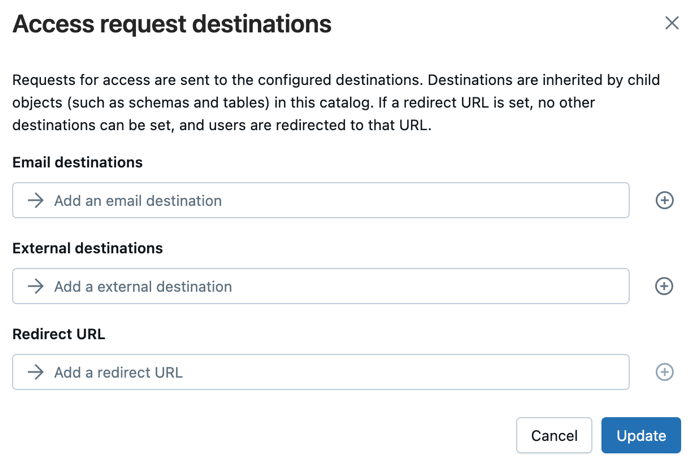
Click the
 kebab menu and select Manage access request destinations.
 -
Select one or more email or external destinations, or configure a redirect URL. If a URL is selected, no other destination types can be added.
-
Click Update.
Use the Access Request Destinations API to set destinations on a securable. PATCH replaces the destinations on the securable; if none were previously set, it creates them.
curl -X PATCH \
  https://<workspace-url>/api/3.0/rfa/destinations \
  -H "Authorization: Bearer $DATABRICKS_TOKEN" \
  -H "Content-Type: application/json" \
  -d '{
    "destinations": [
      { "destination_id": "data-access@example.com", "destination_type": "EMAIL" }
    ],
    "securable": {
      "type": "TABLE",
      "full_name": "main.sales.orders"
    }
  }'
Use the databricks_rfa_access_request_destinations resource.
resource "databricks_rfa_access_request_destinations" "orders" {
  destinations = [
    {
      destination_id   = "data-access@example.com"
      destination_type = "EMAIL"
    }
  ]
  securable = {
    type      = "TABLE"
    full_name = "main.sales.orders"
  }
}
Configure destinations when creating a catalog
- In your Databricks workspace, click Catalog.
- Click the
 plus icon. Then, click Create a catalog.
 - Enter a name for your catalog, then click Create catalog.
- In the next modal, click Configure catalog.
- Under the Access Requests section, add, modify, or remove destinations as necessary. The email of the catalog owner is included as a destination by default.
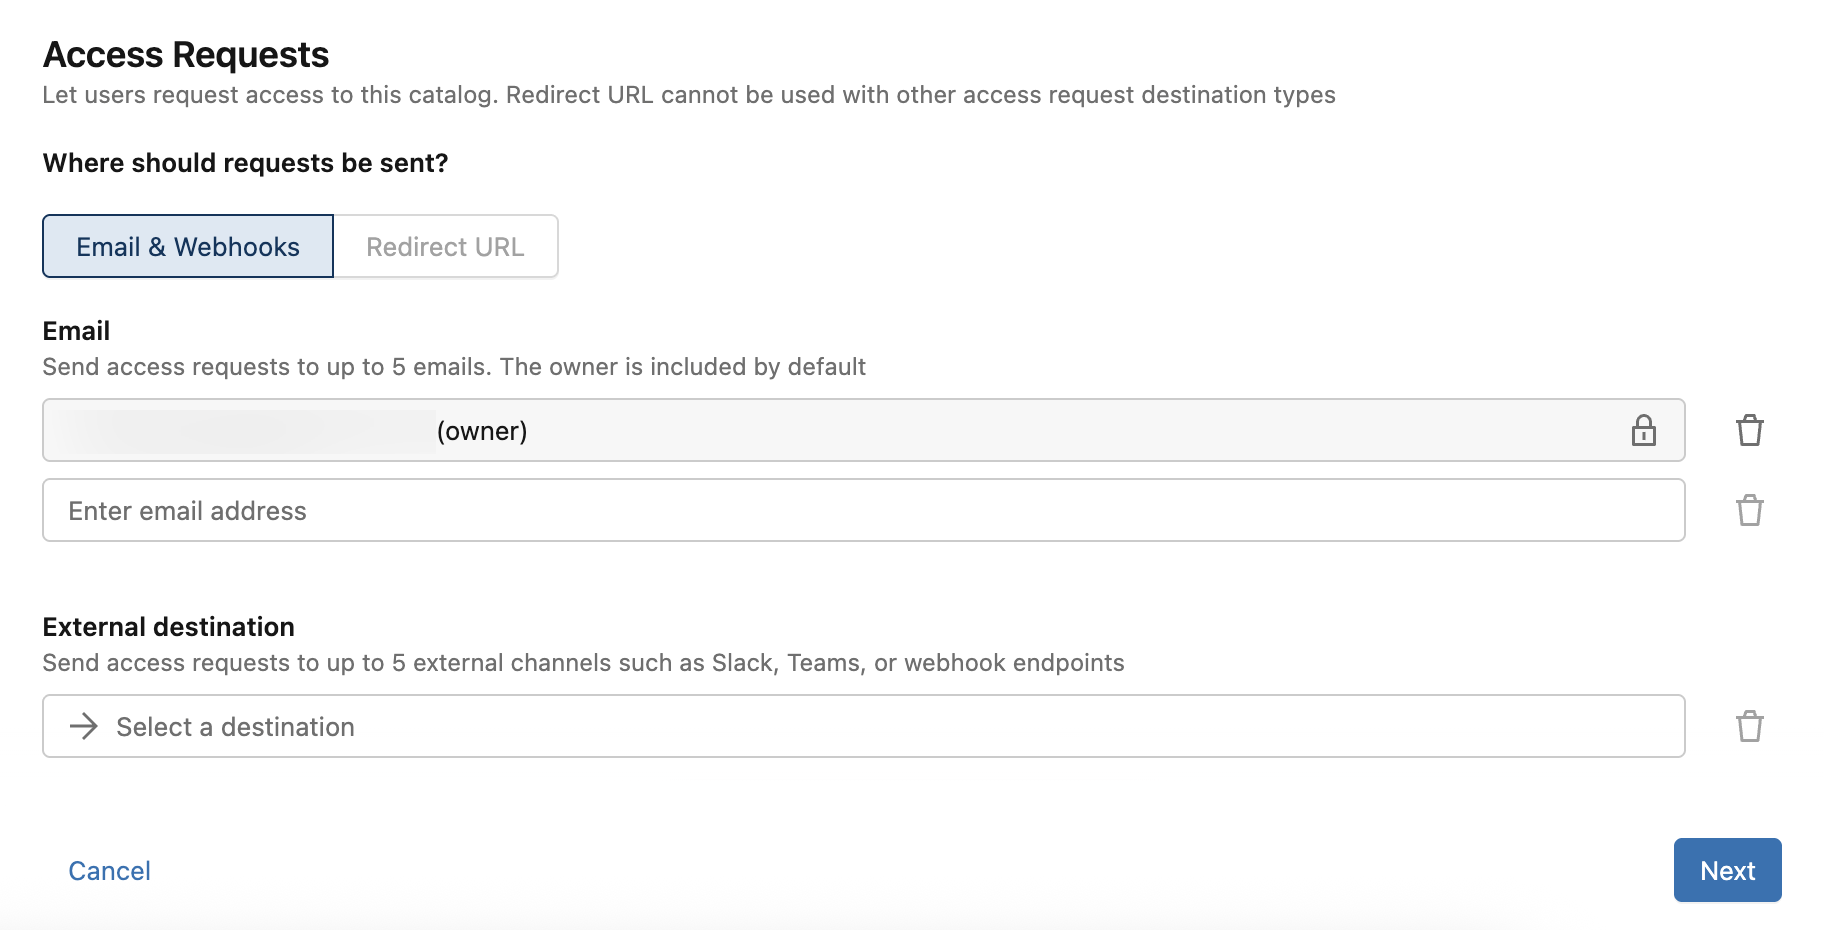
- Click Next, then click Save.
Destinations are inherited in the Unity Catalog object hierarchy. When creating a schema within a catalog that has an access request destination, the Create a new schema modal mentions the inherited destinations:
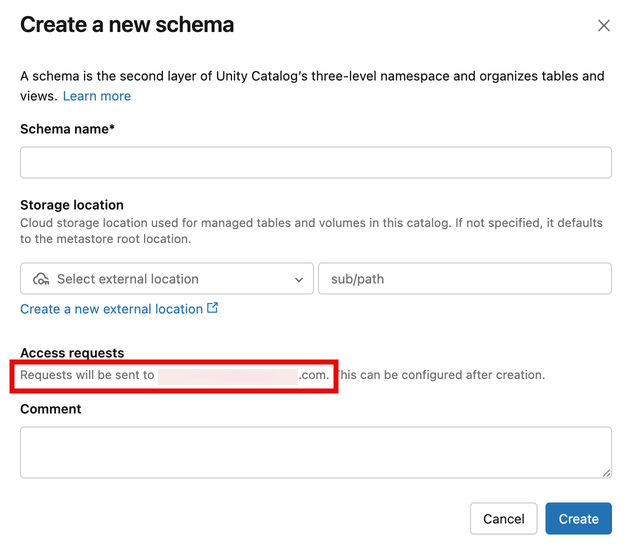
To modify these destinations on the schema, see Configure destinations for existing objects.
Access request examples
The following section shows examples for access requests sent to different destinations.
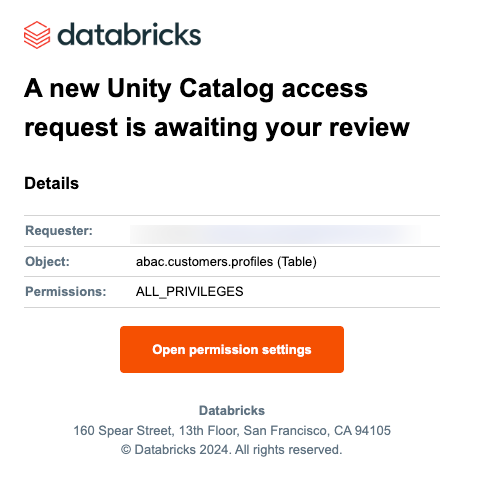
Email
Access request emails are sent from noreply@databricks.com.
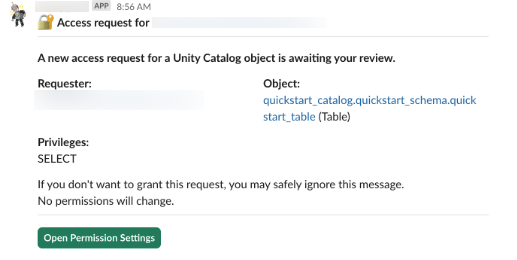
Slack
Webhook (JSON)
{
  "requesterName": "<first-name> <last-name> (<email>)",
  "objectName": "<catalog>.<schema>.<table>",
  "objectType": "Table",
  "privileges": "SELECT",
  "principalName": "<group-name>",
  "onBehalfOf": "<group-name>",
  "onBehalfOfType": "Group",
  "comment": "My team needs access to run queries on this table.",
  "databricksWorkspaceUrl": "https:/<account>.databricks.com/explore/data/<catalog>/<schema>/<table>?o=<table-id>&activeTab=permissions&showGrantModal=true&requestedPrivileges=SELECT&groupId=<group-id>"
}
For information on how to integrate webhooks with common tools, see the following:
Built-in permission validation
- Prerequisite privileges (
USE CATALOG,USE SCHEMA) are checked automatically when a user requests a privilege likeSELECT. - Missing prerequisites generate additional requests routed to the parent objects' approvers.
- Validation also applies to requests submitted on behalf of another user or group.
Approve an access request
To approve an access request, follow the link sent to your access request notification. The link opens a modal dialog in your workspace that displays the requester, object, and requested privileges.
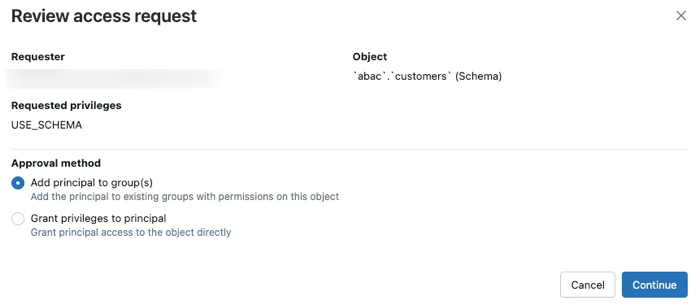
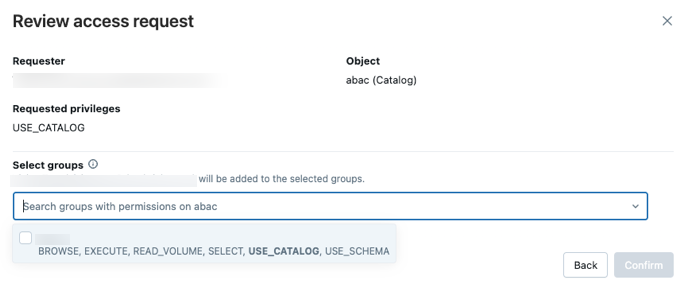
Next, select one of the following approval methods:
-
Add principal to group(s) to add the requester to one or more existing groups that have at least one of the requested privileges.
-
Grant privileges to principal to give them access to the object directly. You can also select privilege presets, such as Data Reader to grant a user a collection of privileges.

For a record of every access request and destination configuration, see Request for access events in the audit log reference.