Set up the Databricks Excel Add-in
This feature is in Public Preview.
The Databricks Excel Add-in connects your Databricks workspace to Microsoft Excel, bringing governed Lakehouse data directly into your spreadsheets to help you move from data to decisions faster. The add-in is fully supported across Excel for the web and desktop versions for both Windows and macOS.
This page describes the two methods available to set up the Databricks Excel Add-in in Microsoft Excel. This add-in uses single sign-on (SSO) authentication to connect to your Databricks workspace and supports Unity Catalog for data governance and access control.
Prerequisites
Before you install the Excel Add-in, verify that you have the following:
- Access to a Databricks workspace with Unity Catalog enabled.
- A workspace admin must enable the Excel Connector preview. See Manage Databricks previews.
- Your Databricks workspace URL for each workspace that Excel should connect to. Custom account URLs are not supported.
- You have Databricks SQL access and at least CAN USE permission on a SQL warehouse.
- Permissions to read data from Unity Catalog tables in your workspace.
- One of the following versions of Excel:
- Excel 2019 or later on Mac
- Excel on Windows (Microsoft 365)
- Excel on the web
- Excel on Mac (Microsoft 365)
- If you use a firewall or a cloud security platform, allowlist the Databricks workspace URLs included in the add-in file.
- If your Microsoft Entra tenant blocks user consent for third-party apps, a Microsoft Entra admin must grant admin consent to the Databricks single sign-on enterprise application before users can sign in. See "Need admin approval" message on log in.
Set up the add-in file
If you are an admin deploying the add-in through the Microsoft Marketplace, skip this section. The marketplace deployment uses PowerShell to configure workspace access instead of the add-in file. See Deploy through Microsoft Marketplace.
The add-in file is a small connector file that tells Excel how to securely connect to Databricks. It acts as the digital handshake that ensures the add-in loads correctly and stays up to date every time you open Excel.
Download and set up the add-in file to use the Databricks Excel Add-in.
Databricks recommends using the multi-workspace manifest so that you can have a consolidated manifest. But, if you cannot use login.databricks.com because you do not have account-level SSO set up, then you must use the Single workspace manifest method.
- Multi-workspace manifest (Recommended)
- Single workspace manifest
-
Download the Databricks Excel add-in file:
-
Edit the add-in file by specifying your workspace URL as an
<AppDomain>within theAppDomainssection. Your workspace URL is the base URL you use to access your Databricks workspace in a browser. To switch between multiple Databricks workspaces, add each workspace URL to the add-in file.XML<AppDomains>
<!-- DO NOT CHANGE -->
<AppDomain>https://www.databricks.com</AppDomain>
<AppDomain>https://login.databricks.com</AppDomain>
<!-- ADD WORKSPACE URLS AS SHOWN BELOW; PUT EACH WORKSPACE URL IN ITS OWN <AppDomain> TAG -->
<!-- EXAMPLE -->
<AppDomain>https://<instance1-id>.<region>.gcp.databricks.com</AppDomain>
<AppDomain>https://<instance2-id>.<region>.gcp.databricks.com</AppDomain>
</AppDomains>notePaste your workspace URL as plain text, without formatting. In most text editors, use
Ctrl+Shift+V(Windows) orCommand+Shift+V(macOS). -
Save your changes. Verify that the file is properly formatted as an
.xmlfile.
These steps apply if you do not have account-level SSO set up.
Each add-in file connects to a single Databricks workspace. To connect to multiple workspaces, repeat these steps for each workspace, and upload a separate add-in file tied to each workspace.
-
Download the Single workspace add-in file:
-
Edit the add-in file by replacing the following placeholders:
YOUR-SERVER-HOSTNAME— Your workspace server hostname.YOUR-WORKSPACE-ID— Your numeric workspace ID.
Your workspace URL is configured through these placeholders, not as a separate
<AppDomain>entry. -
Save your changes. Verify that the file is properly formatted as an
.xmlfile.
Option 1: Admin managed
As a global administrator, you can deploy the Databricks Excel Add-in to users in your organization. You can deploy the add-in as a custom app using the add-in file or install it from the Microsoft Marketplace.
To install the Databricks Excel Add-in as a Microsoft 365 Admin, you must have the global admin permission. As an administrator, you can determine which users in your organization can use add-ins. For more about global admins on Microsoft 365, see the Microsoft documentation.
Databricks recommends deploying the Databricks Excel Add-in as a custom app.
- Deploy as a custom app
- Deploy from Microsoft Marketplace
Deploy the add-in using a custom manifest file. Download and set up the add-in file provided in the Prerequisites.
- In the Microsoft 365 admin center, go to Settings > Integrated apps and click the Add-ins link.
- Click Deploy Add-in and click Next.
- Click Upload custom apps as the option to deploy a new add-in.
- Select the option to upload a manifest. Click Choose File and upload the add-in file.
- Choose which users should have access to the add-in.
- Click Deploy.
For detailed steps about uploading the Databricks Excel Add-in, see the Microsoft documentation.
Install the add-in from the Microsoft Marketplace and use PowerShell to configure workspace access.
Prerequisites
- PowerShell is installed on your machine.
- You must run Windows PowerShell as an administrator.
Install the add-in
- In the Microsoft 365 admin center, go to Settings > Integrated apps and click the Get Apps link.
- Search for "Databricks Add-in for Excel".
- Click Get it now.
- Deploy the add-in to yourself by selecting Just me under Assign Users.
- Click Deploy.
For detailed steps about deploying the Databricks Excel Add-in from the Microsoft Marketplace, see the Microsoft documentation.
Configure workspace access
After installing the add-in, use PowerShell to allowlist your Databricks workspace URLs.
The PowerShell connection to the Office 365 admin center can time out. If a command fails, reopen PowerShell and reconnect by running Connect-OrganizationAddInService.
-
Open PowerShell and run as an administrator. For more information, see the Microsoft documentation.
-
Install and import the Office 365 centralized deployment module:
PowerShellInstall-Module -Name O365CentralizedAddInDeployment
Import-Module O365CentralizedAddInDeployment -
Connect and log in to your Office 365 tenant as an admin:
PowerShellConnect-OrganizationAddInService -
Confirm that the add-in was deployed. The Databricks Add-in for Excel should appear in the list.
PowerShellGet-OrganizationAddInIf the add-in does not appear, it might need to be redeployed or might still be deploying.
-
Allowlist Databricks workspace URLs. Replace each
<workspace-url>with the URL of a workspace you want to allow. You can include as many workspace URLs as you need.PowerShellSet-OrganizationAddInOverrides -ProductId 305c35cc-5f58-46b6-8701-d611c3379a86 `
-AppDomains "https://<workspace1-url>", "https://<workspace2-url>"The product ID for Databricks is
305c35cc-5f58-46b6-8701-d611c3379a86. -
Confirm correct allowlisting. The workspace URLs you allowlisted should appear in the
AppDomainssection.PowerShellGet-OrganizationAddInOverrides -ProductId 305c35cc-5f58-46b6-8701-d611c3379a86
Test the add-in
- In Excel, find the Databricks Add-in.
- Sign in and connect to one of the workspaces you allowlisted.
Allowlisting changes can take a few minutes to sync. If authentication fails, confirm that you are connecting to an allowlisted workspace. If the workspace is correct, close Excel, wait a few minutes, and try again.
Deploy to your organization
- In the Microsoft 365 admin center, go to Settings > Integrated apps.
- Select the Databricks Add-in that you installed and configured.
- Click the Users tab and choose whether to deploy to your entire organization or a specific group of users.
As an administrator, share the account name associated with the workspaces that you allowlisted with the users who plan to use the Databricks Excel Add-in. See Sign in to the add-in.
Option 2: Self-service
Installation steps vary depending on your Excel platform. Download and set up the add-in file provided in the Prerequisites.
- Excel for the web
- Excel Desktop (Windows)
- Excel Desktop (macOS)
To install and connect to the Excel Add-in in Excel for the web do the following:
- Open Excel for the web and create or open a workbook.
- Under the Home tab, click Add-ins > Advanced.
- Click Upload My Add-in.
- Upload the add-in file.
- Click Upload.
- Find and click the Databricks Add-in from the Add-ins menu.
- Sign in to your Databricks account. If there is an error, make sure to enable pop-up dialogs.
- If you configured multiple workspace URLs, select the desired Databricks account name. You only need to select a specific workspace if the URLs are within the same account. For more information on account names, see Locate your account ID.
To install the Excel Add-in in Excel Desktop for Windows, do the following:
- Create a folder named
Manifeston your local drive (for example,C:\Manifest). - Copy the add-in file to the
C:\Manifestfolder. - Open the folder properties and share the folder:
- Right-click the
Manifestfolder and select Properties. - Click Sharing > Share and add yourself as a user with read and write permissions.
- Right-click the
- Open Excel Desktop.
- Configure Excel to trust the manifest folder:
- Click File > Options > Trust Center > Trust Center Settings.
- In the sidebar, click Trusted Add-in Catalogs.
- In Catalog Url, enter the path to the shared folder where the add-in file is located (for example,
\\YourComputerName\Manifest). - Click Add catalog.
- Select the Show in Menu checkbox.
- Click OK to save your changes.
- Restart Excel Desktop.
- In the search box in the title bar, search for "Insert as Add-in" and select it from the results.
- Select the Databricks connector and click Add.
- Click the Databricks Add-in and complete the sign-in process to your Databricks account.
- If you configured multiple workspace URLs, select the desired Databricks account name. You only need to select a specific workspace if the URLs are within the same account. For more information on account names, see Locate your account ID.
To install the Excel Add-in in Excel Desktop for macOS do the following:
-
Copy the add-in file to your Microsoft Office Add-ins folder. If the
weffolder doesn't exist, create it./Users/<your-username>/Library/Containers/com.microsoft.Excel/Data/Documents/wef -
Open or restart Excel Desktop.
-
In the navigation bar, click Add-ins > My Add-ins.
-
Click the Databricks Add-in.
-
Complete the sign-in process to your Databricks account.
-
If you configured multiple workspace URLs, select the desired Databricks account name. You only need to select a specific workspace if the URLs are within the same account. For more information on account names, see Locate your account ID.
Sign in to the add-in
If an administrator in your organization has deployed the Databricks Excel Add-in, sign in and connect to your Databricks workspace from Excel.
- In Excel, under the Home tab, click the Databricks Add-in.
- Enter your workspace URL or select a previously used workspace URL from the drop-down. The add-in remembers workspace URLs that you or your administrator have configured.
- Click Sign in and complete the authentication process to gain access to all Databricks Excel Add-in features.
Change Databricks workspace
If your add-in file specifies multiple Databricks workspaces, you can switch between those workspaces. For more information, see Set up the add-in file.
To connect to a different Databricks workspace, do the following:
- In the upper-right of the Databricks Add-in pane, click the three-dot menu next to the compute selector.
- Click Change workspace.
- Select the account your workspace is in, the workspace if prompted, and sign in.
Troubleshooting
"Authentication in progress" message on log in
If you see an "Authentication in progress" window when trying to log in to Databricks from the add-in, your workspace might not have been correctly added to the custom add-in file. Verify that you have configured your workspace correctly under <AppDomains>.
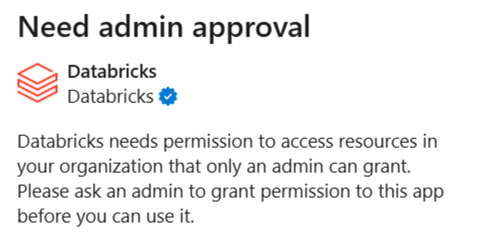
"Need admin approval" message on log in
The following "Need admin approval" message appears when you log in to your Databricks workspace from the Excel add-in because the Microsoft Entra tenant is blocking user consent for the Databricks application. If administrator consent is not granted, Microsoft Entra ID continues to block the login flow even if you have direct workspace access.
To resolve this, a Microsoft Entra user with appropriate administrator roles must grant tenant-wide administrator consent to the Databricks enterprise application.
Ask the Microsoft Entra admin to visit the following link. Replace {TENANT_ID} with your Microsoft Entra tenant ID:
https://login.microsoftonline.com/{TENANT_ID}/adminconsent?client_id=aaec40b0-c0ae-4211-a98b-6fc160abb71b
If the link fails, the admin can grant consent manually:
- In the Microsoft Entra admin center, go to Entra ID > Enterprise apps > All applications and find the Databricks enterprise application used for single sign-on. To identify the application, search for the Application ID
aaec40b0-c0ae-4211-a98b-6fc160abb71b. - Grant admin consent for the permissions requested by the Databricks enterprise app:
- Under Security, click Permissions.
- Click Grant admin consent.
For detailed instructions, see the Microsoft documentation.
Unable to use resources
If you're unable to use Databricks resources, such as SQL warehouses, in the Databricks Add-in, try one of the following methods depending on which version of Excel you're using:
- Excel for the web: Restart the sheet or change workspaces and log back in to the same workspace. See Change Databricks workspace.
- Excel Desktop: Reload the add-in by clicking the information icon in the upper-right corner and selecting Reload.