Omnigent quickstart
Omnigent is in Beta. For the open-source documentation, see the Omnigent documentation.
Omnigent on Databricks is a managed deployment of the server integrated with your workspace identity provider and Unity Gateway. This server coordinates your sessions and allows you to collaborate with others. This page covers the setup that is specific to Databricks. See the open-source Omnigent documentation for more information about Omnigent features and capabilities.
Prerequisites
You must have:
- The Omnigent preview enabled for your workspace. See Manage workspace-level previews.
- A workspace in a region that supports Unity Gateway. See Databricks feature availability by region.
To install Omnigent using the CLI, you must have:
- Python 3.12+
- Node.js 22 LTS with npm
- tmux (macOS and Linux only)
Choose a host or runner
Managed Omnigent runs the server on Databricks. The host or runner where your agent does its work is your own machine. You install the Omnigent CLI and register your laptop or a VM as a host so agents can access local files, tools, or networks. This host is only available while the machine is powered on and the omni host process is running.
You sign in with your Databricks workspace identity, and your sessions appear in the <workspace-url>/omnigent UI where they can be shared with other workspace users.
Launch Omnigent on your own machine
Install the Omnigent CLI and register your laptop or a VM as a host. The machine you register becomes the execution environment for your agents, so choose the machine that has access to the tools, files, and network your agent needs. This host is only available while the machine is powered on and the omni host process is running.
-
Install Omnigent with the
databricksextra, which adds the managed-platform integration.noteOn Windows, use the UV tab, because the install script supports only macOS and Linux. The tmux-based terminal wrappers are not available on Windows, and agents run without file system or network isolation. See the Windows section of the Omnigent README.
- Install script
- UV
- Pip
Bashcurl -fsSL https://omnigent.ai/install.sh | sh -s -- --extra "databricks"Bashuv tool install "omnigent[databricks]"Bashpip install "omnigent[databricks]" -
Set up model credentials. Run
omni setup:Bashomni setup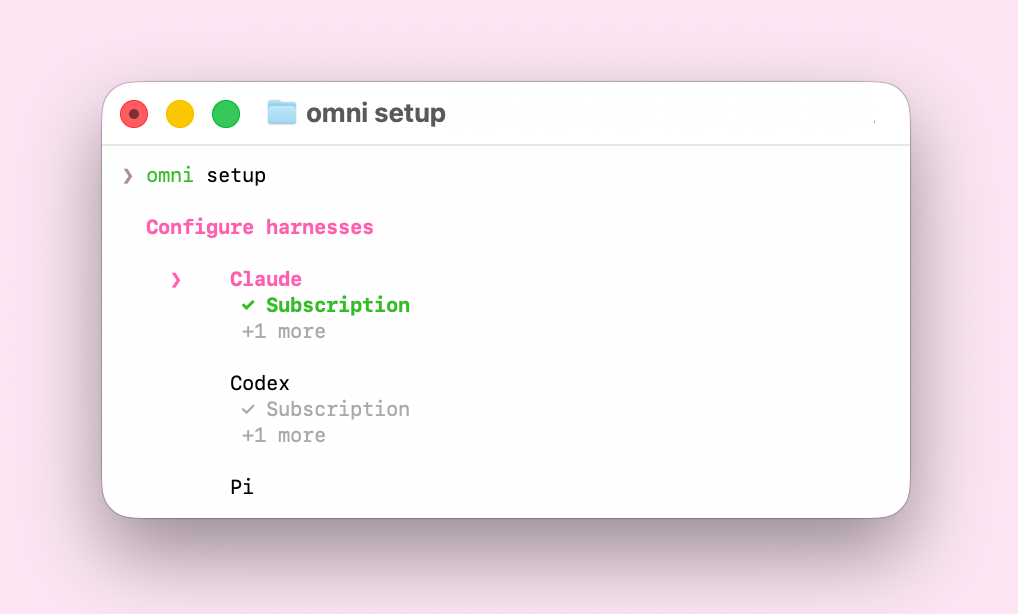
-
Credentials are scoped per harness, so you must select a harness, then choose how to provide its credentials.
- To invoke your workspace's Foundation Model APIs, choose Databricks and enter your workspace URL. This signs you into the workspace and routes that harness's model calls through Unity Gateway, so there are no API keys to manage and usage is governed and billed there.
- Otherwise, provide your own API key, subscription, or gateway.
-
Sign in with your Databricks identity and register the machine as an Omnigent host:
Bashomni login <workspace-url>omni host --server <workspace-url> -
In your web browser, go to
<workspace-url>/omnigent. -
Select New session.
-
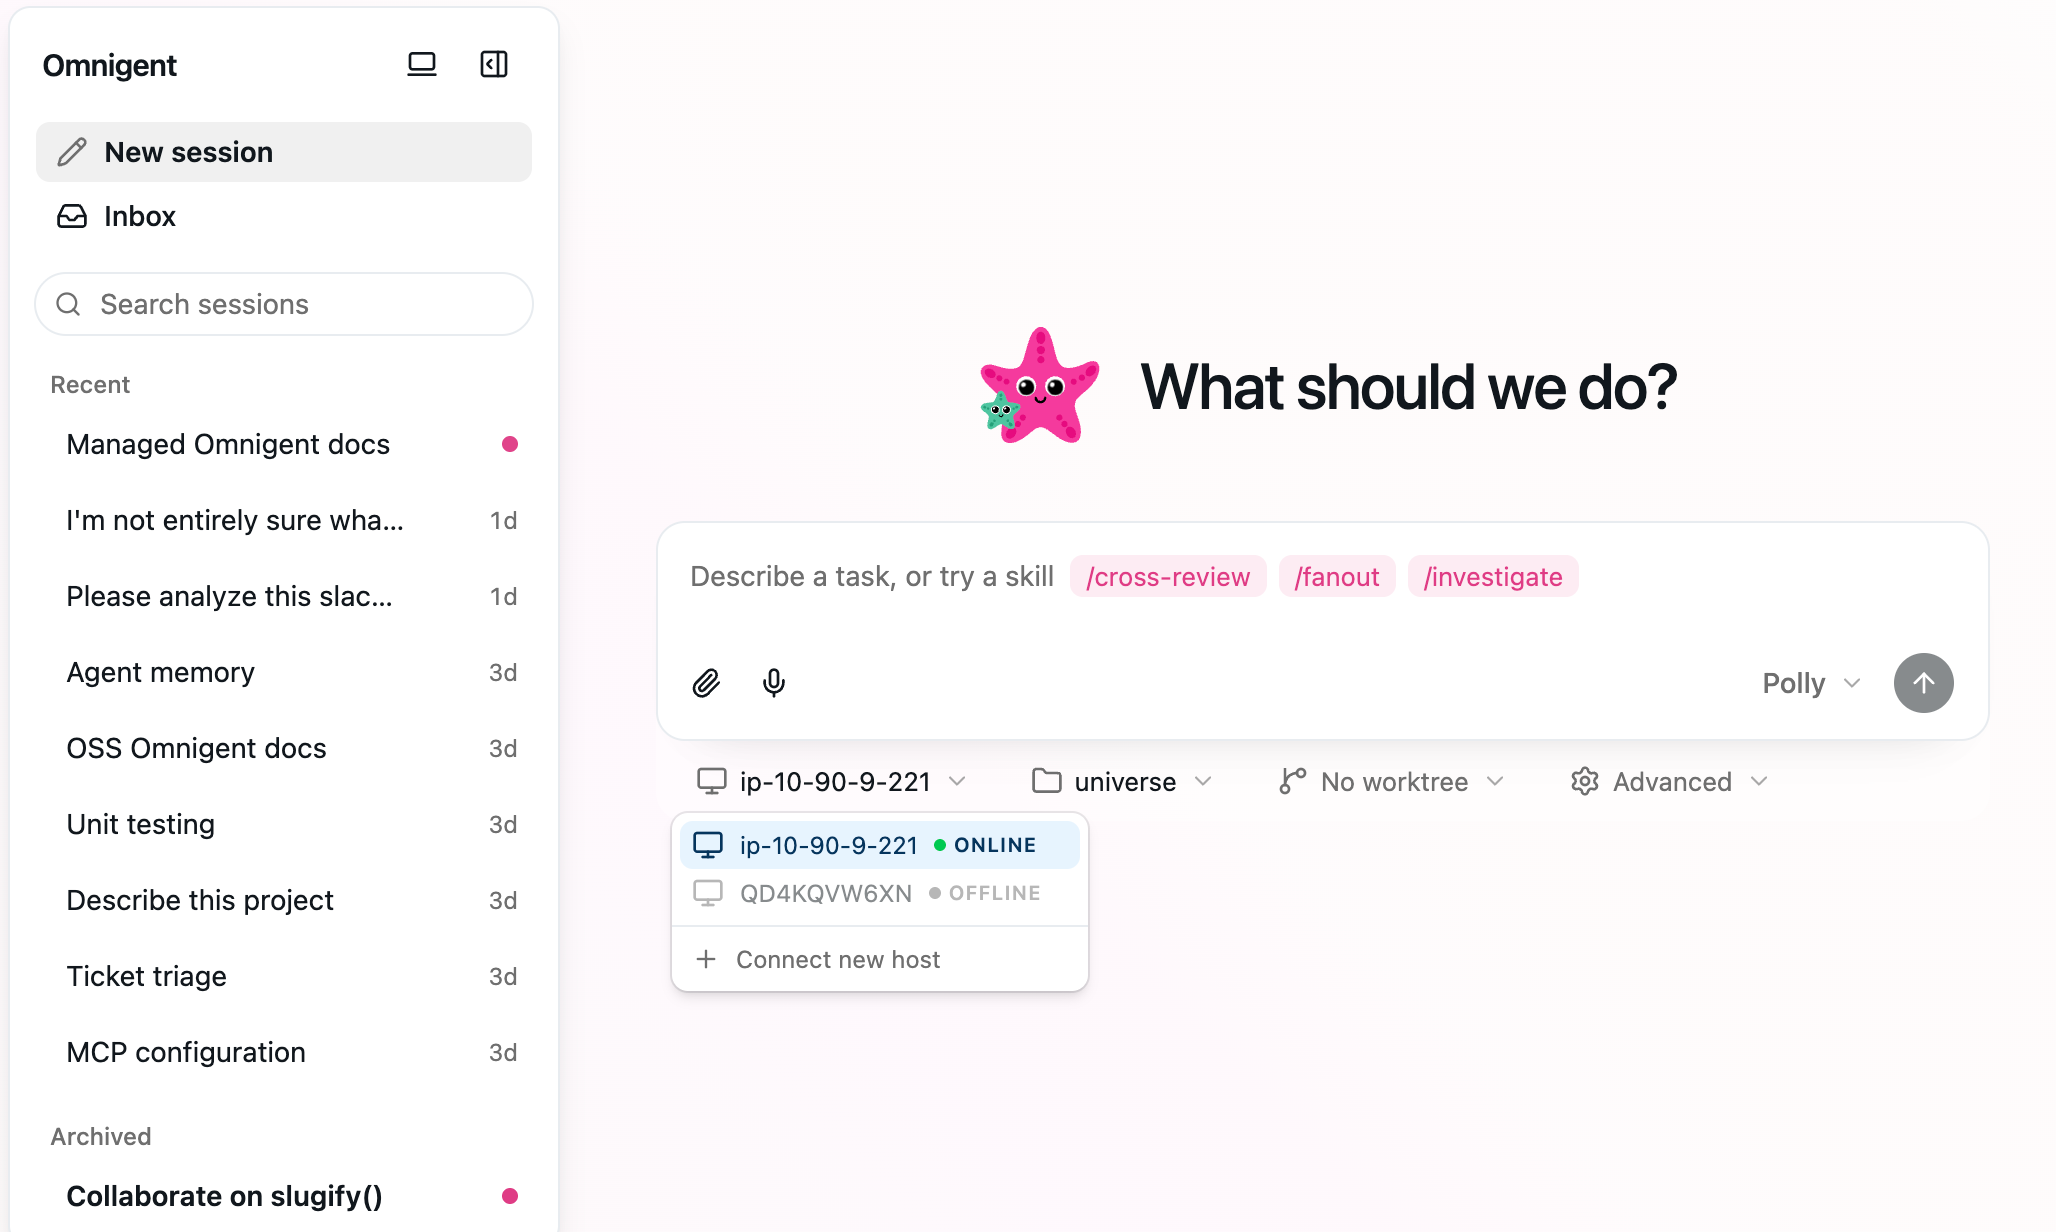
Open the host picker and select the machine you registered. The host you select determines the execution environment the agent runs in, so pick the host that has access to the tools, files, and network your agent needs.
-
Describe a task in the composer and send it to start the session.
Connect the desktop app or mobile app
The Omnigent desktop app is optional and available on macOS, Windows, and Linux. Install the desktop app, then after you have created a host, select Connect to new server in the app and enter your workspace URL.
The Omnigent mobile app connects the same way. Install it from the App Store or use the mobile web UI in any phone browser, then enter your workspace URL. For install and setup details, see the Omnigent mobile docs.
If your workspace restricts network access, an admin may need to allow mobile devices to reach the workspace before you can connect. See Mobile network access.