SSO to Databricks with JumpCloud
This feature is in Public Preview.
This page shows how to configure JumpCloud as the identity provider for single sign-on (SSO) in your Databricks account. JumpCloud supports SAML 2.0.
Enable JumpCloud SSO using SAML
-
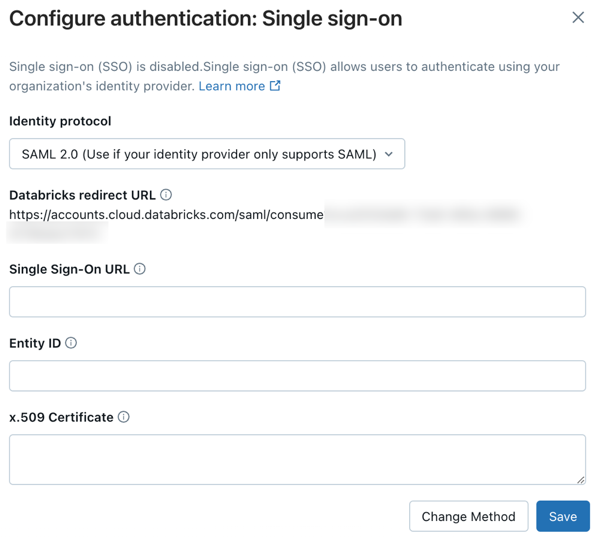
Copy the redirect URL from Databricks.
- As an account admin, log in to the account console and click Security.
- Click the Identity provider setup tab.
- In the Authentication section, configure single sign-on to open the SSO configuration dialog.
- On the Add details step, under Identity protocol, select SAML 2.0.
- Make note of the Databricks Redirect URL value.
-
Create a SAML application in JumpCloud.
- In a new browser tab, log in to your JumpCloud admin portal.
- In the sidebar, under User Authentication, click SSO Applications.
- Click Add New Application > Custom Application > Next.
- In Select the features you would like to enable, select Manage Single Sign-on (SSO) and Configure SSO with SAML.
- In Enter General Info, enter a Display label and a Description.
- Click Save Application.
-
Configure the SSO settings.
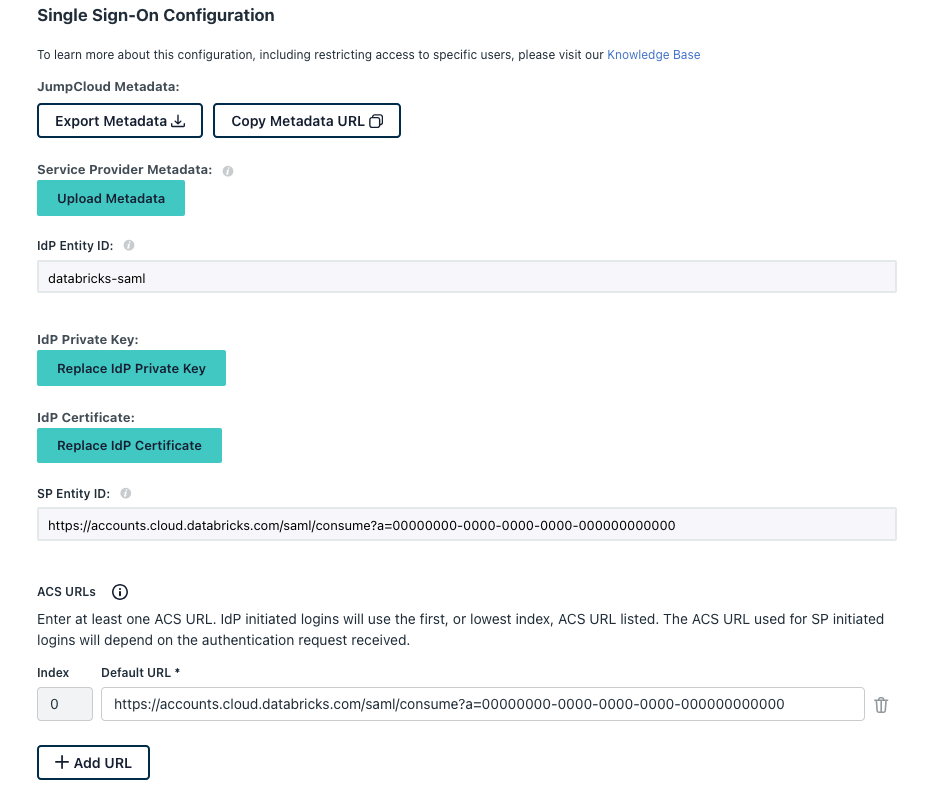
- Click the SSO tab.
- Set IdP Entity ID to a value to uniquely identify this SSO application in your JumpCloud environment. Save this value.
- Set SP Entity ID to the Databricks Redirect URL you copied above.
- Set ACS URLs to the Databricks Redirect URL you copied above.
-
Set the SAML configurations.
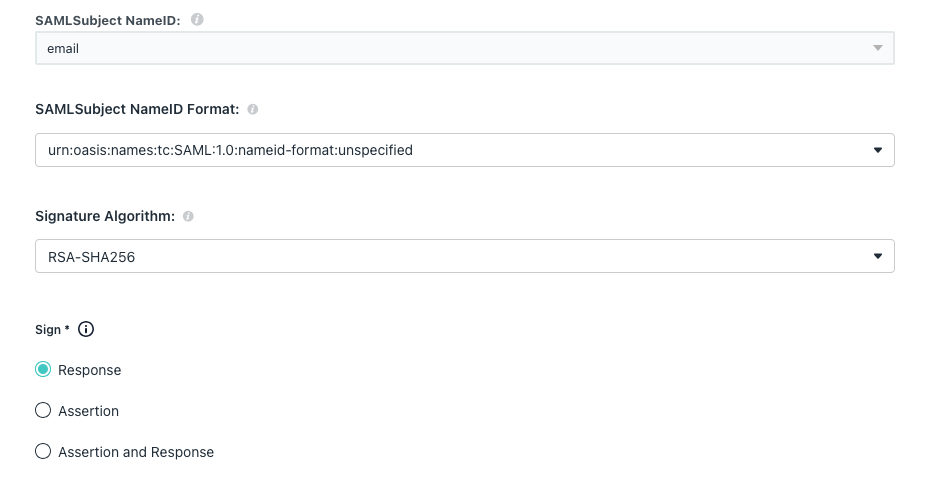
- On the SSO tab, in SAMLSubject NameID select email.
- In SAMLSubject NameID Format select urn:oasis:names:tc:SAML:1.0:nameid-format:unspecified.
- In Signature Algorithm select RSA-SHA256.
- In Sign select Response.
- Copy and save the IDP URL.
-
Download the JumpCloud certificate.
-
In the sidebar, click IDP Certificate Valid and Download Certificate. The certificate is downloaded locally as a file with the
.cerextension. -
Open the
.cerfile in a text editor and copy the file contents. The file is the entire x.509 certificate for the JumpCloud SAML application.important- Do not open it using the macOS keychain, which is the default application for that file type in macOS.
- The certificate is sensitive data. Use caution about where to download it. Delete it from local storage as soon as possible.
-
-
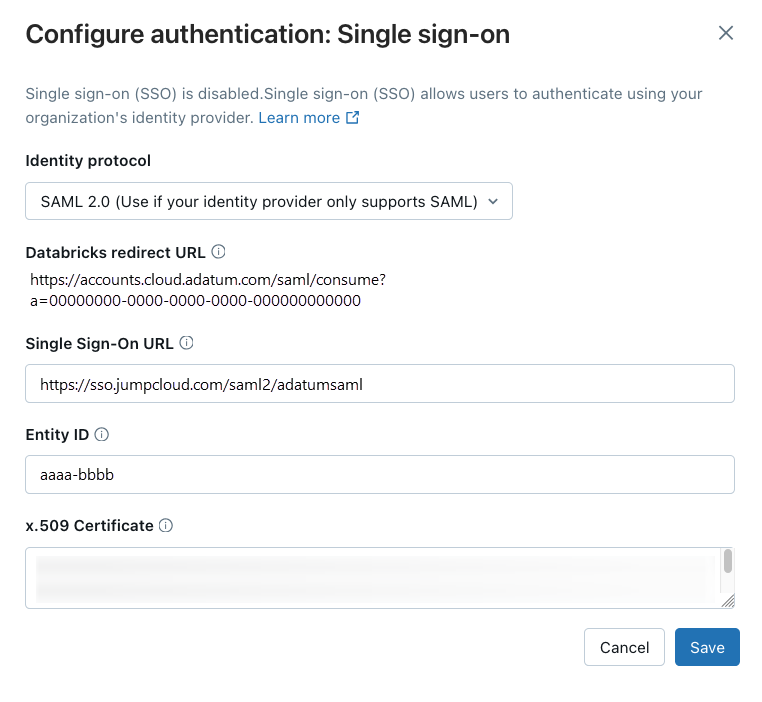
Configure Databricks in the Databricks account console SSO page.
- Set Single Sign-On URL to the JumpCloud field IDP URL.
- Set Identity Provider Entity ID to the JumpCloud field IdP Entity ID.
- Set x.509 Certificate to the JumpCloud x.509 certificate, including the markers for the beginning and end of the certificate.
- On the Enable SSO step, click Enable SSO. Databricks saves the configuration in a disabled state and runs a connection test. You are redirected to complete a sign-in with JumpCloud. If the test succeeds, SSO is enabled automatically. If the test fails, Databricks reports that it couldn't validate the configuration. Review the values you entered and try again.
-
After SSO is enabled, to create user accounts the first time a user signs in, enable just-in-time (JIT) provisioning using the Create new identities during first-time signup toggle in the next-steps card. See Automatically provision users (JIT).
For detailed post-setup testing guidance, including workspace login testing, see Test your SSO configuration.
Add users to Databricks
After you configure SSO, add users to your account. Databricks recommends syncing users from your identity provider using automatic identity management, which syncs users and groups automatically from your identity provider to your Databricks account. See Configure Microsoft Entra ID for automatic identity management. Alternatively, if your identity provider does not support automatic identity management, you can configure SCIM provisioning. See Sync users and groups from your identity provider using SCIM.
Just-in-time (JIT) provisioning, which automatically adds users to Databricks when they first log in using SSO, is on by default for accounts created after February 2, 2026. See Automatically provision users (JIT).