SSO to Databricks with Keycloak
This feature is in Public Preview.
This page shows how to configure Keycloak as the identity provider for single sign-on (SSO) in your Databricks account. Keycloak supports both OpenID Connect (OIDC) and SAML 2.0. Keycloak does not support SCIM to sync users and groups to Databricks.
Enable Keycloak single sign-on
Choose your identity protocol:
- OIDC
- SAML 2.0
-
As an account admin, log in to the account console and click Security.
-
Click the Authentication tab.
-
Next to Authentication, click Manage.
-
Choose Single sign-on with my identity provider.
-
Click Continue.
-
Under Identity protocol, select OpenID Connect.
-
On the Authentication tab, make note of the Databricks Redirect URL value.
-
In a new browser tab, log in to your Keycloak admin console.
-
Select the realm for Databricks integration or create a new one.
-
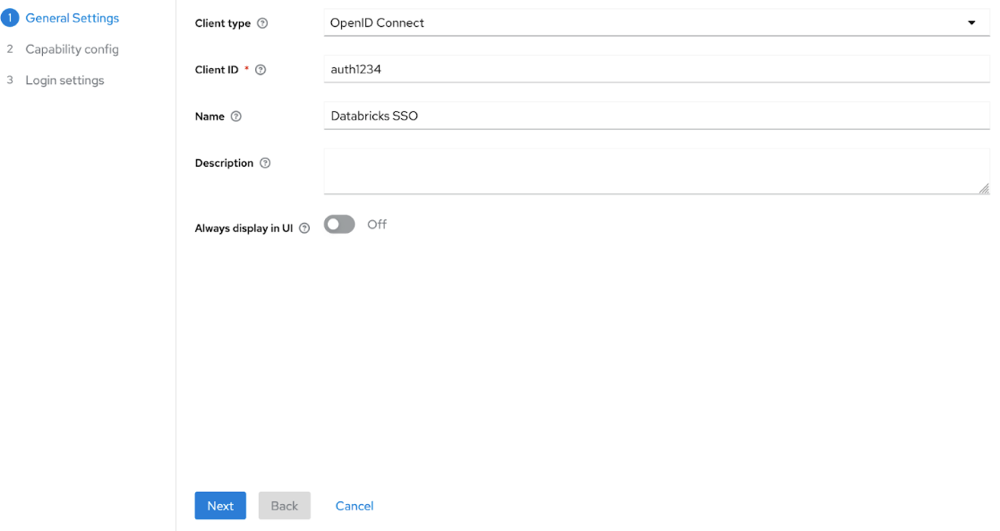
Create a new client:
-
Click Clients and click Create client.
-
In Client type, select OpenID Connect.
-
Enter a Client ID and Name.
-
Click Next and Save.
-
-
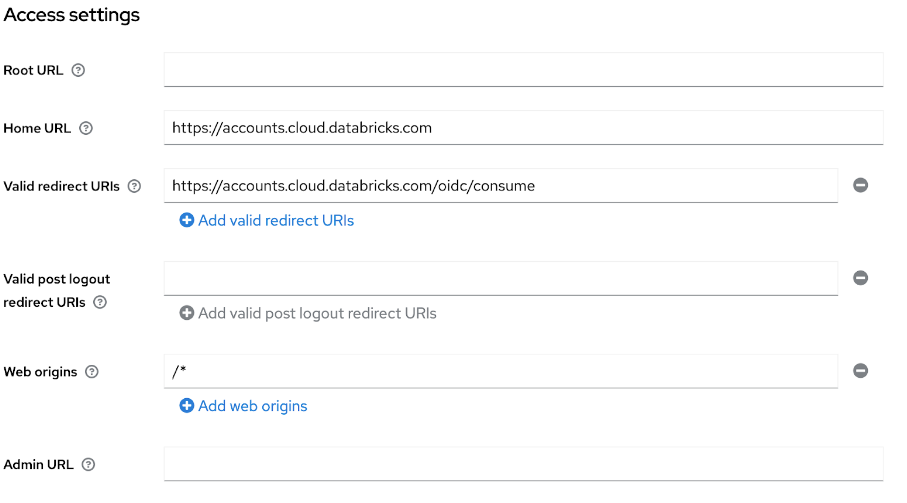
Configure the Databricks client:
- In Access Settings, set Home URL to your Databricks account URL.
- Set Valid redirect URIs to the Databricks Redirect URL you copied above.
- In Capability config, set Client authentication to On for confidential access.
-
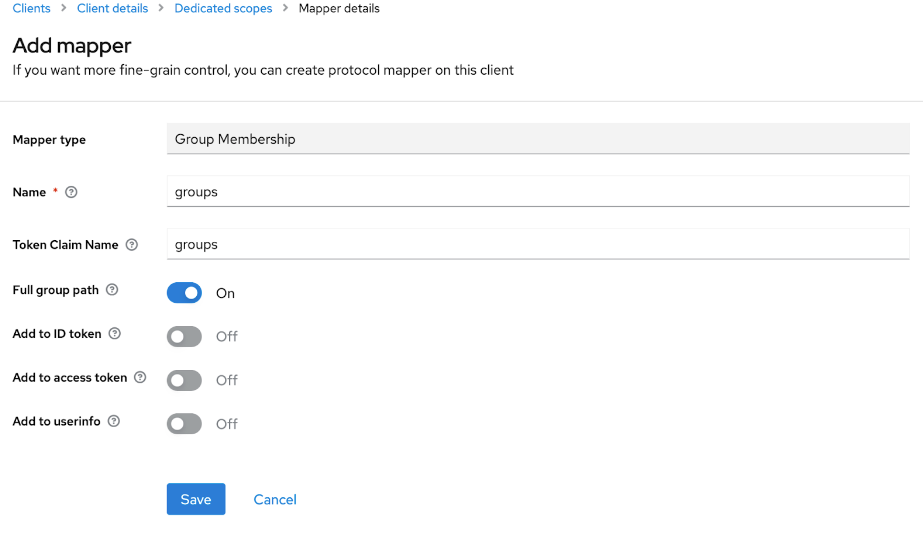
Set up group membership mapping:
- Click Client scopes and select the dedicated scope for your client.
- In the Mappers tab, click Configure a new mapper.
- In Mapper type, select Group Membership.
- Set both Name and Token Claim Name to groups.
- Toggle Full group path to On or Off based on your preference.
-
Return to the Databricks account console Authentication tab and enter values you copied from Keycloak:
- Client ID: The Client ID from Keycloak.
- Client secret: Found in the Credentials tab of your Keycloak client.
- OpenID issuer URL: Your Keycloak URL with realm (For example,
https://keycloak.example.com/realms/your-realm).
-
Click Save.
-
Click Test SSO to validate that your SSO configuration is working properly. Databricks opens a new browser window and attempts to authenticate using Keycloak. Complete the sign-in flow and review the test results.
-
Click Enable SSO to enable single sign-on for your account.
-
Test account console login with SSO. For testing steps, see Test your SSO configuration.
-
As an account admin, log in to the account console and click Security.
-
Click the Authentication tab.
-
Next to Authentication, click Manage.
-
Choose Single sign-on with my identity provider.
-
Click Continue.
-
Under Identity protocol, select SAML 2.0.
-
On the Authentication tab, make note of the Databricks Redirect URL value.
-
In a new browser tab, log in to your Keycloak admin console.
-
Select the realm for Databricks integration or create a new one.
-
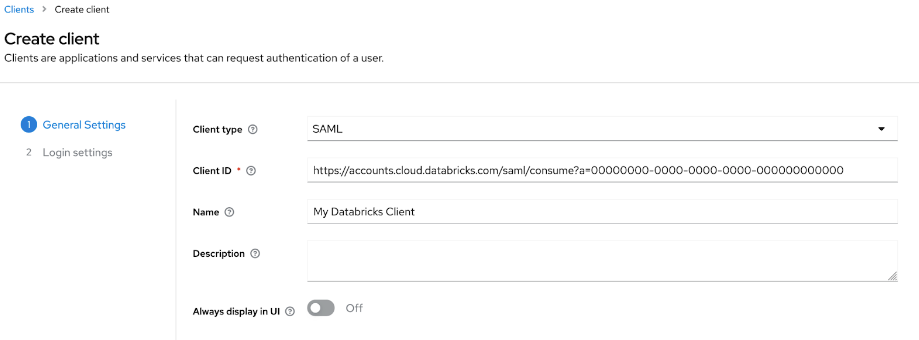
Create a new client:
- Click Clients and click Create client.
- In Client type, select SAML.
- Enter a Client ID and Name.
- Click Next and Save.
- In login settings, set Valid redirect URIs to the Databricks Redirect URL you copied above.
-
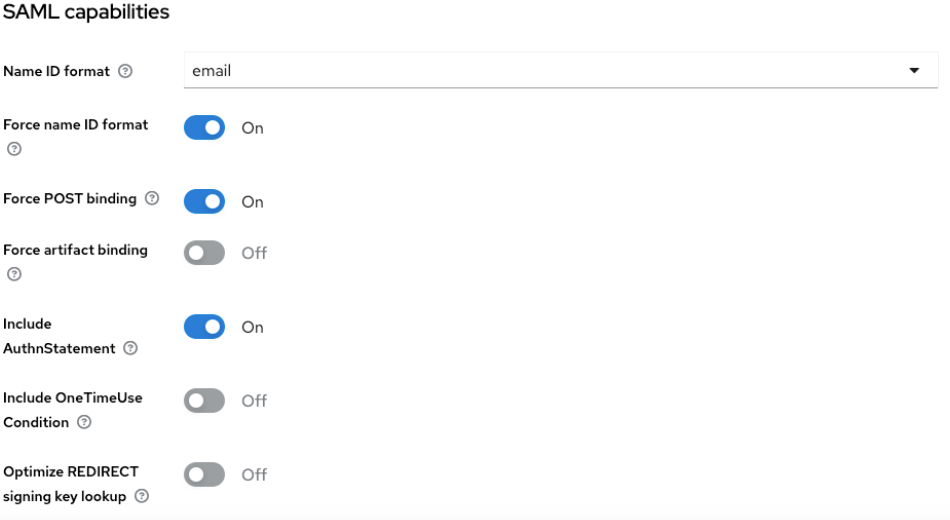
Configure the client:
- In the Settings tab under SAML capabilities, set Name ID format to email.
- Turn on Force name ID format.
- Click Save.
-
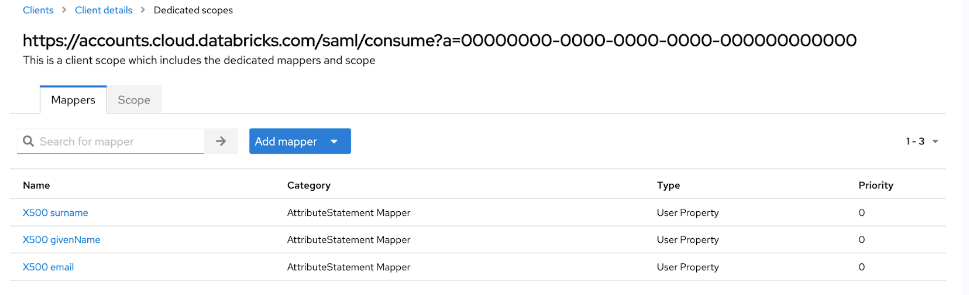
Set up SAML attribute mapping:
- Click Client scopes and select the dedicated scope for your client.
- On the Mappers tab, click Add predefined mapper.
- Select X500 email, X500 givenName, and X500 surname and click Add.
-
Retrieve SAML metadata:
- Click Realm settings and General.
- Click on SAML 2.0 Identity Provider Metadata.
- From the metadata, save the following values:
- The
Locationattribute in theSingleSignOnServiceelement (For example,https://my-idp.example.com/realms/DatabricksRealm/protocol/saml). This is the Single Sign-On URL in Databricks - The
entityIDattribute in theEntityDescriptorelement (For example,https://my-idp.example.com/realms/DatabricksRealm). - The
X509Certificatetag.
-
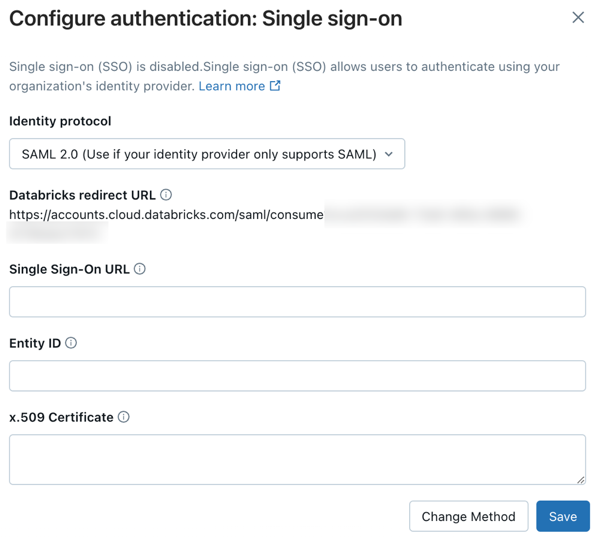
Return to the Databricks account console Authentication tab and enter values you copied from Keycloak:
- Single Sign-On URL: The
Locationattribute in theSingleSignOnServiceelement - Identity Provider Entity ID: The
entityIDattribute in theEntityDescriptorelement - x.509 Certificate: The
X509Certificatetag
- Single Sign-On URL: The
-
Click Save.
-
Click Test SSO to validate that your SSO configuration is working properly. Databricks opens a new browser window and attempts to authenticate using Keycloak. Complete the sign-in flow and review the test results.
-
Click Enable SSO to enable single sign-on for your account.
-
Test account console login with SSO. For testing steps, see Test your SSO configuration.
Add users to Databricks
After you configure SSO, add users to your account. Databricks recommends syncing users from your identity provider using automatic identity management, which syncs users and groups automatically from your identity provider to your Databricks account. See Configure Microsoft Entra ID for automatic identity management. Alternatively, if your identity provider does not support automatic identity management, you can configure SCIM provisioning. See Sync users and groups from your identity provider using SCIM.
Just-in-time (JIT) provisioning, which automatically adds users to Databricks when they first log in using SSO, is on by default for accounts created after February 2, 2026. See Automatically provision users (JIT).