Customize Databricks notebook appearance
You can customize the appearance of your Databricks notebook with several settings: remove cell margins, add line numbers, wrap lines, adjust font size, and view in dark mode.
Adjust editor font size
You can adjust the editor font size in Developer Settings. This setting applies to the notebook, SQL, and file editors.
- Click your username at the upper-right of your workspace, then click Settings in the drop-down list.
- In the Settings sidebar, select Developer.
- In the Editor font size setting, select the font size.
To increase the font size from inside the notebook, SQL, or file editor, press Option + Plus sign (+) (Mac) or Alt + Plus (+) (Windows/Linux). To decrease the font size, press Option + Minus sign (-) (Mac) or Alt + Minus (+) (Windows/Linux). This change updates the Editor font size developer setting.
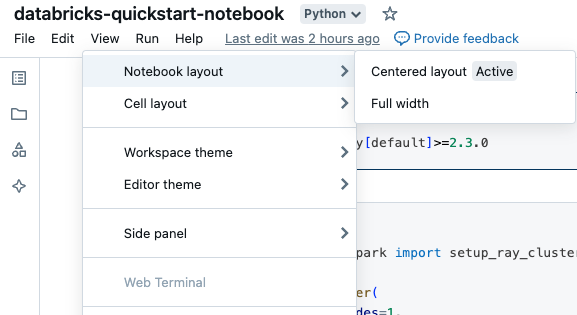
Remove cell margins
You can expand or minimize margins by clicking View > Notebook layout in the notebook menu.
Line and command numbers
To show or hide line numbers or command numbers, select Line numbers or Command numbers from the View menu. For line numbers, you can also use the keyboard shortcut Control+L. When a cell is in an error state, line numbers are displayed regardless of the selection.
If you turn on line or command numbers, Databricks saves your preference and shows them in all of your other notebooks for that browser.
Line wrapping
You can turn on or turn off line wrapping in notebook cells, allowing text to either wrap onto multiple lines or remain on a single line with horizontal scrolling.
- In the upper-right corner of any page, click your profile photo, then click Settings.
- Click Developer settings > Wrap lines.
View notebooks in dark mode
You can display notebooks in dark mode. To turn dark mode on or off, select View > Theme and select Light theme or Dark theme.
If you turn on line or command numbers, Databricks saves your preference and shows them in your other notebooks for that browser.
Browse data
To explore tables and volumes available to use in the notebook, click ![]() on the left side of the notebook to open the schema browser. See Browse data for more details.
on the left side of the notebook to open the schema browser. See Browse data for more details.