Run a file on a cluster or a file or notebook as a job in Databricks using the Databricks extension for Visual Studio Code
The Databricks extension for Visual Studio Code allows you to run your Python code on a cluster or your Python, R, Scala, or SQL code or notebook as a job in Databricks.
This information assumes that you have already installed and set up the Databricks extension for Visual Studio Code. See Install the Databricks extension for Visual Studio Code.
To debug code or notebooks from within Visual Studio Code, use Databricks Connect. See Debug code using Databricks Connect for the Databricks extension for Visual Studio Code and Run and debug notebook cells with Databricks Connect using the Databricks extension for Visual Studio Code.
Run a Python file on a cluster
This feature is not available when using serverless compute.
To run a Python file on a Databricks cluster using the Databricks extension for Visual Studio Code, with the extension and your project opened:
- Open the Python file that you want to run on the cluster.
- Do one of the following:
-
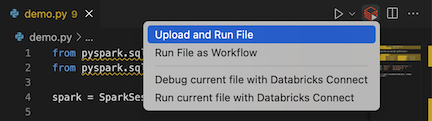
In the file editor's title bar, click the Run on Databricks icon, and then click Upload and Run File.
-
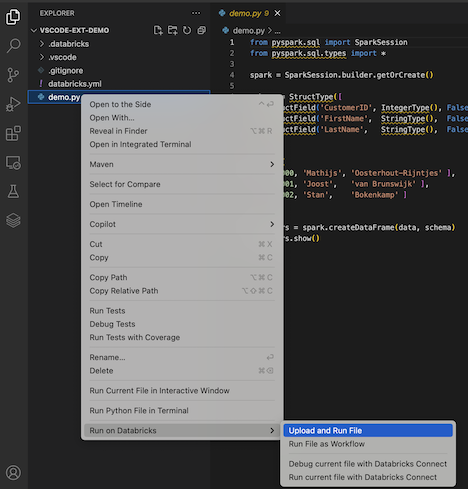
In Explorer view (View > Explorer), right-click the file, and then select Run on Databricks > Upload and Run File from the context menu.
-
The file runs on the cluster, and output is available in the Debug Console (View > Debug Console).
Run a Python file as a job
To run a Python file as a Databricks job using the Databricks extension for Visual Studio Code, with the extension and your project opened:
- Open the Python file that you want to run as a job.
- Do one of the following:
-
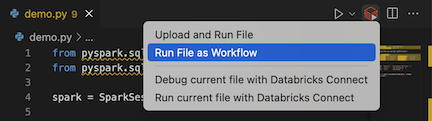
In the file editor's title bar, click the Run on Databricks icon, and then click Run File as Workflow.
-
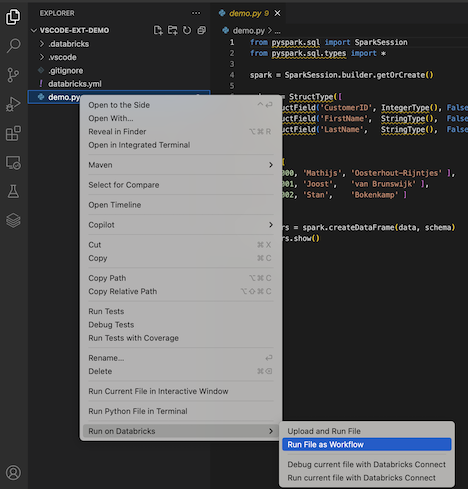
In Explorer view (View > Explorer), right-click the file, and then select Run on Databricks > Run File as Workflow from the context menu.
-
A new editor tab appears, titled Databricks Job Run. The file runs as a job in the workspace, and any output is printed to the new editor tab's Output area.
To view information about the job run, click the Task run ID link in the new Databricks Job Run editor tab. Your workspace opens and the job run's details are displayed in the workspace.
Run a Python, R, Scala, or SQL notebook as a job
To run a notebook as a Databricks job using the Databricks extension for Visual Studio Code, with the extension and your project opened:
-
Open the notebook that you want to run as a job.
tipTo turn a Python, R, Scala, or SQL file into a Databricks notebook, add the comment
# Databricks notebook sourceto the beginning of the file, and add the comment# COMMAND ----------before each cell. For more information, see Convert a file to a notebook.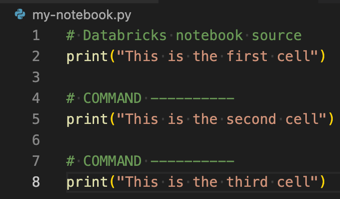
-
Do one of the following:
- In the notebook file editor's title bar, click the Run on Databricks icon, and then click Run File as Workflow.
noteIf Run on Databricks as Workflow is not available, see Create a custom run configuration.
- In Explorer view (View > Explorer), right-click the notebook file, and then select Run on Databricks > Run File as Workflow from the context menu.
A new editor tab appears, titled Databricks Job Run. The notebook runs as a job in the workspace. The notebook and its output are displayed in the new editor tab's Output area.
To view information about the job run, click the Task run ID link in the Databricks Job Run editor tab. Your workspace opens and the job run's details are displayed in the workspace.
Create a custom run configuration
A custom run configuration for the Databricks extension for Visual Studio Code allows you to pass custom arguments to a job or a notebook, or create different run settings for different files.
To create a custom run configuration, click Run > Add Configuration from the main menu in Visual Studio Code. Then select either Databricks for a cluster-based run configuration or Databricks: Workflow for a job-based run configuration.
For example, the following custom run configuration modifies the Run File as Workflow launch command to pass the --prod argument to the job:
{
  "version": "0.2.0",
  "configurations": [
    {
      "type": "databricks-workflow",
      "request": "launch",
      "name": "Run on Databricks as Workflow",
      "program": "${file}",
      "parameters": {},
      "args": ["--prod"]
    }
  ]
}
Add "databricks": true to your "type": "python" configuration if you want to use Python configuration and take advantage of the Databricks Connect authentication that is part of the extension setup.
Using custom run configurations, you can also pass in command-line arguments and run your code just by pressing F5. For more information, see Launch configurations in the Visual Studio Code documentation.