Get started with Databricks Apps
This article helps you get started with Databricks Apps using a step-by-step example to create a simple app in your Databricks workspace using a template that follows Databricks best practices.
This example walks you through:
- Creating an app from a template
- Viewing the app after it's deployed
- Copying the app template to your computer for further development
- Running the app locally
- Re-deploying the app to your workspace
By the end of this article, you’ll be able to iterate on your app locally and deploy updates to Databricks.
Prerequisites
Before you complete this tutorial, make sure that your Databricks workspace and local development environment are configured correctly. See Set up your Databricks Apps workspace and development environment.
Step 1: Install dependencies
Open a terminal and run the following commands to:
- Install the Python libraries required by the example app.
- Create a local directory for the source and configuration files for your app.
pip install gradio
pip install pandas
mkdir gradio-hello-world
cd gradio-hello-world
gradio-hello-world is the local directory for your app files.
Step 2: Create the app
-
In your Databricks workspace, click + New > App in the left sidebar.
-
Choose the Gradio Hello world template.
-
Name the app gradio-hello-world and click Install.
This creates a new app based on the selected template and deploys it to your workspace.
Step 3: View the app
After you create an app, it starts automatically and displays a URL that you can use to preview it. View the app URL and deployment status on the Overview page:
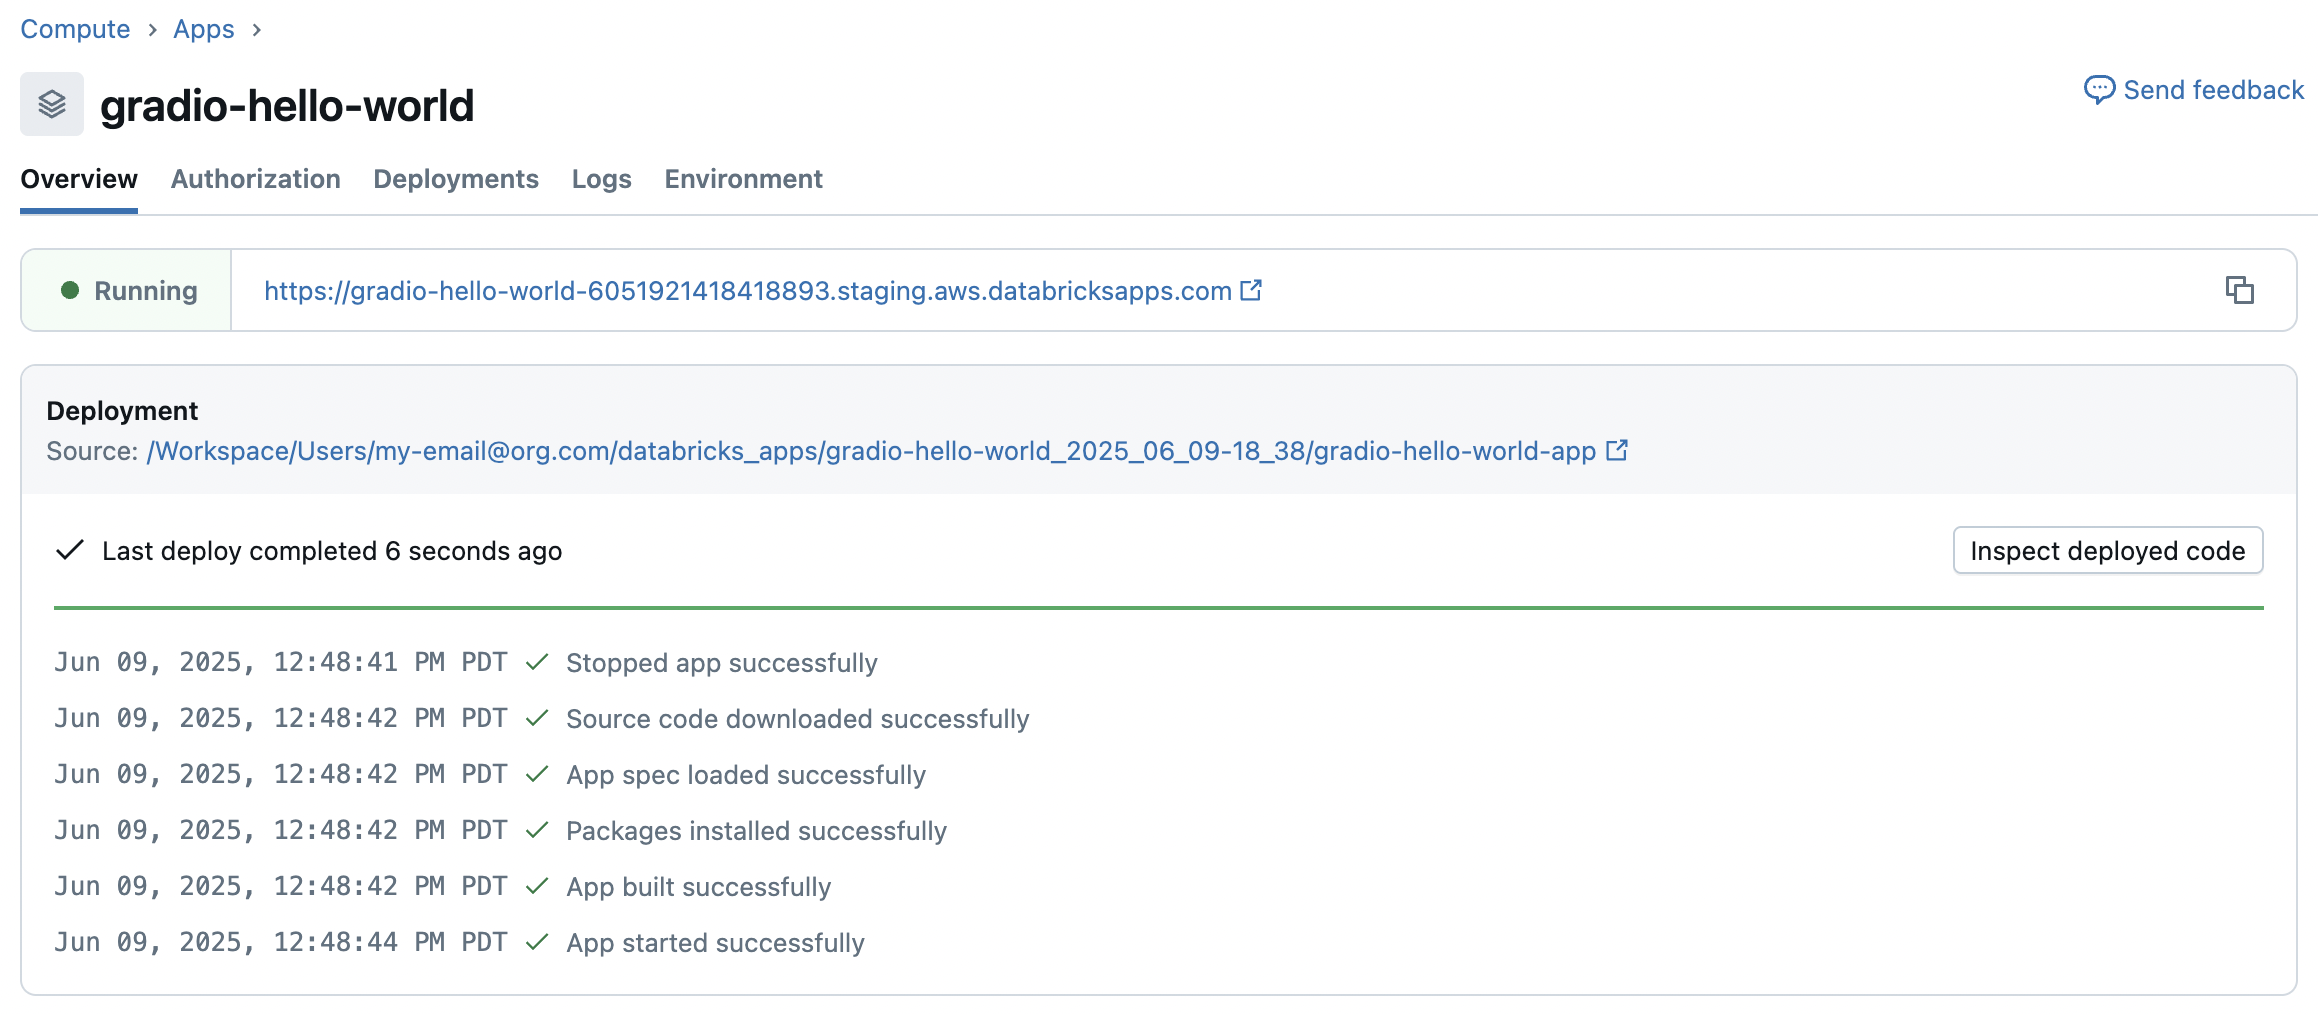
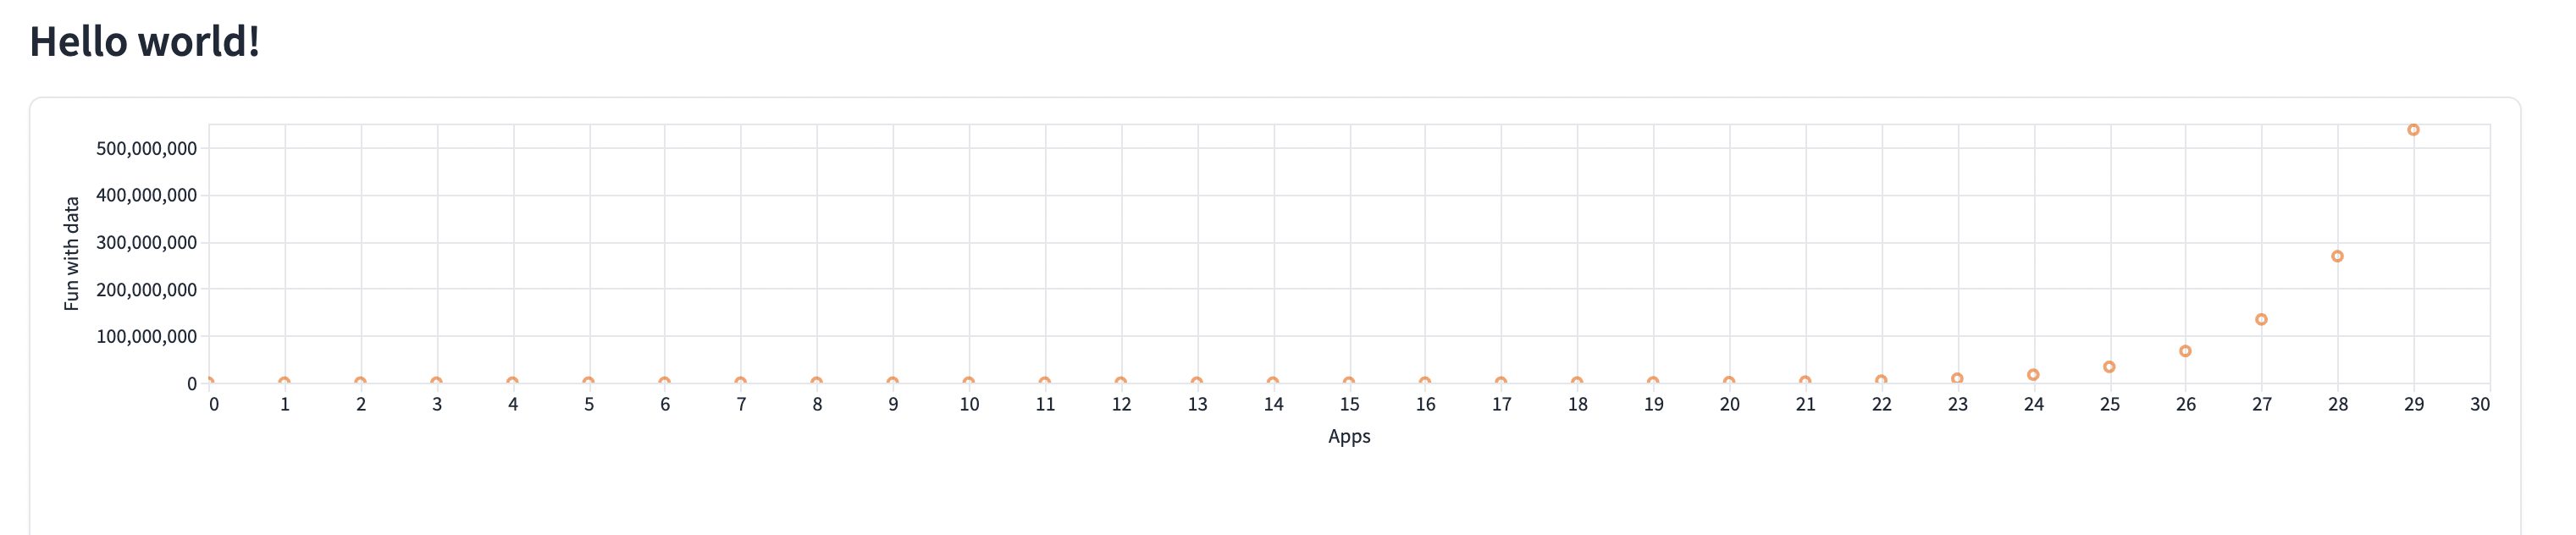
Click the URL to view the app:
Databricks generates the app URL automatically based on your app name and workspace ID. You can't change the URL after you create the app. If you need a different URL, create a new app with a different name. For more information, see App URL.
Step 4: Copy the app to your computer
After you create the app, you can download the source code to your local machine to customize it.
-
Copy the commands under Sync the files:

-
In a terminal, navigate to the
gradio-hello-worldlocal directory that you created, then run the copied commands:Bashdatabricks workspace export-dir /Workspace/Users/my-email@org.com/databricks_apps/gradio-hello-world_2026_02_03-22_34/gradio-hello-world-app .
...
Export complete
gradio-hello-world % databricks sync --watch . /Workspace/Users/my-email@org.com/databricks_apps/gradio-hello-world_2026_02_03-22_34/gradio-hello-world-app
...
Initial Sync CompleteThe first command exports three files from your workspace to your local directory:
app.py,app.yaml, andrequirements.txt. The second command starts a sync process that watches for local file changes and automatically uploads them to your workspace.app.pycontains the code that implements the app's functionality and user interface.app.yamldefines the app's configuration, including its entry point and permissions.requirements.txtlists the Python packages required by the app.
Step 5: Modify and test the app locally
-
Optionally, customize and develop your app locally. For example, you might modify
app.pyto make the data interactive, add a theme or styling options, or allow data uploads. -
To test your app, run
python app.py:Bashpython app.py
Running on local URL: http://127.0.0.1:7860
... -
To view the app, navigate to
http://127.0.0.1:7860in a browser window. -
Optionally, use the databricks apps run-local command to run and debug the app:
Bashdatabricks apps run-local --prepare-environment --debugThis command installs all dependencies and prepares the virtual environment, then starts the app and the debugger on port 5678. Navigate to
http://localhost:8001to view the app.To set breakpoints in Visual Studio Code, install the Python debugger extension, then go to Run > Start Debugging > Remote Attach.
Step 6: Re-deploy the app to your workspace
To re-deploy the app, copy the command under Deploy to Databricks Apps on the app overview page:

Run the command from within the gradio-hello-world local directory.
The command succeeds with:
{
  "create_time": "2026-02-03T23:25:38Z",
  "creator": "my-email@org.com",
  "deployment_artifacts": {
    "source_code_path": "/Workspace/Users/4cfd4a36-2cef-4155-88c4-d258ed6d0d91/src/01f10157a60a113e980014bebd5f4a03"
  },
  "deployment_id": "01f10157a60a113e980014bebd5f4a03",
  "mode": "SNAPSHOT",
  "source_code_path": "/Workspace/Users/my-email@org.com/databricks_apps/gradio-hello-world_2026_02_03-22_34/gradio-hello-world-app",
  "status": {
    "message": "App started successfully",
    "state": "SUCCEEDED"
  },
  "update_time": "2026-02-03T23:25:41Z"
}
To view the deployment status, go to the Overview page for the app.
Next steps
Now that you deployed and customized your first app, you can:
- Configure authorization to manage who can access and edit your app.
- Integrate your app with Databricks platform features like Databricks secrets or Databricks SQL.
- Share your app with other users in your workspace or across your organization.
- Explore more app templates to experiment with different frameworks and capabilities.