Model Context Protocol (MCP) on Databricks
MCP is an open source standard that connects AI agents to tools, resources, prompts, and other contextual information.
Databricks provides the following types of MCP servers:
-
- Managed MCP
- Immediately access Databricks features using pre-configured MCP servers.
-
- External MCP
- Securely connect to MCP servers hosted outside of Databricks using managed connections.
-
- Custom MCP
- Host a custom MCP server as a Databricks App.
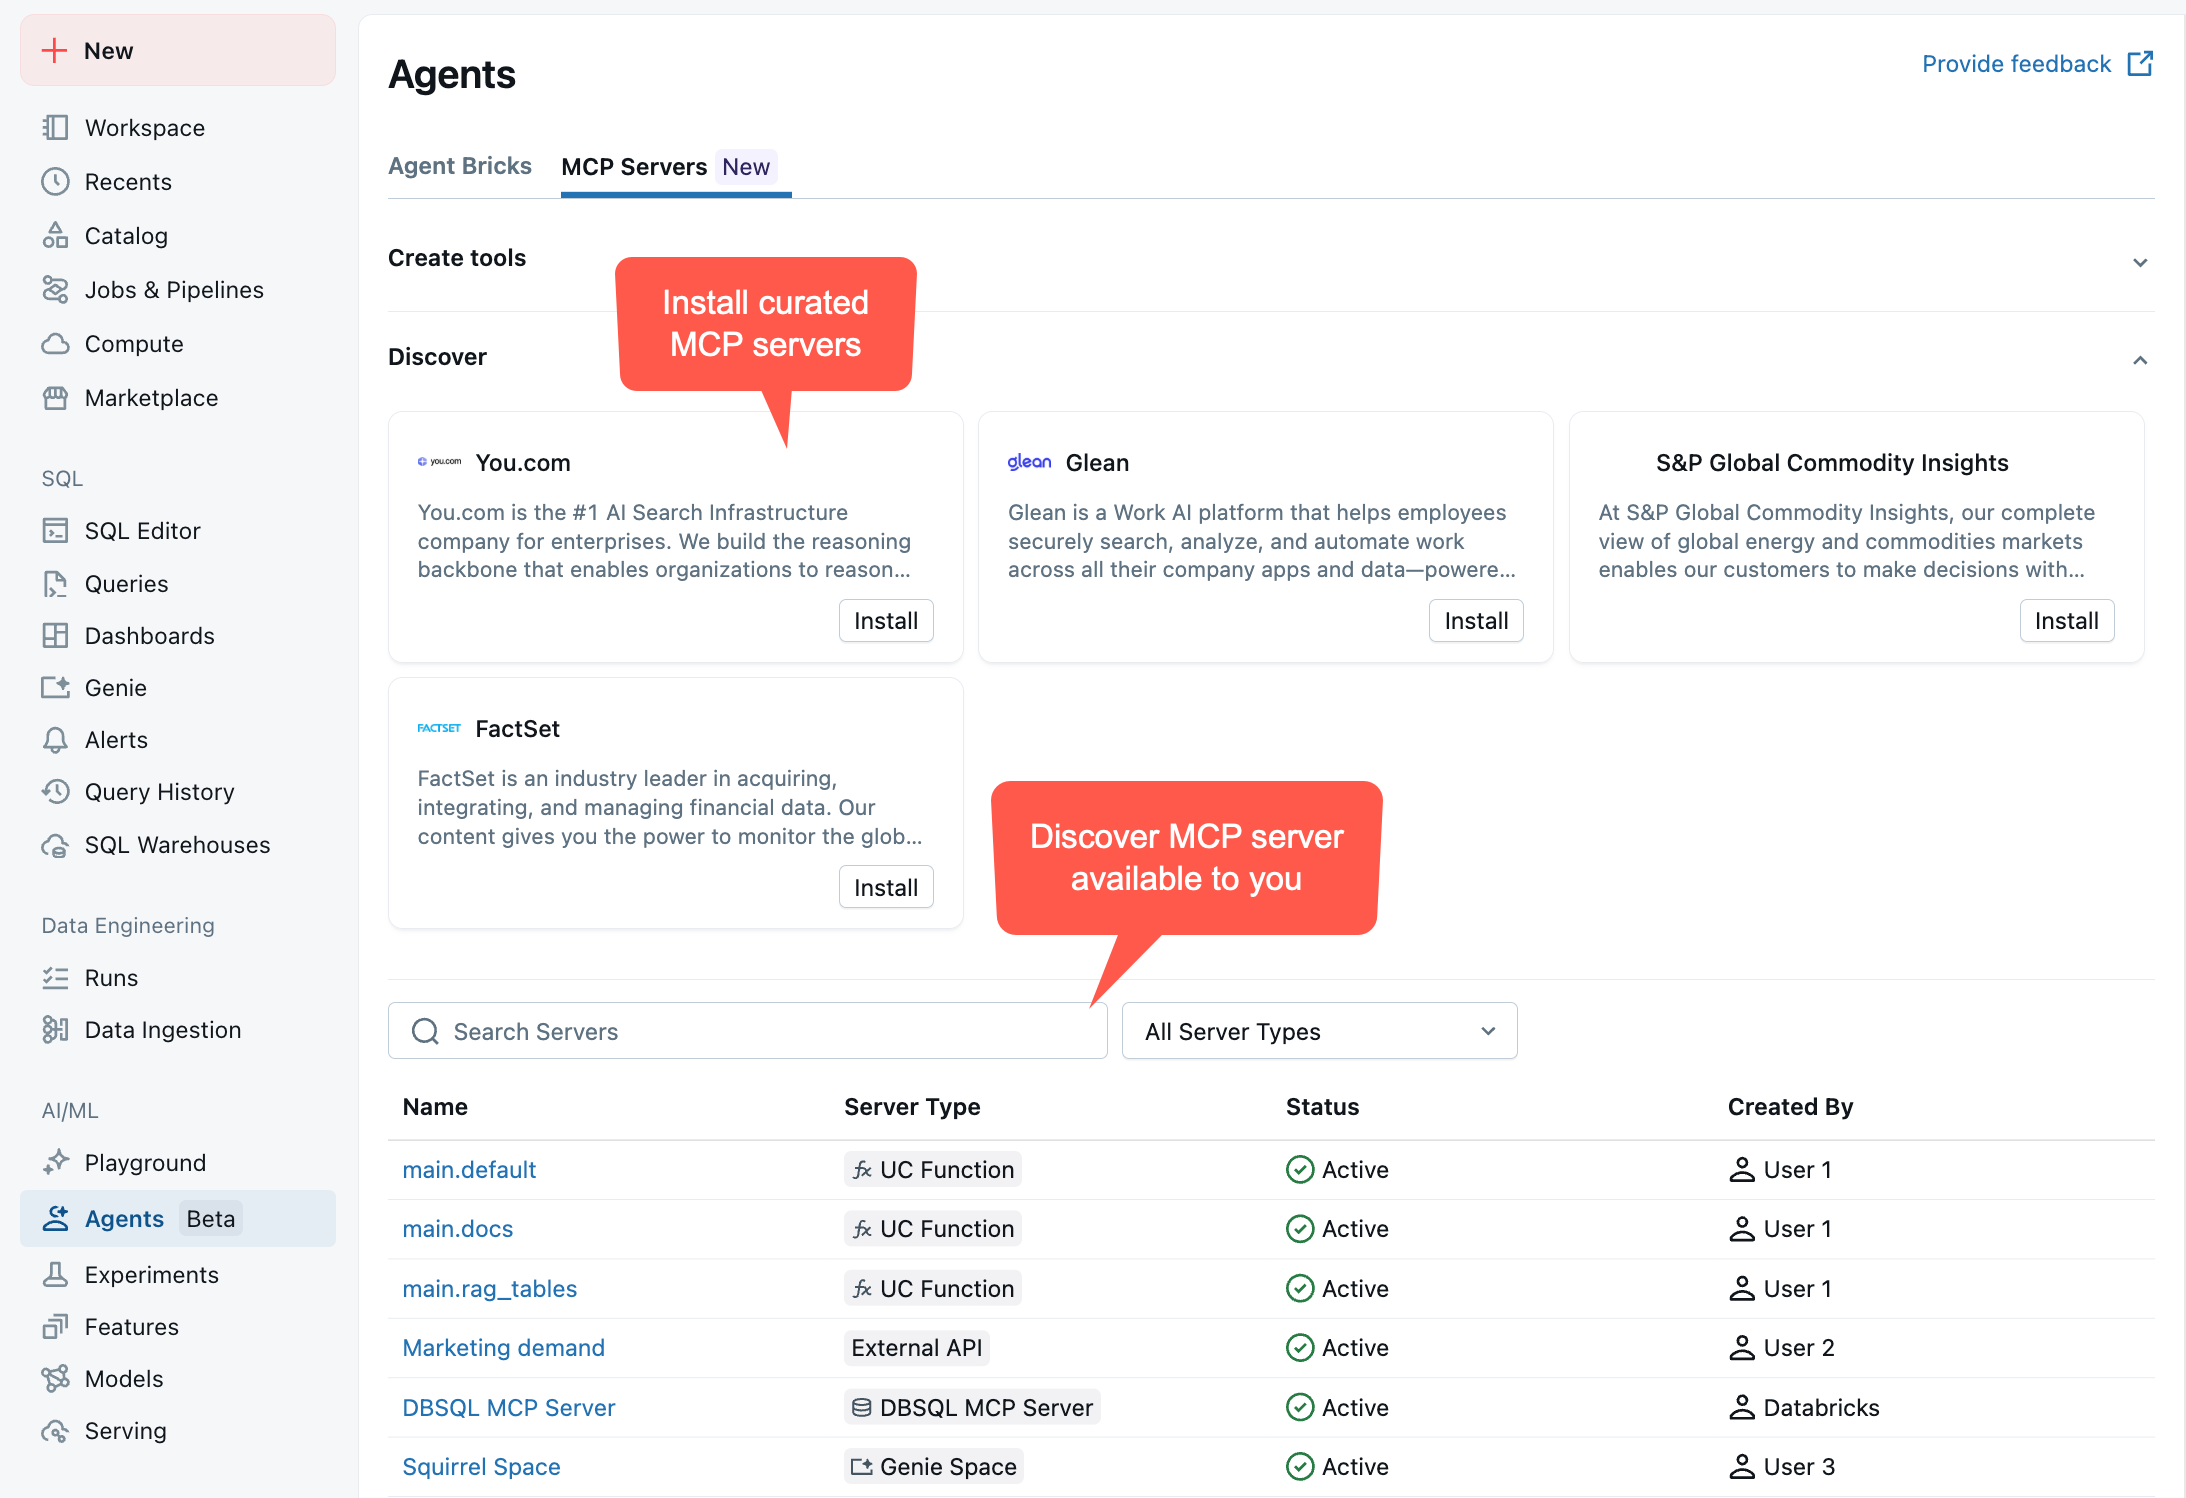
To see your available MCP servers, go to your workspace > Agents > MCP Servers:
How to use MCP servers
MCP is designed to be used with an LLM that dynamically discovers available tools, decides which tools to call, and interprets the output. When building agents that use MCP servers, Databricks recommends:
- Do not hardcode tool names: The set of available tools may change as Databricks adds new capabilities or modifies existing ones. Your agent should dynamically discover tools at runtime by listing tools.
- Do not parse tool output programmatically: Tool output formats are not guaranteed to remain stable. Let your LLM interpret and extract information from tool responses.
- Let the LLM decide: Your agent's LLM should determine which tools to call based on the user's request and the tool descriptions provided by the MCP server.
These practices allow your agents to automatically benefit from improvements to MCP servers without requiring code changes.
Compute pricing
Custom MCP servers are subject to Databricks Apps pricing.
Managed MCP server pricing depends on the type of feature:
-
Unity Catalog functions use serverless general compute pricing.
-
Genie spaces use serverless SQL compute pricing.
-
Databricks SQL servers use Databricks SQL pricing.
-
Vector Search indices use Vector Search pricing.