View training results with MLflow runs
This article describes how to use MLflow runs to view and analyze the results of a model training experiment, and how to manage and organize runs. For more information about MLflow experiments, see Organize training runs with MLflow experiments.
An MLflow run corresponds to a single execution of model code. Each run records information such as the notebook that launched the run, any models created by the run, model parameters and metrics saved as key-value pairs, tags for run metadata, and any artifacts, or output files, created by the run.
All MLflow runs are logged to the active experiment. If you have not explicitly set an experiment as the active experiment, runs are logged to the notebook experiment.
View run details
You can access a run either from its experiment details page or directly from the notebook that created the run.
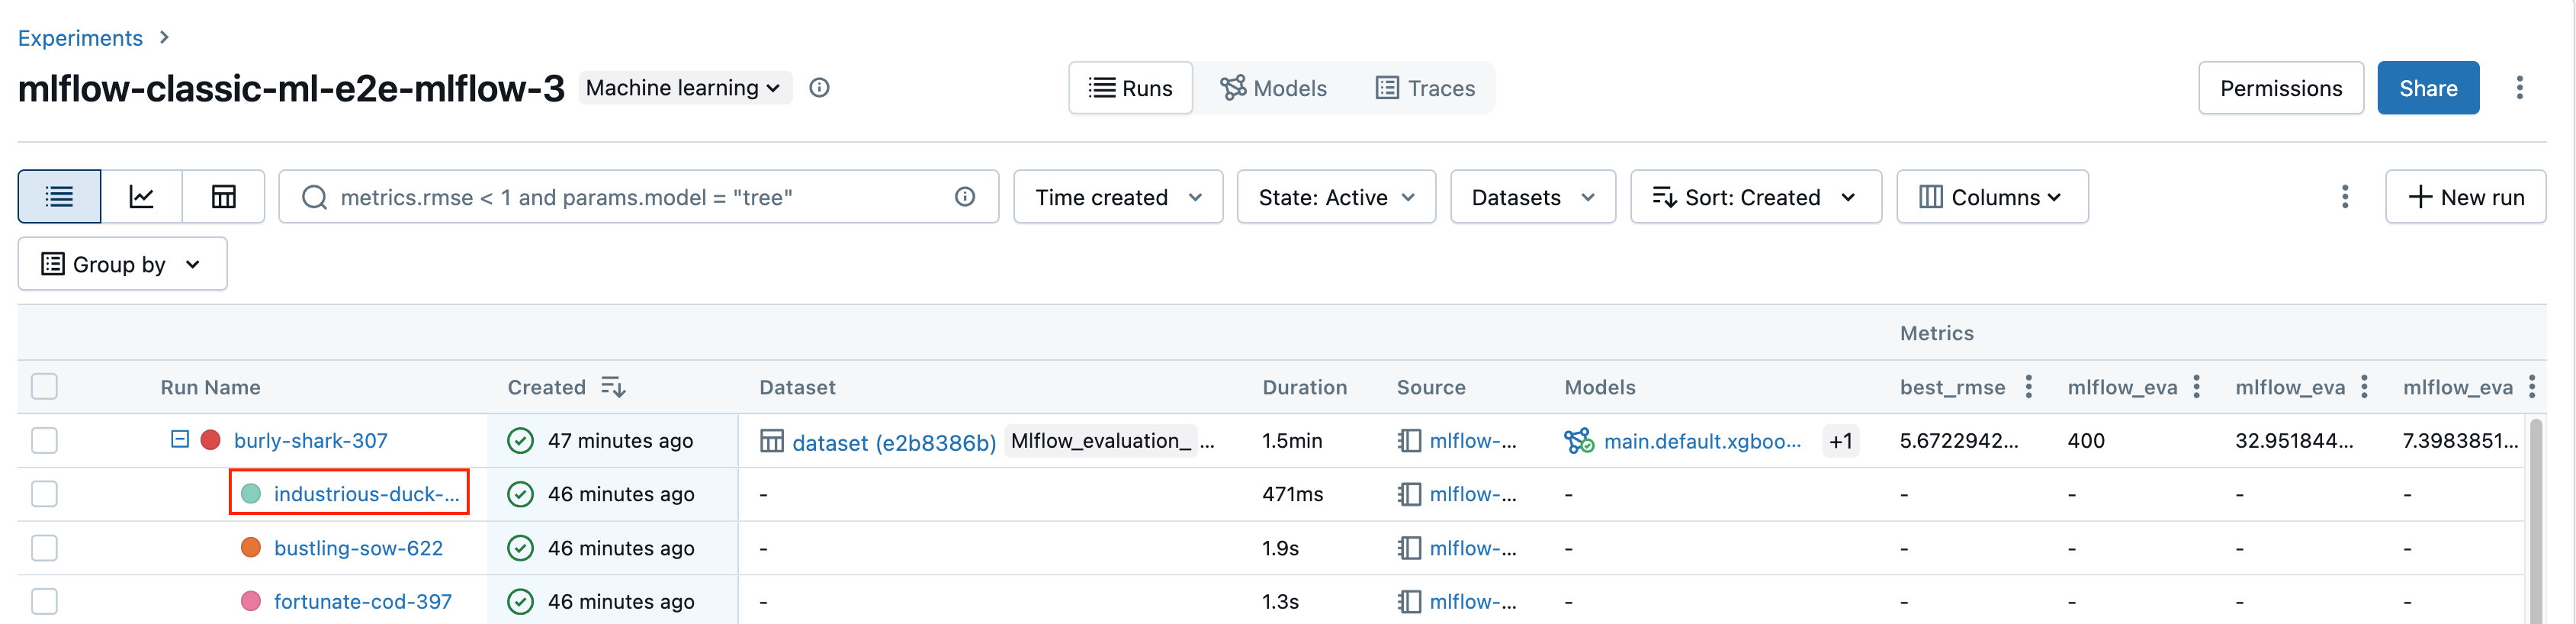
From the experiment details page, click the run name in the runs table.
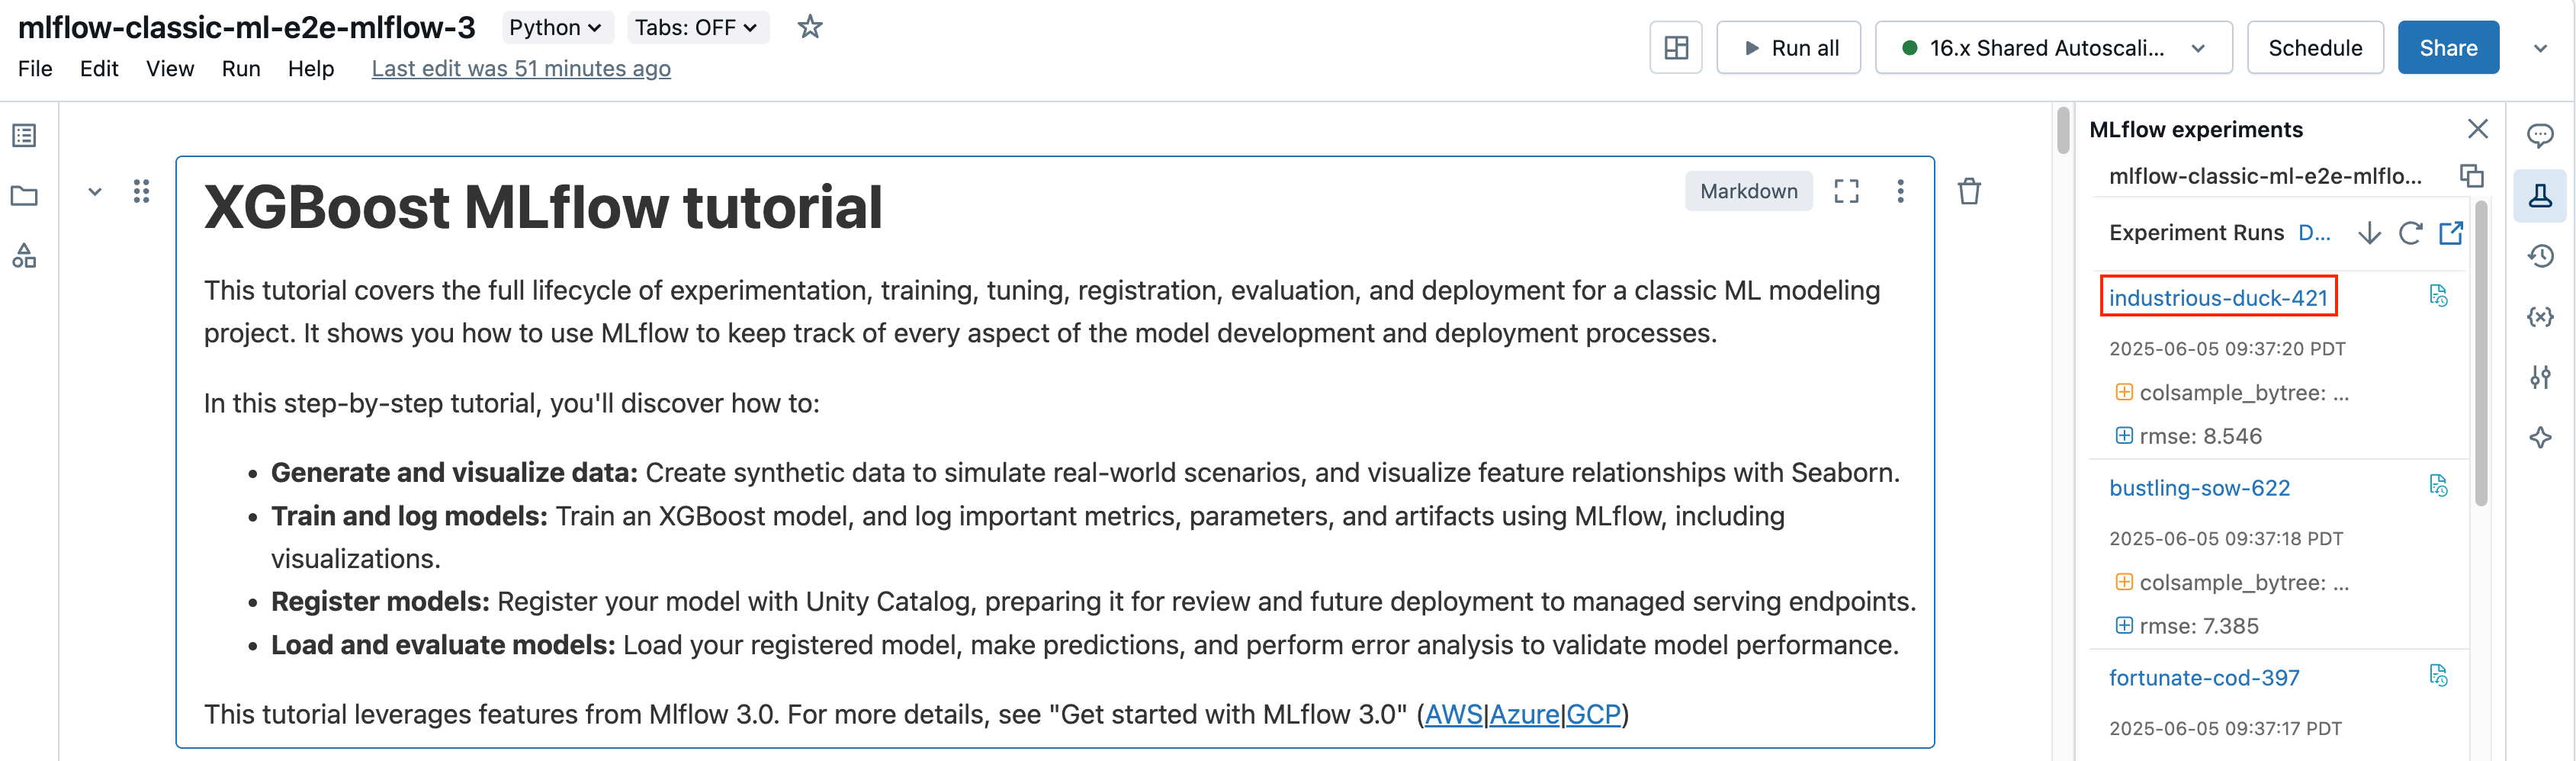
From the notebook, click the run name in the Experiment Runs sidebar.
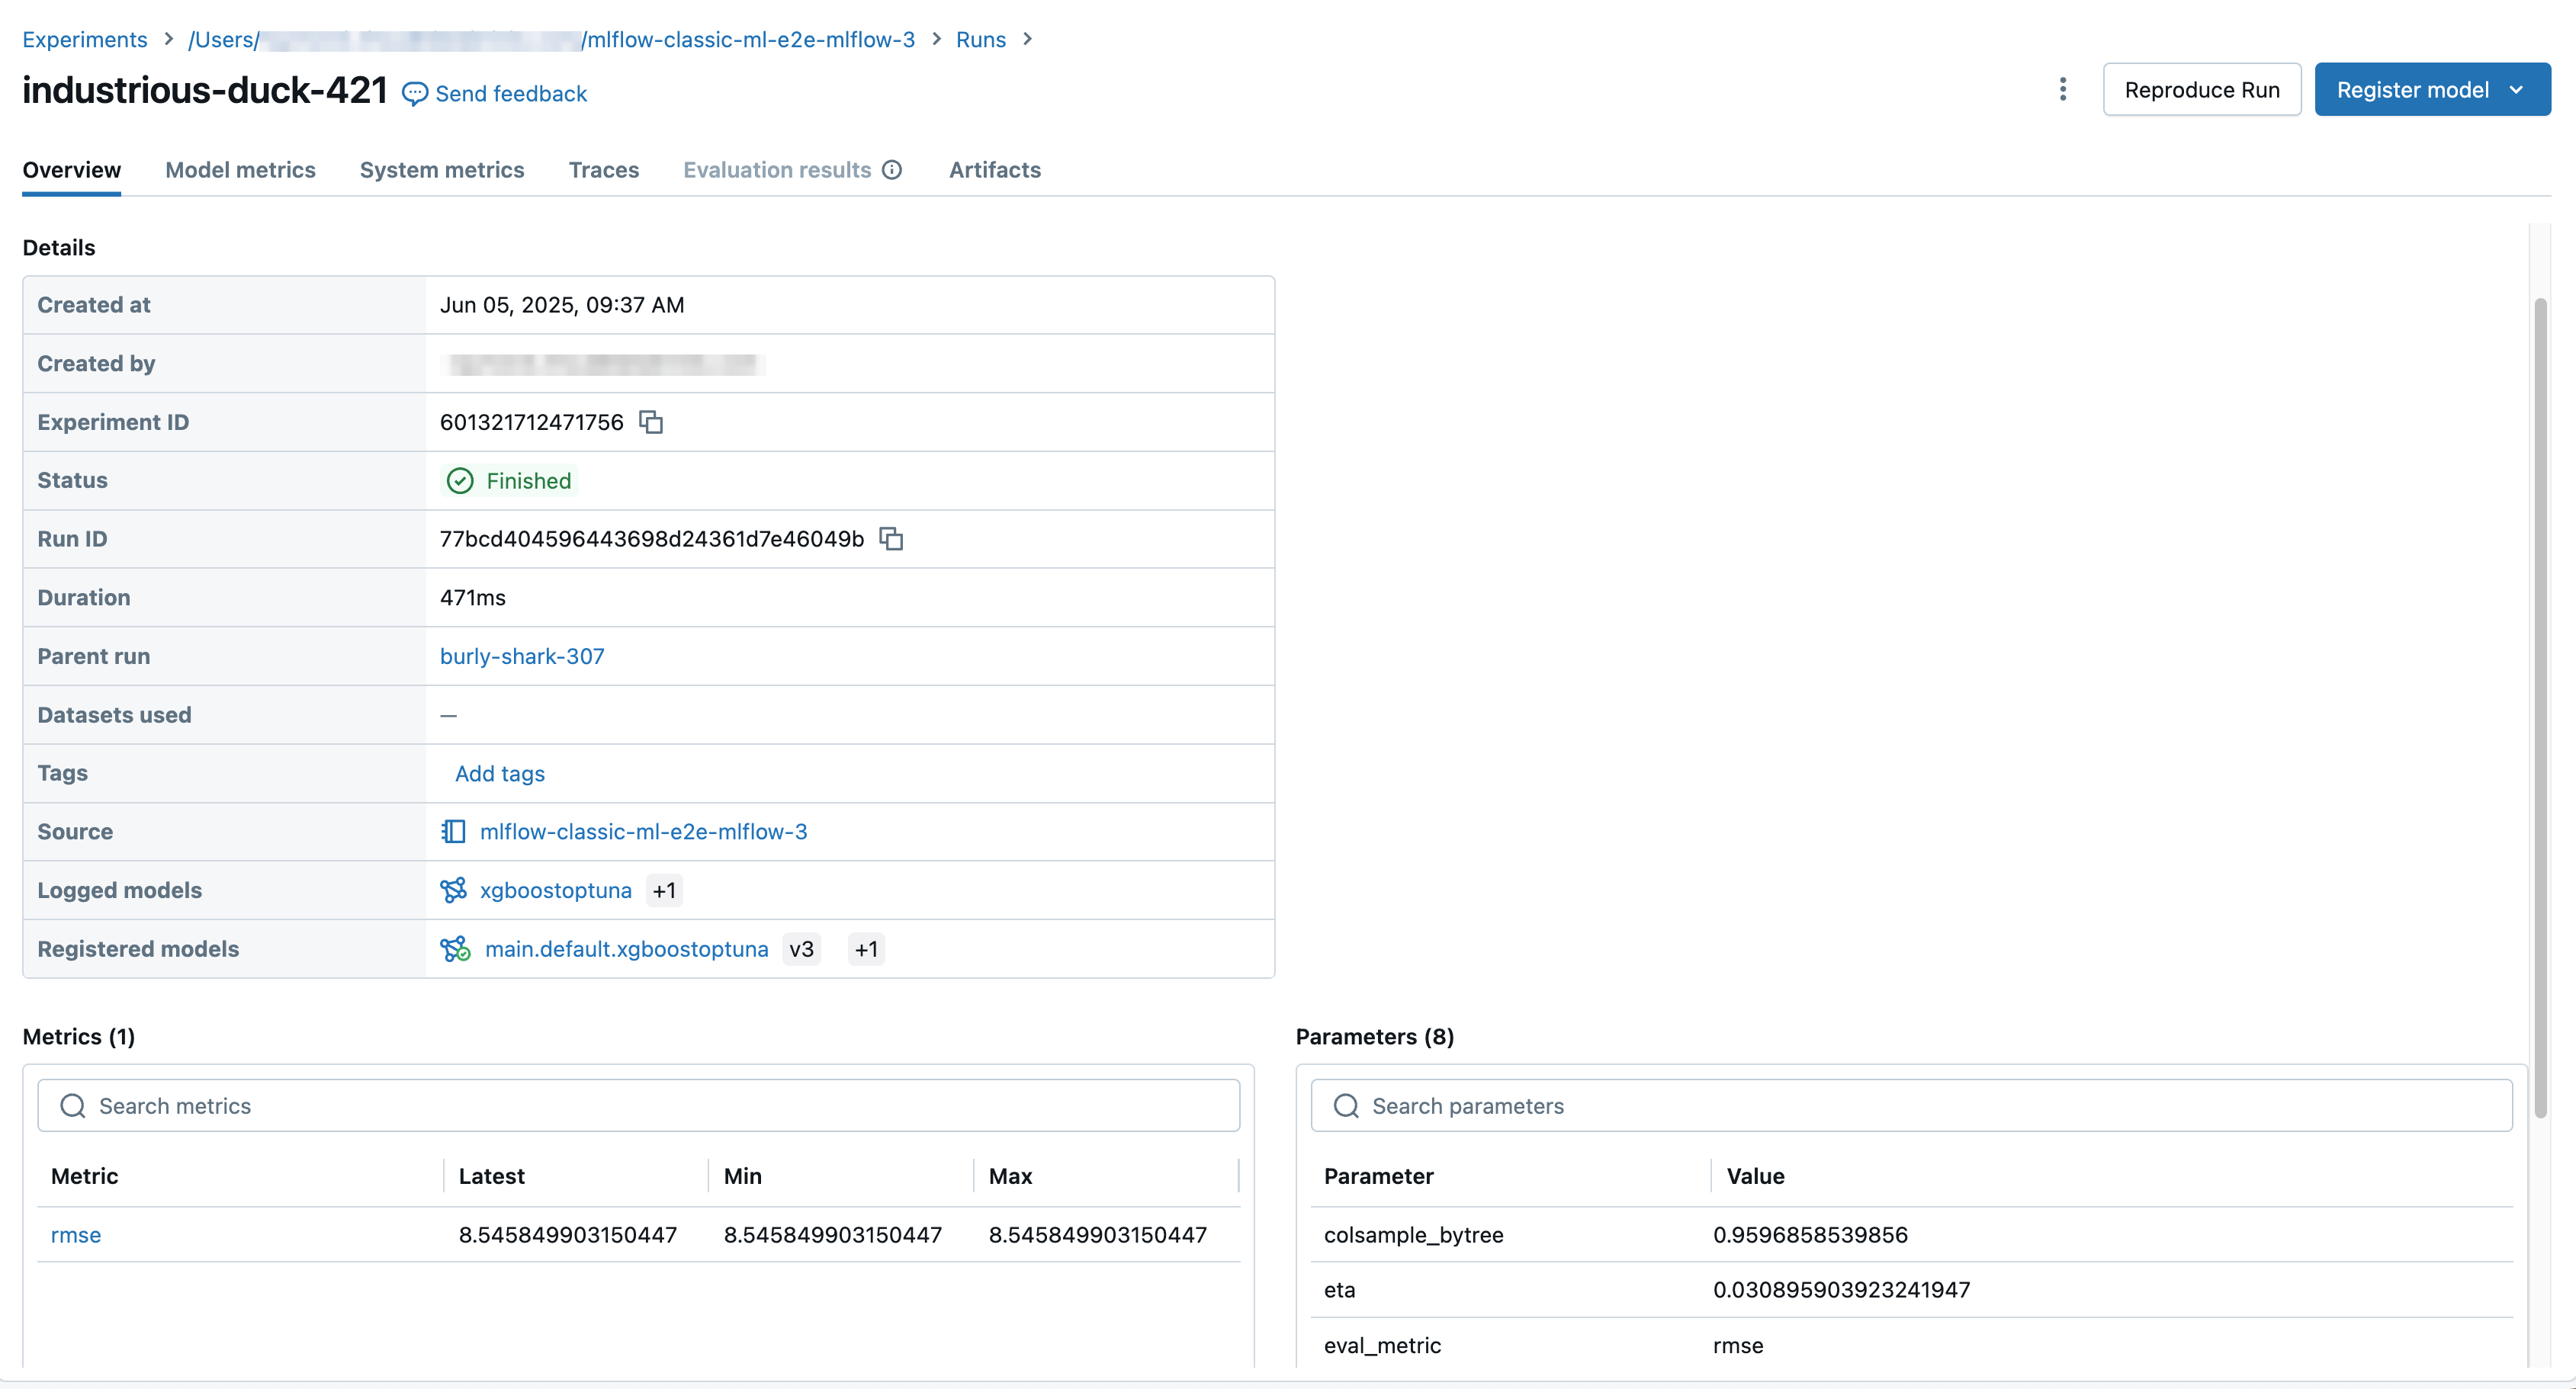
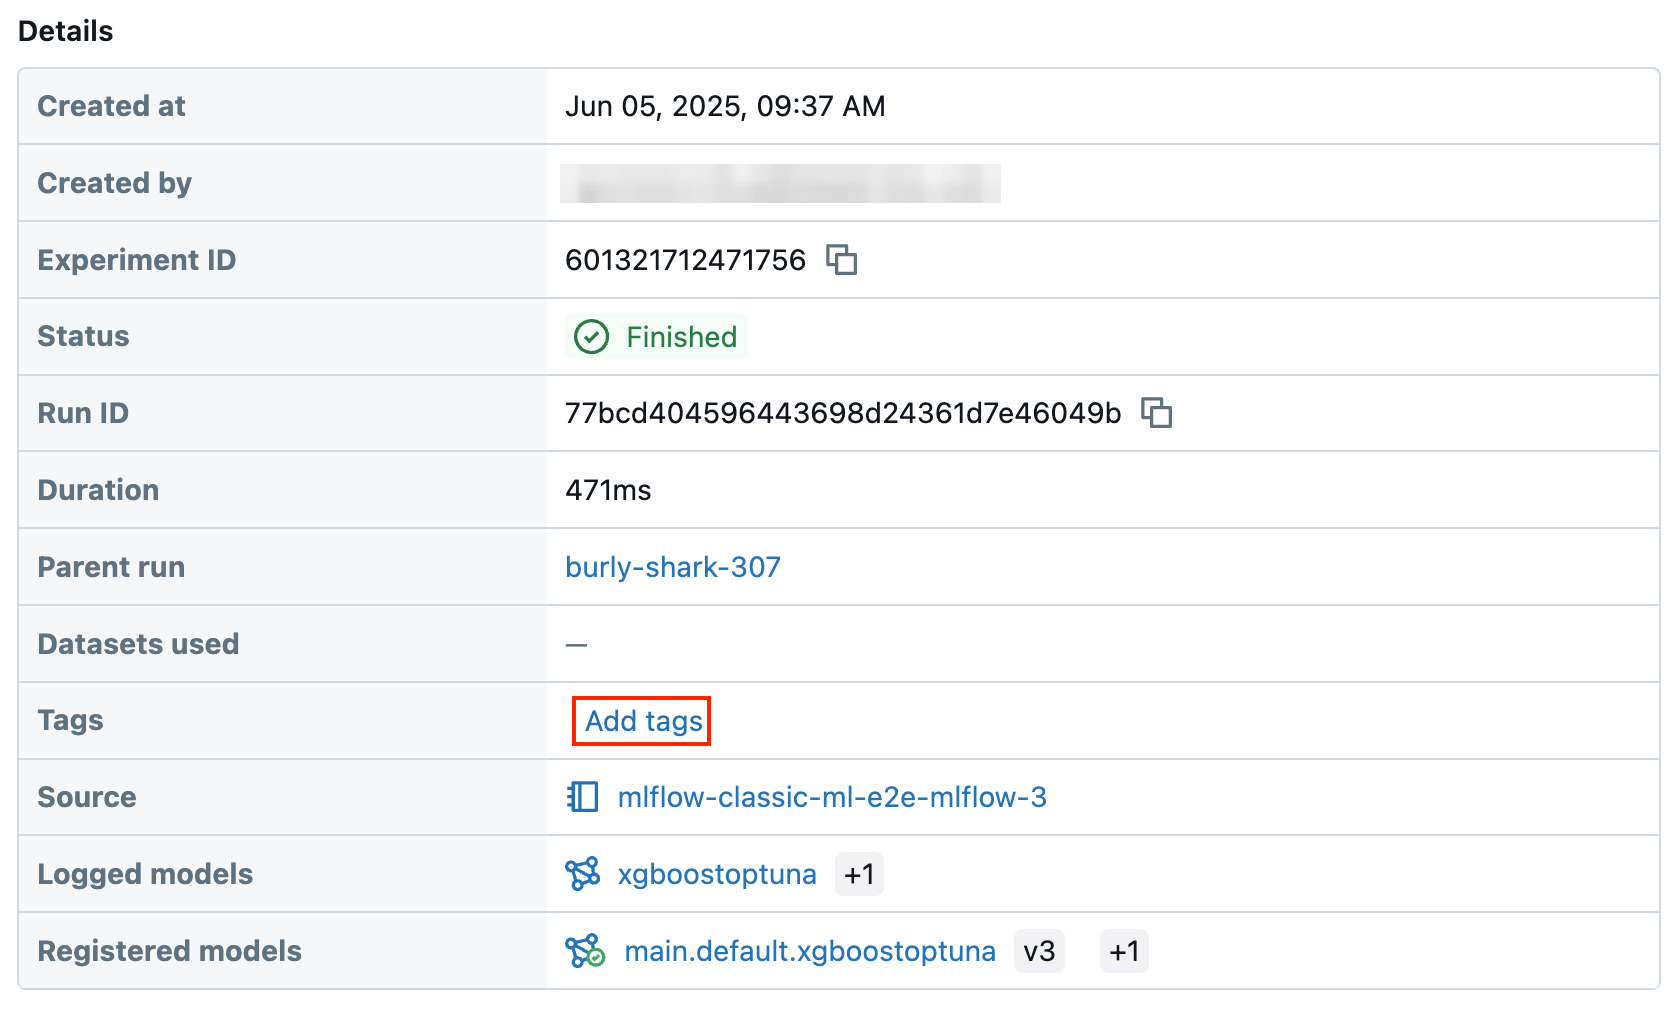
The run screen shows the run ID, the parameters used for the run, the metrics resulting from the run, and details about the run including a link to the source notebook. Artifacts saved from the run are available in the Artifacts tab.
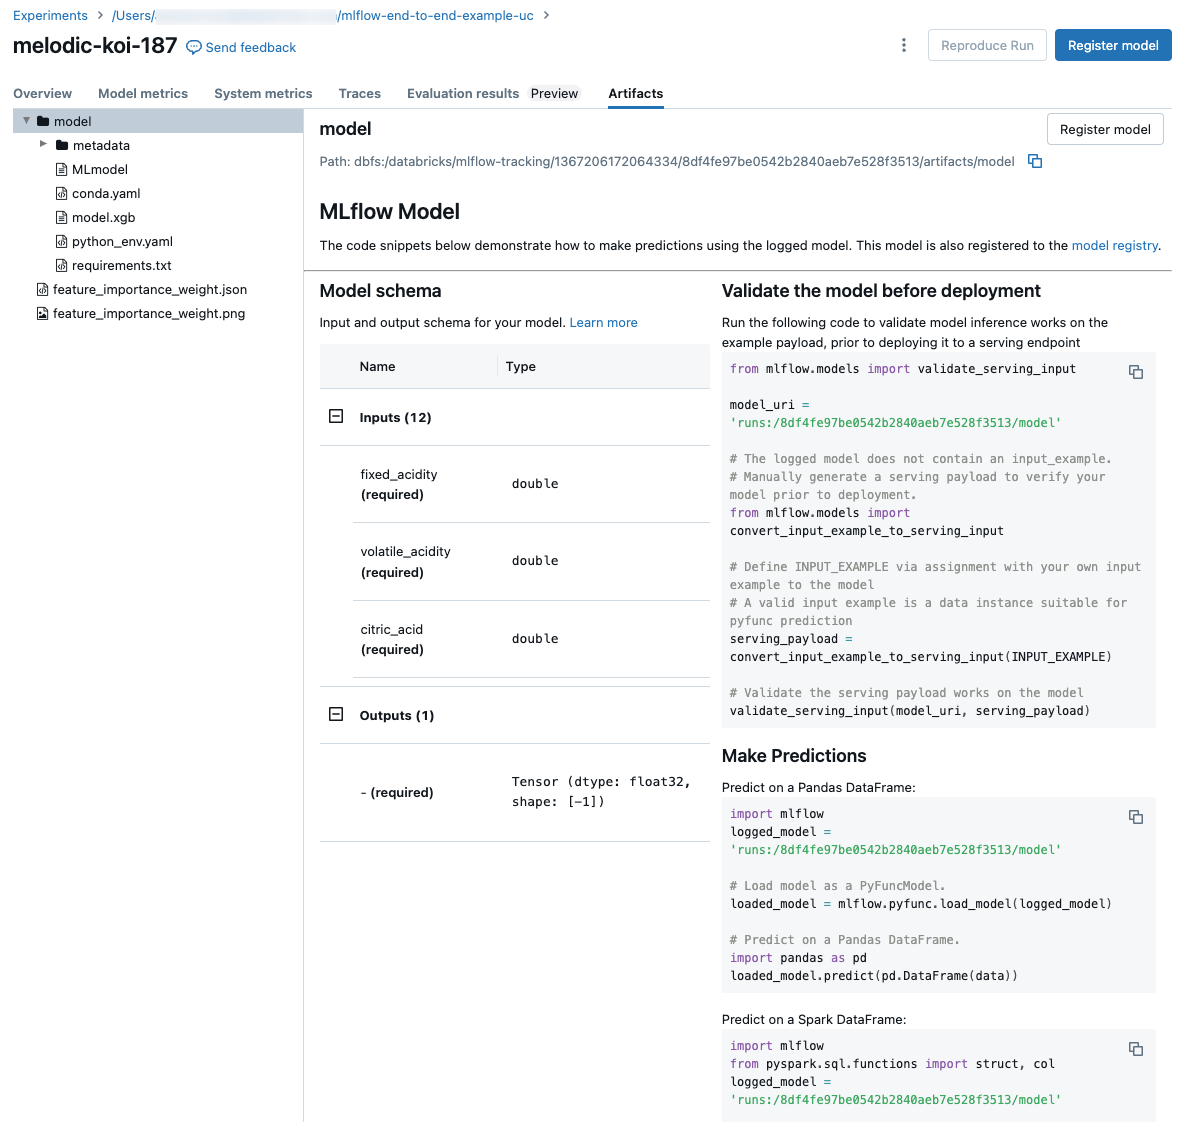
Code snippets for prediction
If you log a model from a run, the model appears in the Artifacts tab, along with code snippets illustrating how to load and use the model to make predictions on Spark and Pandas DataFrames. In MLflow 3, models are now their distinct first-class object rather than being logged as run artifact. For more information, see Get started with MLflow 3 for models.
View the notebook used for a run
To view the version of the notebook that created a run:
- On the experiment details page, click the link in the Source column.
- On the run page, click the link next to Source.
- From the notebook, in the Experiment Runs sidebar, click the Notebook icon
 in the box for that Experiment Run.
The version of the notebook associated with the run appears in the main window with a highlight bar showing the date and time of the run.
Add a tag to a run
Tags are key-value pairs that you can create and use later to search for runs.
-
In the Details table on the run page, click Add tags next to Tags.
-
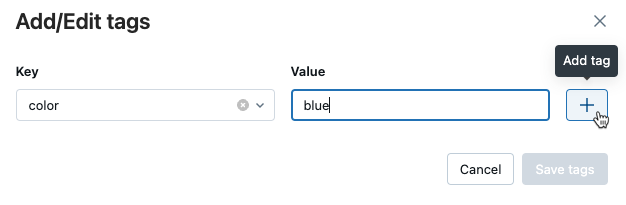
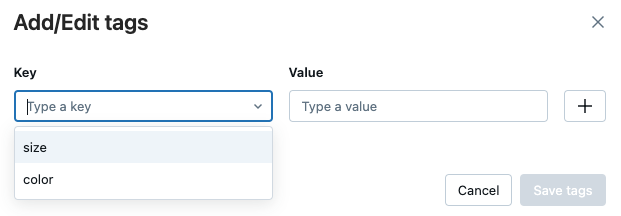
The Add/Edit tags dialog opens. In the Key field, enter a name for the key, and click Add tag.

-
In the Value field, enter the value for the tag.
-
Click the plus sign to save the key-value pair you just entered.
-
To add additional tags, repeat steps 2 through 4.
-
When you are done, click Save tags.
Edit or delete a tag for a run
-
In the Details table on the run page, click
 next to the existing tags.
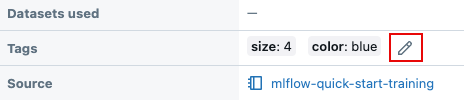
-
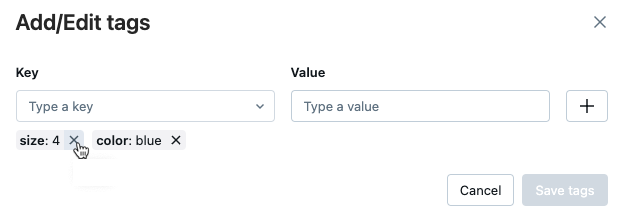
The Add/Edit tags dialog opens.
-
To delete a tag, click the X on that tag.
-
To edit a tag, select the key from the drop-down menu, and edit the value in the Value field. Click the plus sign to save your change.
-
-
When you are done, click Save tags.
Rename run
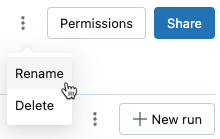
To rename a run, click the kebab menu ![]() at the upper right corner of the run page (next to the Permissions button) and select Rename.
at the upper right corner of the run page (next to the Permissions button) and select Rename.
Select columns to display
To control the columns displayed in the runs table on the experiment details page, click Columns and select from the drop-down menu.
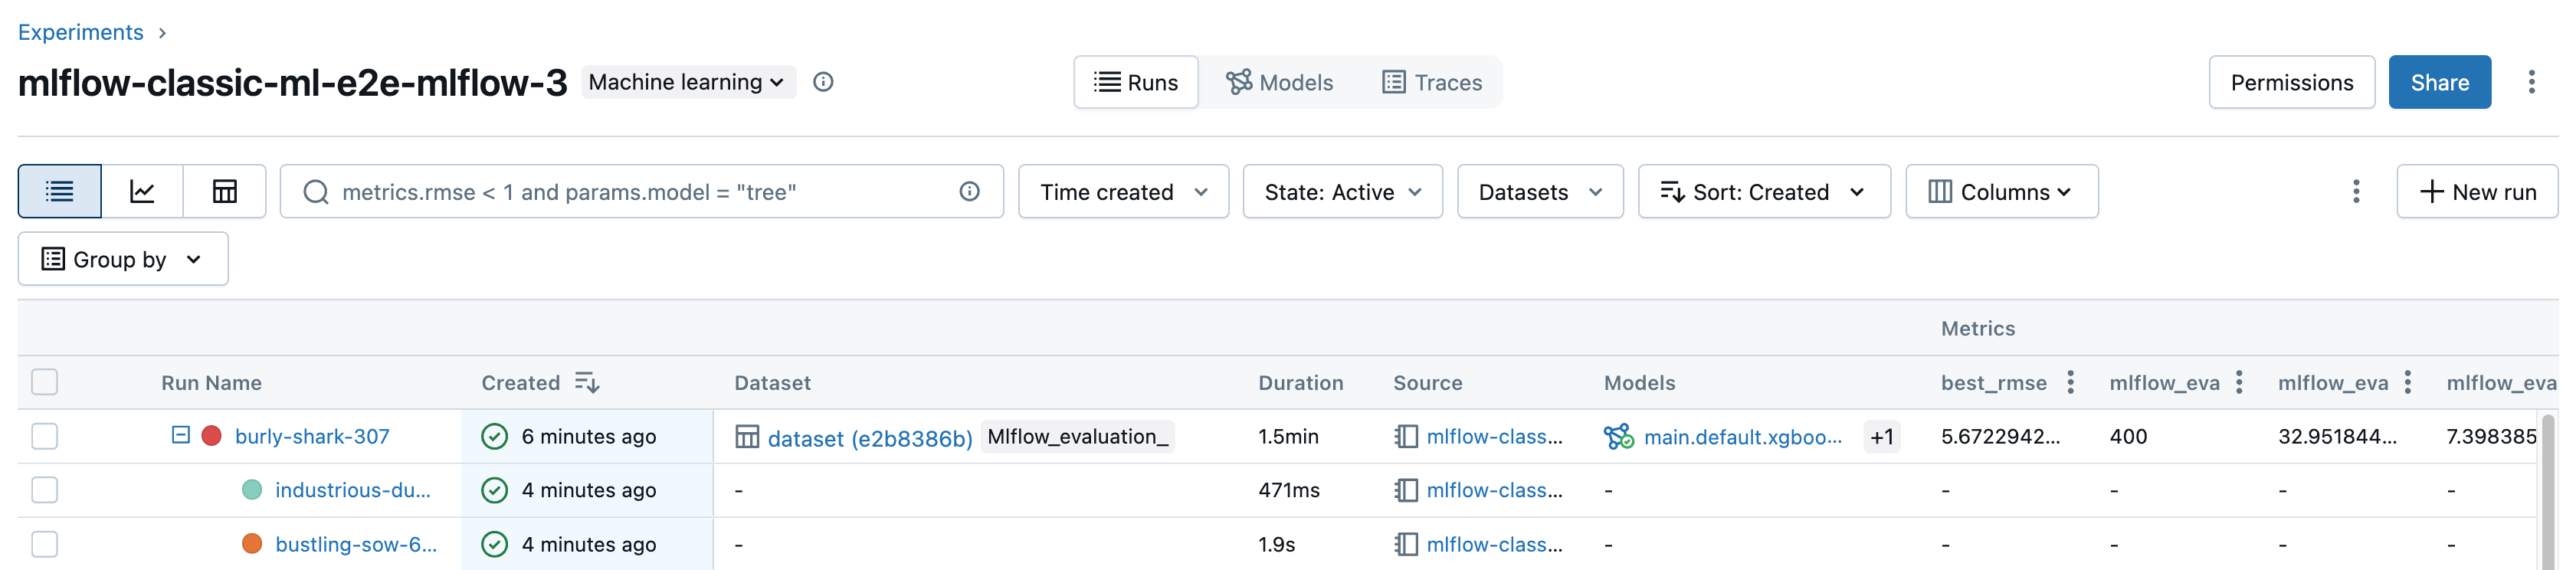
Filter runs
You can search for runs in the table on the experiment details page based on parameter or metric values. You can also search for runs by tag.
-
To search for runs that match an expression containing parameter and metric values, enter a query in the search field and press Enter. Some query syntax examples are:
metrics.r2 > 0.3params.elasticNetParam = 0.5params.elasticNetParam = 0.5 AND metrics.avg_areaUnderROC > 0.3MIN(metrics.rmse) <= 1MAX(metrics.memUsage) > 0.9LATEST(metrics.memUsage) = 0 AND MIN(metrics.rmse) <= 1By default, metric values are filtered based on the last logged value. Using
MINorMAXlets you search for runs based on the minimum or maximum metric values, respectively. Only runs logged after August 2024 have minimum and maximum metric values. -
To search for runs by tag, enter tags in the format:
tags.<key>="<value>". String values must be enclosed in quotes as shown.tags.estimator_name="RandomForestRegressor"tags.color="blue" AND tags.size=5Both keys and values can contain spaces. If the key includes spaces, you must enclose it in backticks as shown.
tags.`my custom tag` = "my value"
You can also filter runs based on their state (Active or Deleted), when the run was created, and what datasets were used. To do this, make your selections from the Time created, State, or Datasets drop-down menus respectively.
Download runs
You can download runs from the Experiment details page as follows:
-
Click
 to open the kebab menu.
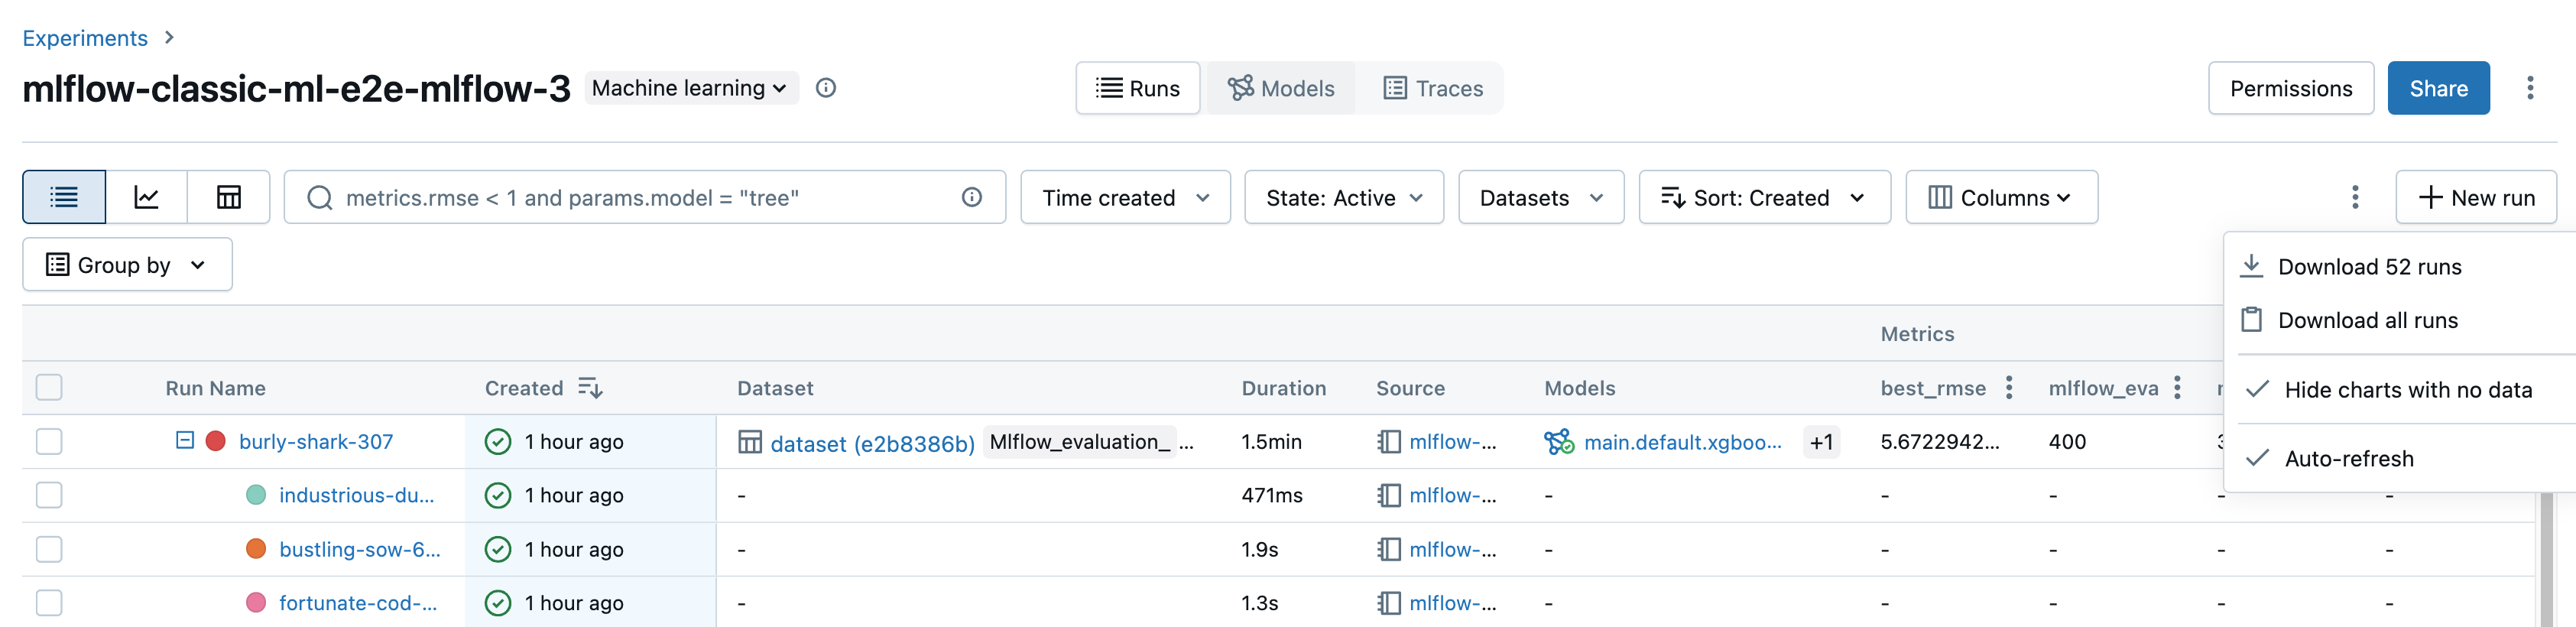
-
To download a file in CSV format containing all runs shown (up to a maximum of 100), select Download
<n>runs. MLflow creates and downloads a file with one run per row, containing the following fields for each run:Start Time, Duration, Run ID, Name, Source Type, Source Name, User, Status, <parameter1>, <parameter2>, ..., <metric1>, <metric2>, ... -
If you want to download more than 100 runs or want to download runs programmatically, select Download all runs. A dialog opens showing a code snippet that you can copy or open in a notebook. After you run this code in a notebook cell, select Download all rows from the cell output.
Delete runs
You can delete runs from the experiment details page following these steps:
- In the experiment, select one or more runs by clicking in the checkbox to the left of the run.
- Click Delete.
- If the run is a parent run, decide whether you also want to delete descendant runs. This option is selected by default.
- Click Delete to confirm. Deleted runs are saved for 30 days. To display deleted runs, select Deleted in the State field.
Bulk delete runs based on the creation time
You can use Python to bulk delete runs of an experiment that were created prior to or at a UNIX timestamp.
Using Databricks Runtime 14.1 or later, you can call the mlflow.delete_runs API to delete runs and return the number of runs deleted.
The following are the mlflow.delete_runs parameters:
experiment_id: The ID of the experiment containing the runs to delete.max_timestamp_millis: The maximum creation timestamp in milliseconds since the UNIX epoch for deleting runs. Only runs created prior to or at this timestamp are deleted.max_runs: Optional. A positive integer that indicates the maximum number of runs to delete. The maximum allowed value for max_runs is 10000. If not specified,max_runsdefaults to 10000.
import mlflow

# Replace <experiment_id>, <max_timestamp_ms>, and <max_runs> with your values.
runs_deleted = mlflow.delete_runs(
  experiment_id=<experiment_id>,
  max_timestamp_millis=<max_timestamp_ms>,
  max_runs=<max_runs>
)
# Example:
runs_deleted = mlflow.delete_runs(
  experiment_id="4183847697906956",
  max_timestamp_millis=1711990504000,
  max_runs=10
)
Using Databricks Runtime 13.3 LTS or earlier, you can run the following client code in a Databricks Notebook.
from typing import Optional

def delete_runs(experiment_id: str,
                max_timestamp_millis: int,
                max_runs: Optional[int] = None) -> int:
    """
    Bulk delete runs in an experiment that were created prior to or at the specified timestamp.
    Deletes at most max_runs per request.

    :param experiment_id: The ID of the experiment containing the runs to delete.
    :param max_timestamp_millis: The maximum creation timestamp in milliseconds
                                 since the UNIX epoch for deleting runs. Only runs
                                 created prior to or at this timestamp are deleted.
    :param max_runs: Optional. A positive integer indicating the maximum number
                     of runs to delete. The maximum allowed value for max_runs
                     is 10000. If not specified, max_runs defaults to 10000.
    :return: The number of runs deleted.
    """
    from mlflow.utils.databricks_utils import get_databricks_host_creds
    from mlflow.utils.request_utils import augmented_raise_for_status
    from mlflow.utils.rest_utils import http_request

    json_body = {"experiment_id": experiment_id, "max_timestamp_millis": max_timestamp_millis}
    if max_runs is not None:
        json_body["max_runs"] = max_runs
    response = http_request(
        host_creds=get_databricks_host_creds(),
        endpoint="/api/2.0/mlflow/databricks/runs/delete-runs",
        method="POST",
        json=json_body,
    )
    augmented_raise_for_status(response)
    return response.json()["runs_deleted"]
See the Databricks Experiments API documentation for parameters and return value specifications for deleting runs based on creation time.
Restore runs
You can restore previously deleted runs from the UI as follows:
- On the Experiment page, in the State field, select Deleted to display deleted runs.
- Select one or more runs by clicking in the checkbox to the left of the run.
- Click Restore.
- Click Restore to confirm. The restored runs now appear when you select Active in the State field.
Bulk restore runs based on the deletion time
You can also use Python to bulk restore runs of an experiment that were deleted at or after a UNIX timestamp.
Using Databricks Runtime 14.1 or later, you can call the mlflow.restore_runs API to restore runs and return the number of restored runs.
The following are the mlflow.restore_runs parameters:
experiment_id: The ID of the experiment containing the runs to restore.min_timestamp_millis: The minimum deletion timestamp in milliseconds since the UNIX epoch for restoring runs. Only runs deleted at or after this timestamp are restored.max_runs: Optional. A positive integer that indicates the maximum number of runs to restore. The maximum allowed value for max_runs is 10000. If not specified, max_runs defaults to 10000.
import mlflow

# Replace <experiment_id>, <min_timestamp_ms>, and <max_runs> with your values.
runs_restored = mlflow.restore_runs(
  experiment_id=<experiment_id>,
  min_timestamp_millis=<min_timestamp_ms>,
  max_runs=<max_runs>
)
# Example:
runs_restored = mlflow.restore_runs(
  experiment_id="4183847697906956",
  min_timestamp_millis=1711990504000,
  max_runs=10
)
Using Databricks Runtime 13.3 LTS or earlier, you can run the following client code in a Databricks Notebook.
from typing import Optional

def restore_runs(experiment_id: str,
                 min_timestamp_millis: int,
                 max_runs: Optional[int] = None) -> int:
    """
    Bulk restore runs in an experiment that were deleted at or after the specified timestamp.
    Restores at most max_runs per request.

    :param experiment_id: The ID of the experiment containing the runs to restore.
    :param min_timestamp_millis: The minimum deletion timestamp in milliseconds
                                 since the UNIX epoch for restoring runs. Only runs
                                 deleted at or after this timestamp are restored.
    :param max_runs: Optional. A positive integer indicating the maximum number
                     of runs to restore. The maximum allowed value for max_runs
                     is 10000. If not specified, max_runs defaults to 10000.
    :return: The number of runs restored.
    """
    from mlflow.utils.databricks_utils import get_databricks_host_creds
    from mlflow.utils.request_utils import augmented_raise_for_status
    from mlflow.utils.rest_utils import http_request
    json_body = {"experiment_id": experiment_id, "min_timestamp_millis": min_timestamp_millis}
    if max_runs is not None:
        json_body["max_runs"] = max_runs
    response = http_request(
        host_creds=get_databricks_host_creds(),
        endpoint="/api/2.0/mlflow/databricks/runs/restore-runs",
        method="POST",
        json=json_body,
    )
    augmented_raise_for_status(response)
    return response.json()["runs_restored"]
See the Databricks Experiments API documentation for parameters and return value specifications for restoring runs based on deletion time.
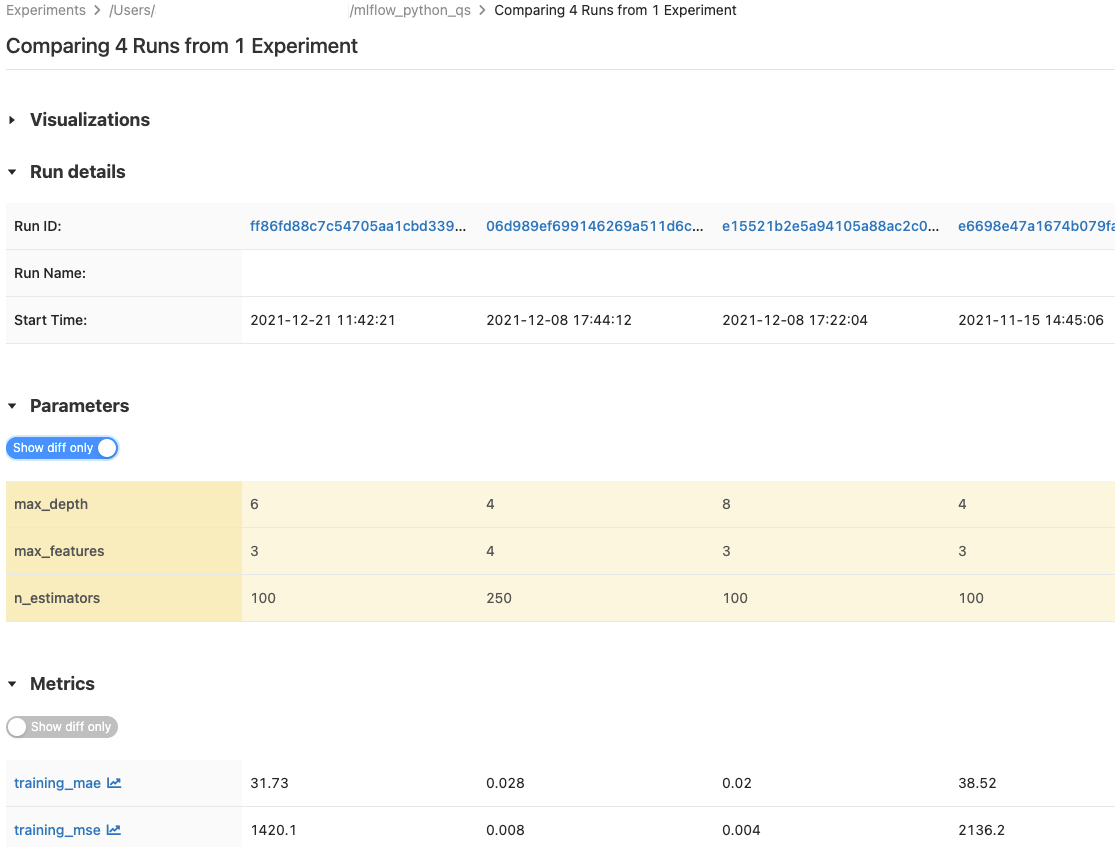
Compare runs
You can compare runs from a single experiment or from multiple experiments. The Comparing Runs page presents information about the selected runs in tabular format. You can also create visualizations of run results and tables of run information, run parameters, and metrics. See Compare MLflow runs and models using graphs and charts.
The Parameters and Metrics tables display the run parameters and metrics from all selected runs. The columns in these tables are identified by the Run details table immediately above. For simplicity, you can hide parameters and metrics that are identical in all selected runs by toggling ![]() .
.
Compare runs from a single experiment
- On the experiment details page, select two or more runs by clicking in the checkbox to the left of the run, or select all runs by checking the box at the top of the column.
- Click Compare. The Comparing
<N>Runs screen appears.
Compare runs from multiple experiments
- On the experiments page, select the experiments you want to compare by clicking in the box at the left of the experiment name.
- Click Compare (n) (n is the number of experiments you selected). A screen appears showing all of the runs from the experiments you selected.
- Select two or more runs by clicking in the checkbox to the left of the run, or select all runs by checking the box at the top of the column.
- Click Compare. The Comparing
<N>Runs screen appears.
Compare runs using system tables
MLflow metadata for experiments and runs is also available in system tables, where you can leverage Databricks SQL and all the lakehouse tooling Databricks offers to analyze your experiment data. For more details, see MLflow system tables reference.
Copy runs between workspaces
To import or export MLflow runs to or from your Databricks workspace, you can use the community-driven open source project MLflow Export-Import.