Crie e edite solicitações
Beta
Este recurso está em versão Beta. Os administradores do espaço de trabalho podem controlar o acesso a este recurso na página de Pré-visualizações . Veja as prévias do Gerenciador Databricks.
Esta página mostra como criar novos prompts e gerenciar suas versões no MLflow Prompt Registry usando o MLflow Python SDK. Ele inclui instruções para usar o MLflow Python SDK e a interface de usuário do MLflow da Databricks. Todo o código desta página está incluído no Notebook de exemplo.
Pré-requisitos
-
Instale o site MLflow e o pacote necessário
Bashpip install --upgrade "mlflow[databricks]>=3.1.0" openai -
Crie um experimento do MLflow seguindo o início rápido da configuração do ambiente.
-
Crie ou identifique um esquema do Unity Catalog para armazenar prompts. O senhor deve ter os privilégios
CREATE FUNCTION,EXECUTEeMANAGEno esquema do Unity Catalog.
Etapa 1. Crie um novo prompt
Você pode criar prompts na interface do usuário do Databricks MLflow ou programaticamente usando o SDK Python do MLflow.
Usar a interface de usuário do Databricks MLflow
Para criar um prompt na interface do usuário:
-
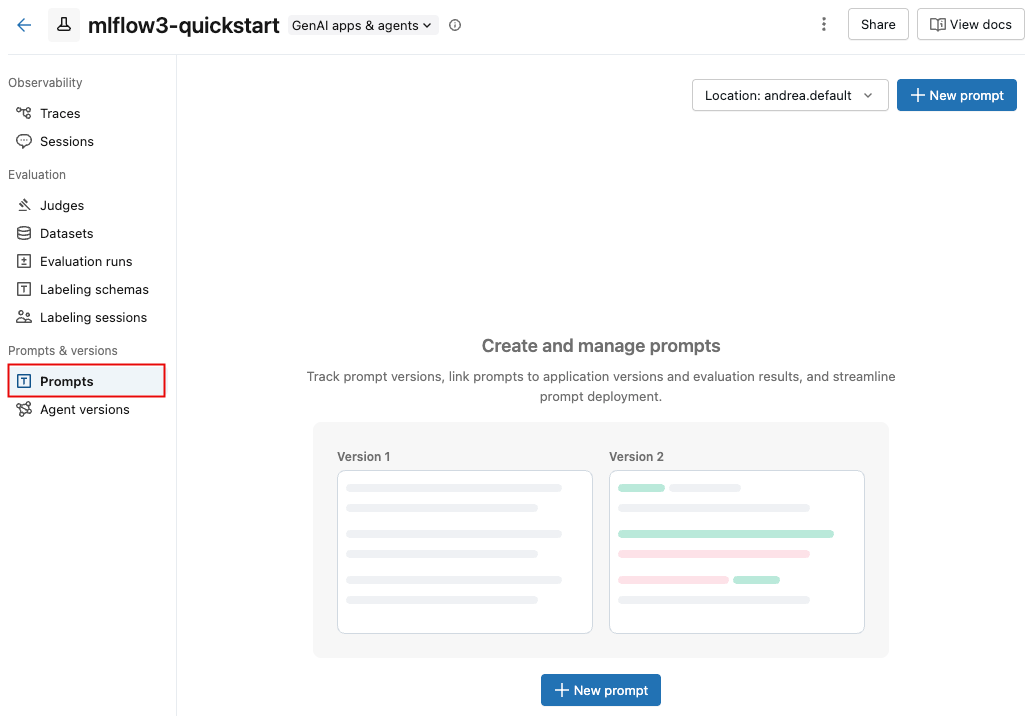
Navegue até seu experimento MLflow.
-
Clique em Prompts tab.
-
Clique
 . Aparece uma caixa de diálogo.
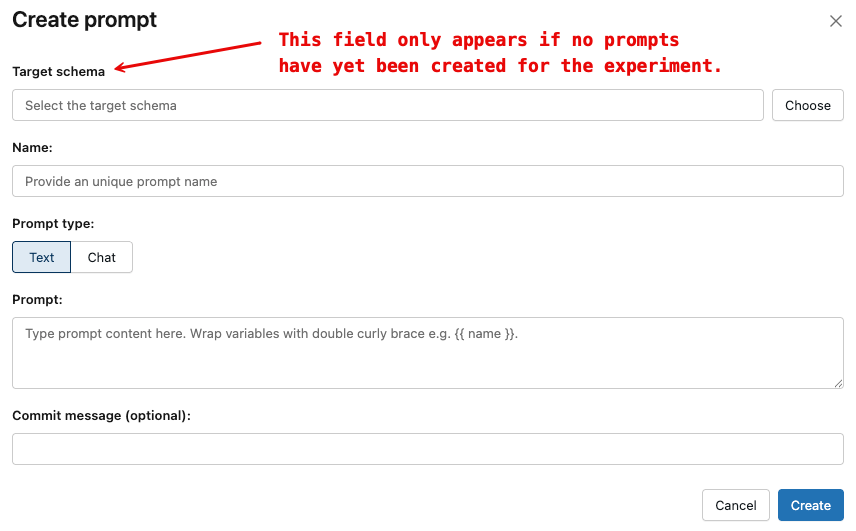
-
Se você ainda não selecionou um esquema para este experimento, a caixa de diálogo inclui um campo "Esquema de destino" . Para escolher um esquema:
- Ao lado do campo Esquema de destino , clique em Escolher para abrir o seletor de esquemas.
- No seletor, escolha o esquema desejado e clique em Confirmar . Você deve ter as seguintes permissões no esquema:
CREATE FUNCTION,EXECUTEeMANAGE.
-
No campo Nome , digite um nome para o prompt. Os nomes dos prompts podem conter apenas letras, números, hífenes, sublinhados e pontos.
-
Em Tipo de prompt , selecione uma das seguintes opções:
- Texto : Um único texto padrão. Use isso para perguntas de preenchimento automático.
- Chat : Uma lista de mensagens baseadas em funções (por exemplo,
systemeuser). Use isso para prompts em estilo de bate-papo que visam modelos conversacionais.
-
No campo "Instrução" , digite o conteúdo da sua instrução. Use a sintaxe
{{variable_name}}para definir variáveis que você preencherá em tempo de execução. -
(Opcional) No campo "Mensagem de commit" , digite uma breve descrição desta versão. As mensagens de commit são armazenadas com a versão do prompt e ajudam você a rastrear as alterações entre as versões.
-
Clique em Criar .
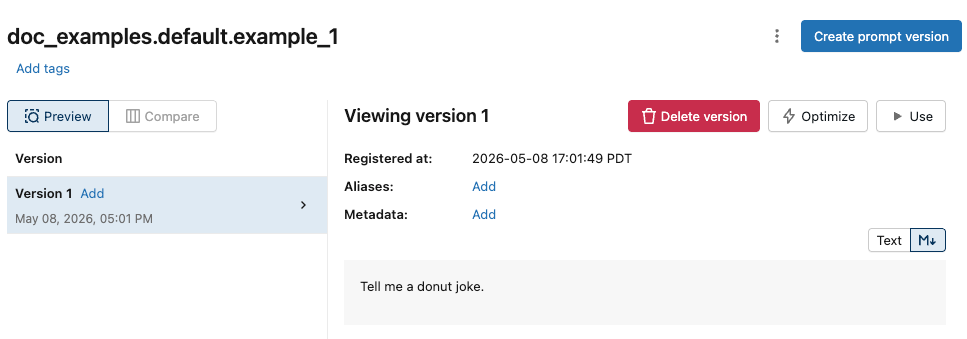
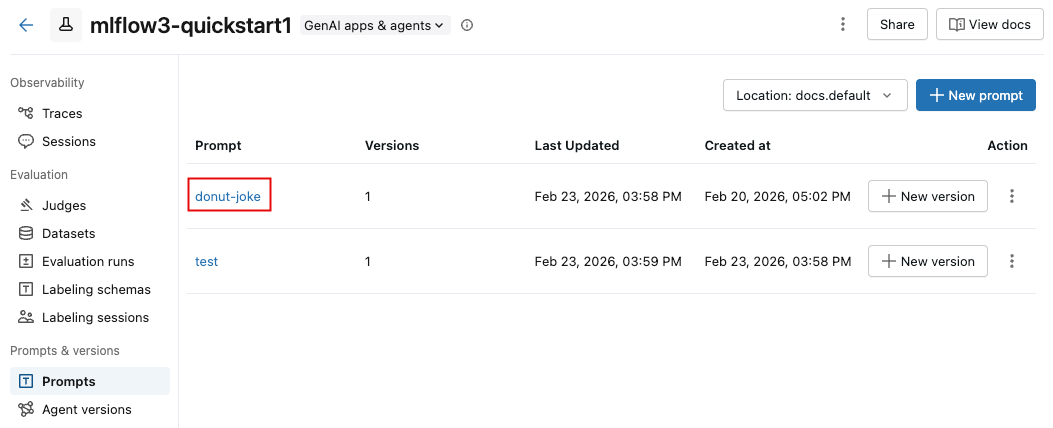
O prompt aparece na interface do usuário:
Use o Python SDK
-
Vincule seu experimento MLflow a um local do Prompt Registry default definindo um experimento tag usando
mlflow.set_experiment_tags. Isso permite que os SDKs e as ferramentas deduzam automaticamente o esquema de prompt do Unity Catalog.Use a tag
mlflow.promptRegistryLocationcom o valorcatalog.schema:Pythonimport mlflow
# Link the current MLflow experiment to a UC schema for prompts
mlflow.set_experiment_tags({
"mlflow.promptRegistryLocation": "main.default"
}) -
Crie prompts usando
mlflow.genai.register_prompt(). Os prompts usam a sintaxe de dupla trava ({{variable}}) para variáveis padrão.Python# Replace with a Unity Catalog schema where you have CREATE FUNCTION, EXECUTE, and MANAGE privileges
uc_schema = "main.default"
# This table is created in the UC schema specified in the previous line
prompt_name = "summarization_prompt"
# Define the prompt template with variables
initial_template = """\
Summarize content you are provided with in {{num_sentences}} sentences.
Content: {{content}}
"""
# Register a new prompt
prompt = mlflow.genai.register_prompt(
name=f"{uc_schema}.{prompt_name}",
template=initial_template,
# all following parameters are optional
commit_message="Initial version of summarization prompt",
tags={
"author": "data-science-team@company.com",
"use_case": "document_summarization",
"task": "summarization",
"language": "en",
"model_compatibility": "gpt-4"
}
)
print(f"Created prompt '{prompt.name}' (version {prompt.version})")
Etapa 2: use o prompt em seu aplicativo
Os passos a seguir criam um aplicativo simples que usa seu prompt padrão usando o SDK Python .
Carregue o prompt do registro
# Load a specific version using URI syntax
prompt = mlflow.genai.load_prompt(name_or_uri=f"prompts:/{uc_schema}.{prompt_name}/1")

# Alternative syntax without URI
prompt = mlflow.genai.load_prompt(name_or_uri=f"{uc_schema}.{prompt_name}", version="1")
Use o prompt em seu aplicativo
- Inicialize um cliente OpenAI para se conectar a LLMs hospedados pela Databricks ou LLMs hospedados pela OpenAI.
- Databricks-hosted LLMs
- OpenAI-hosted LLMs
Use databricks-openai para obter um cliente OpenAI que se conecta a LLMs hospedados no Databricks. Selecione um modelo dentre os modelos de fundação disponíveis.
import mlflow
from databricks_openai import DatabricksOpenAI

# Enable MLflow's autologging to instrument your application with Tracing
mlflow.openai.autolog()

# Set up MLflow tracking to Databricks
mlflow.set_tracking_uri("databricks")
mlflow.set_experiment("/Shared/docs-demo")

# Create an OpenAI client that is connected to Databricks-hosted LLMs
client = DatabricksOpenAI()

# Select an LLM
model_name = "databricks-claude-sonnet-4"
Use o SDK nativo do OpenAI para se conectar a modelos hospedados pelo OpenAI. Selecione um modelo dentre os modelos OpenAI disponíveis.
import mlflow
import os
import openai

# Ensure your OPENAI_API_KEY is set in your environment
# os.environ["OPENAI_API_KEY"] = "<YOUR_API_KEY>" # Uncomment and set if not globally configured

# Enable auto-tracing for OpenAI
mlflow.openai.autolog()

# Set up MLflow tracking to Databricks
mlflow.set_tracking_uri("databricks")
mlflow.set_experiment("/Shared/docs-demo")

# Create an OpenAI client connected to OpenAI SDKs
client = openai.OpenAI()

# Select an LLM
model_name = "gpt-4o-mini"
-
Defina seu aplicativo:
Python# Use the trace decorator to capture the application's entry point
@mlflow.trace
def my_app(content: str, num_sentences: int):
# Format with variables
formatted_prompt = prompt.format(
content=content,
num_sentences=num_sentences
)
response = client.chat.completions.create(
model=model_name, # This example uses a Databricks hosted LLM. You can replace this with any AI Gateway or Model Serving endpoint, or with a valid OpenAI model like gpt-4o.
messages=[
{
"role": "system",
"content": "You are a helpful assistant.",
},
{
"role": "user",
"content": formatted_prompt,
},
],
)
return response.choices[0].message.content
result = my_app(content="This guide shows you how to integrate prompts from the MLflow Prompt Registry into your GenAI applications. You'll learn to load prompts, format them with dynamic data, and ensure complete lineage by linking prompt versions to your MLflow Models.", num_sentences=1)
print(result)
Etapa 3. Edite o prompt
As versões de prompt são imutáveis após sua criação. Para editar um prompt, você deve criar uma nova versão. Esse controle de versão semelhante ao Gitmantém o histórico completo e permite reversões.
Usar a interface de usuário do Databricks MLflow
Para criar uma nova versão:
-
Na tab Instruções , clique em
 ao lado do texto que você deseja editar.
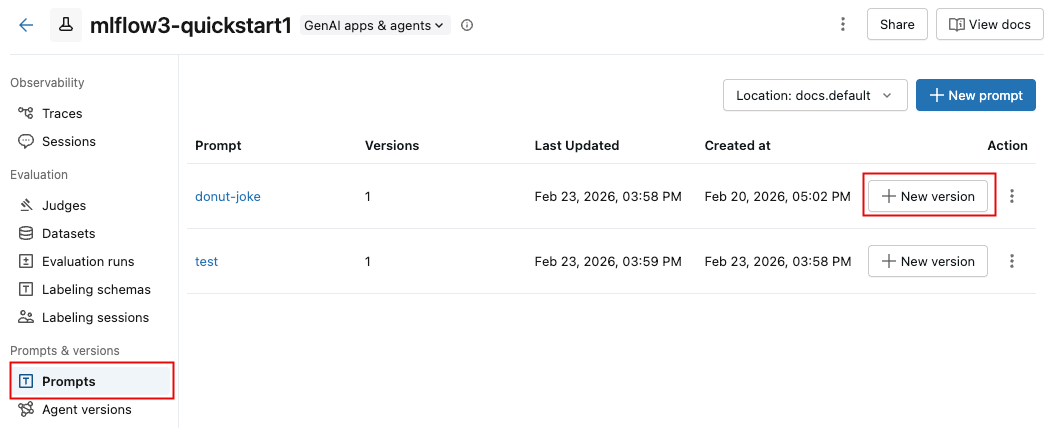
-
Digite sua solicitação e clique em Salvar .
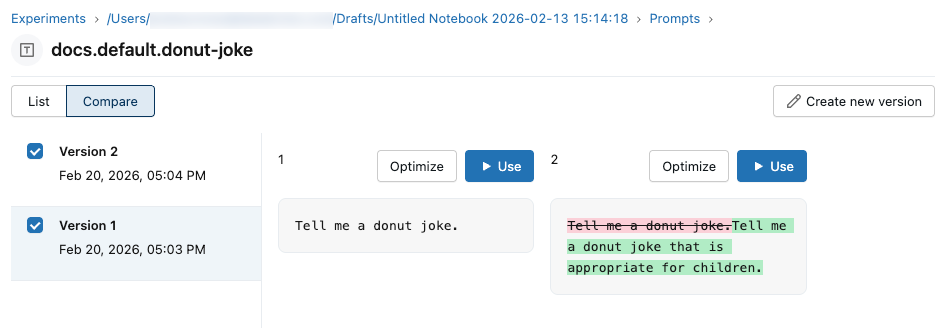
Compare as versões de prompt
Para comparar versões de prompts:
-
Na tab "Sugestões" , clique no nome da sugestão.
-
No canto superior esquerdo, clique em Comparar e selecione as versões que deseja comparar.
Use o Python SDK
Crie uma nova versão chamando mlflow.genai.register_prompt() com um nome de prompt existente:
import mlflow

# Define the improved template
new_template = """\
You are an expert summarizer. Condense the following content into exactly {{ num_sentences }} clear and informative sentences that capture the key points.

Content: {{content}}

Your summary should:
- Contain exactly {{num_sentences}} sentences
- Include only the most important information
- Be written in a neutral, objective tone
- Maintain the same level of formality as the original text
"""

# Register a new version
updated_prompt = mlflow.genai.register_prompt(
    name=f"{uc_schema}.{prompt_name}",
    template=new_template,
    commit_message="Added detailed instructions for better output quality",
    tags={
        "author": "data-science-team@company.com",
        "improvement": "Added specific guidelines for summary quality"
    }
)

print(f"Created version {updated_prompt.version} of '{updated_prompt.name}'")
Etapa 4. Use o novo prompt
O código a seguir mostra como usar o prompt.
# Load a specific version using URI syntax
prompt = mlflow.genai.load_prompt(name_or_uri=f"prompts:/{uc_schema}.{prompt_name}/2")

# Or load from specific version
prompt = mlflow.genai.load_prompt(name_or_uri=f"{uc_schema}.{prompt_name}", version="2")
Etapa 5. Solicitações de pesquisa e descoberta
Para encontrar prompts em seu esquema do Unity Catalog:
# REQUIRED format for Unity Catalog - specify catalog and schema
results = mlflow.genai.search_prompts("catalog = 'main' AND schema = 'default'")

# Using variables for your schema
catalog_name = uc_schema.split('.')[0]  # 'main'
schema_name = uc_schema.split('.')[1]   # 'default'
results = mlflow.genai.search_prompts(f"catalog = '{catalog_name}' AND schema = '{schema_name}'")

# Limit results
results = mlflow.genai.search_prompts(
    filter_string=f"catalog = '{catalog_name}' AND schema = '{schema_name}'",
    max_results=50
)
Exemplo de notebook
Criar e editar prompts exemplo Notebook
Recursos adicionais
- Avalie as versões do prompt - Compare as diferentes versões do prompt para identificar o melhor desempenho.
- Acompanhe as solicitações com as versões do aplicativo - Vincule as versões das solicitações às versões do seu aplicativo.
- Use prompts em aplicativos implantados - prompts implantados para produção com aliases.