10分間のデモ: 人間のフィードバックを収集する
このチュートリアルでは、エンドユーザーのフィードバックを収集し、開発者の注釈を追加し、専門家のレビュー セッションを作成し、そのフィードバックを使用して GenAI アプリの品質を評価する方法を説明します。
達成できること
このチュートリアルを終了すると、次のことができるようになります。
- MLflow トレースを使用して 生成AI アプリを計測可能にする
- この例では、SDK を使用してシミュレートされたエンドユーザーのフィードバックを収集します。
- UI を通じて開発者のフィードバックをインタラクティブに追加する
- トレースと一緒にフィードバックを表示する
- 構造化された専門家のレビューのためのラベル付けセッションを作成して専門家のフィードバックを収集します
環境設定
必要なパッケージをインストールします。
mlflow[databricks]: より多くの機能と改善を得るには、最新バージョンの MLflow を使用してください。openai: このアプリは、OpenAI API クライアントを使用して、Databricks でホストされるモデルを呼び出します。
%pip install -q --upgrade "mlflow[databricks]>=3.1.0" databricks-openai
dbutils.library.restartPython()
MLflowエクスペリメントを作成します。 Databricksノートブックを使用している場合は、このステップをスキップして、安全ノートブック体験を使用できます。 それ以外の場合は、環境設定のクイックスタートに従ってエクスペリメントを作成し、 MLflowトラッキング サーバーに接続します。
手順 1: 簡単なアプリを作成してトレースする
まず、MLflow トレースを備えた LLM を使用して、シンプルな GenAI アプリを作成します。アプリはOpenAI APIを使用して、 Databricksでホストされる基盤モデル エンドポイントを呼び出します。
from databricks_openai import DatabricksOpenAI
import mlflow

# Enable automatic tracing for the OpenAI client
mlflow.openai.autolog()

# Create an OpenAI client that is connected to Databricks-hosted LLMs.
client = DatabricksOpenAI()

# Create a RAG app with tracing
@mlflow.trace
def my_chatbot(user_question: str) -> str:
    # Retrieve relevant context
    context = retrieve_context(user_question)

    # Generate response using LLM with retrieved context
    response = client.chat.completions.create(
        model="databricks-claude-sonnet-4",  # If using OpenAI directly, use "gpt-4o" or "gpt-3.5-turbo"
        messages=[
            {"role": "system", "content": "You are a helpful assistant. Use the provided context to answer questions."},
            {"role": "user", "content": f"Context: {context}\n\nQuestion: {user_question}"}
        ],
        temperature=0.7,
        max_tokens=150
    )
    return response.choices[0].message.content

@mlflow.trace(span_type="RETRIEVER")
def retrieve_context(query: str) -> str:
    # Simulated retrieval. In production, this could search a vector database
    if "mlflow" in query.lower():
        return "MLflow is the largest open source AI engineering platform for agents, LLMs, and ML models. MLflow enables teams of all sizes to debug, evaluate, monitor, and optimize their AI applications while controlling costs and managing access to models and data. With over 30 million monthly downloads, thousands of organizations rely on MLflow each day to ship AI to production with confidence."
    return "General information about machine learning and data science."

# Run the app to generate a trace
response = my_chatbot("What is MLflow?")
print(f"Response: {response}")

# Get the trace ID for the next step
trace_id = mlflow.get_last_active_trace_id()
print(f"Trace ID: {trace_id}")
ステップ 2: エンドユーザーのフィードバックを収集する
ユーザーがアプリを操作するとき、親指を立てる/下向きにするボタンなどの UI 要素を通じてフィードバックを提供できます。このクイックスタートでは、SDK を直接使用して、否定的なフィードバックを提供するエンド ユーザーをシミュレートします。
from mlflow.entities.assessment import AssessmentSource, AssessmentSourceType

# Simulate end-user feedback from your app
# In production, this could be triggered when a user clicks thumbs down in your UI
mlflow.log_feedback(
    trace_id=trace_id,
    name="user_feedback",
    value=False,  # False for thumbs down - user is unsatisfied
    rationale="Missing details about MLflow's key features like Projects and Model Registry",
    source=AssessmentSource(
        source_type=AssessmentSourceType.HUMAN,
        source_id="enduser_123",  # In production, this is the actual user ID
    ),
)

print("End-user feedback recorded!")

# In a real app, you could:
# 1. Return the trace_id with your response to the frontend
# 2. When user clicks thumbs up/down, call your backend API
# 3. Your backend calls mlflow.log_feedback() with the trace_id
ステップ 3: UI でフィードバックを表示する
MLflow UI を起動して、フィードバック付きのトレースを確認します。
- MLflowエクスペリメントに移動します。
- [ログ] タブに移動します。
- トレースをクリックします。
- トレースの詳細ダイアログが表示されます。ダイアログの右側にある 評価 の下に、ユーザーが応答をサムズダウンにマークしたことを示す、
user_feedbackにfalseが表示されます。

ステップ 4: UI を使用して開発者注釈を追加する
開発者は、独自のフィードバックやメモを UI に直接追加することもできます。
-
[ログ] タブで、トレースをクリックして開きます。
-
任意のスパンをクリックします (トレース レベルのフィードバックのルート スパンを選択します)。
-
右側の 評価 タブで、 新しい評価を追加 をクリックし、次の項目を入力します。
- タイプ :
Feedback。 - 名前 :
accuracy_score。 - 値 :
.75。 - 理由 :
This answer includes the core elements of ML lifecycle management, experiment tracking, packaging, and deployment. However, it does not mention the model registry, project packaging, integration with Generative AI and LLMs, or unique features available in Databricks-managed MLflow, which are now considered essential to a complete description of the platform.
- タイプ :
-
作成 をクリックします。
ページを更新すると、新しい評価の列がログ テーブルに表示されます。
ステップ 5: 専門家によるレビューのためにトレースを送信する
ステップ 2 のエンドユーザーからの否定的なフィードバックは、潜在的な品質問題を示していますが、本当に問題があるかどうかを確認し、正しい答えを提供できるのは、ドメインの専門家だけです。ラベル付けセッションを作成して、信頼できる専門家のフィードバックを取得します。
from mlflow.genai.label_schemas import create_label_schema, InputCategorical, InputText
from mlflow.genai.labeling import create_labeling_session

# Define what feedback to collect
accuracy_schema = create_label_schema(
    name="response_accuracy",
    type="feedback",
    title="Is the response factually accurate?",
    input=InputCategorical(options=["Accurate", "Partially Accurate", "Inaccurate"]),
    overwrite=True
)

ideal_response_schema = create_label_schema(
    name="expected_response",
    type="expectation",
    title="What would be the ideal response?",
    input=InputText(),
    overwrite=True
)

# Create a labeling session
labeling_session = create_labeling_session(
    name="quickstart_review",
    label_schemas=[accuracy_schema.name, ideal_response_schema.name],
)

# Add your trace to the session
# Get the most recent trace from the current experiment
traces = mlflow.search_traces(
    max_results=1  # Gets the most recent trace
)
labeling_session.add_traces(traces)

# Share with reviewers
print(f"Trace sent for review!")
print(f"Share this link with reviewers: {labeling_session.url}")

エキスパートのレビュー担当者は、次の操作を実行できるようになりました。
-
レビューアプリのURLを開きます。
-
質問と回答 (エンドユーザーのフィードバックを含む) でトレースを確認します。
-
応答が実際に正確かどうかを評価します。
-
「MLflow とは何ですか?」という質問に対する正しい回答を
expected_responseに入力してください。MLflow is the largest open source AI engineering platform for agents, LLMs, and ML models. MLflow enables teams of all sizes to debug, evaluate, monitor, and optimize their AI applications while controlling costs and managing access to models and data. With over 30 million monthly downloads, thousands of organizations rely on MLflow each day to ship AI to production with confidence. -
彼らの専門家による評価をグラウンドトゥルースとして提出してください。
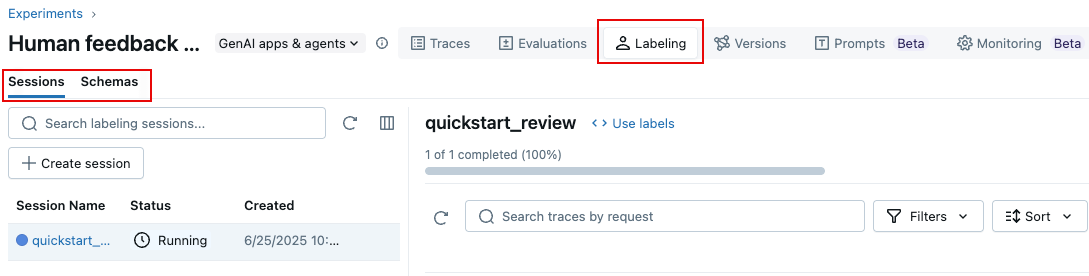
次のように、MLflow 3 UI を使用してラベル付けセッションを作成することもできます。
- エクスペリメントページで、 ラベル付け タブをクリックします。
- 左側にある セッション タブと スキーマ タブを使用して、新しいラベルスキーマを追加し、新しいセッションを作成します。
ステップ 6: フィードバックを使用してアプリを評価する
専門家からのフィードバックを受けたら、 expected_responseラベルを使用して MLflow のCorrectnessスコアラーでアプリを評価します。
この例では、評価のためにトレースを直接使用します。Databricksでは、アプリケーションで、バージョン追跡とリネージを提供するラベル付きトレースをMLflow評価データセットに追加することをお勧めします。 評価データセットの構築について学習します。
from mlflow.genai.scorers import Correctness

# Get traces from the labeling session
labeled_traces = mlflow.search_traces(
    run_id=labeling_session.mlflow_run_id,  # Labeling Sessions are MLflow Runs
)

# Evaluate your app against expert expectations
eval_results = mlflow.genai.evaluate(
    data=labeled_traces,
    predict_fn=my_chatbot,  # The app we created in Step 1
    scorers=[Correctness()]  # Compares outputs to expected_response
)
正確性スコアラーは、アプリの出力を専門家が提供する expected_responseと比較し、専門家の期待との整合性に関する定量的なフィードバックを提供します。

次のステップ
さまざまな種類の人間からのフィードバックを収集する方法の詳細については、以下を参照してください。
- 開発におけるラベリング - 開発のための高度なアノテーション手法を学ぶ
- ドメインエキスパートによるバイブチェック- エキスパートとインタラクティブにアプリをテスト
- ドメインの専門家からのフィードバックを収集する - 専門家による体系的なレビュープロセスを設定する