Tutorial: Create your first table and grant privileges
This tutorial provides a quick walkthrough of creating a table and granting privileges in Databricks using the Unity Catalog data governance model. As of November 8, 2023, workspaces in new accounts are automatically enabled for Unity Catalog and include the permissions required for all users to complete this tutorial.
If you are unsure if your workspace is enabled for Unity Catalog, see Get started with Unity Catalog. If you would like to familiarize yourself with Unity Catalog data objects, see What is Unity Catalog?.
This article is intended for users but may also be of interest to admins who are newly responsible for workspace management.
Before you begin
In order to perform the tasks described in this article, you must have:
- A Databricks workspace that was enabled for Unity Catalog automatically.
- Permissions to attach to a compute resource. See Classic compute overview.
Step 1: Create your first table
Unity Catalog includes a three-level namespace for data objects: catalog.schema.table. In this example, you'll run a notebook that creates a table named department in the workspace catalog and default schema (database).
The workspace catalog is the default catalog created with your workspace that all users have access to. It shares a name with your workspace.
You can define access to tables declaratively using SQL or the Databricks Explorer UI:
-
In the sidebar, click +New > Notebook.
-
Select
SQLas your notebook language. -
Click Connect and attach the notebook to a compute resource.
-
Add the following commands to the notebook and run them (replace
<workspace-catalog>with the name of your workspace catalog):SQLUSE CATALOG <workspace-catalog>SQLCREATE TABLE IF NOT EXISTS default.department
(
deptcode INT,
deptname STRING,
location STRING
);SQLINSERT INTO default.department VALUES
(10, 'FINANCE', 'EDINBURGH'),
(20, 'SOFTWARE', 'PADDINGTON'); -
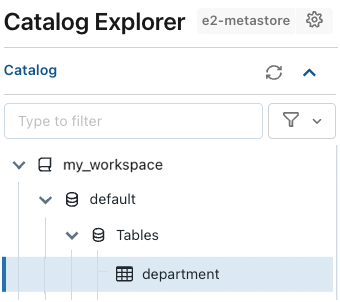
In the sidebar, click
 Catalog and then search for the workspace catalog (
<workspace-name>) and thedefaultschema, where you'll find your newdepartmenttable.
Step 2: Manage permissions on your table
As the original table creator, you're the table owner, and you can grant other users permission to read or write to the table. You can even transfer ownership, but we won't do that here. For more information about the Unity Catalog privileges and permissions model, see Manage privileges in Unity Catalog.
Grant permissions using the UI
To give users permissions on your table using the UI:
- Click the table name in Catalog Explorer to open the table details page, and go to the Permissions tab.
- Click Grant.
- On the Grant on dialog:
- Select the users and groups you want to give permission to.
- Select the privileges you want to grant. For this example, assign the
SELECT(read) privilege and click Grant.
Grant permissions using SQL statements
You can also grant those permissions using the following SQL statement in a Databricks notebook or the SQL query editor. In this example, you give a group called data-consumers permissions on your table:
GRANT SELECT ON default.department TO `data-consumers`;
Next steps
Learn more about: